Troubleshooting & Replacing TV Capacitors: A Comprehensive Guide
2025.02.11
Just like the silent heartbeat of a city's power grid, capacitors are vital components in your TV, ensuring a stable and consistent flow of power. When a TV capacitor fails, it can lead to various issues, from flickering screens to complete power loss. This guide will break down everything you need to know about TV capacitors, from their fundamental role to diagnosing and repairing them, bridging the gap between everyday tech and the science that powers it.
Understanding the Role of a TV Capacitor
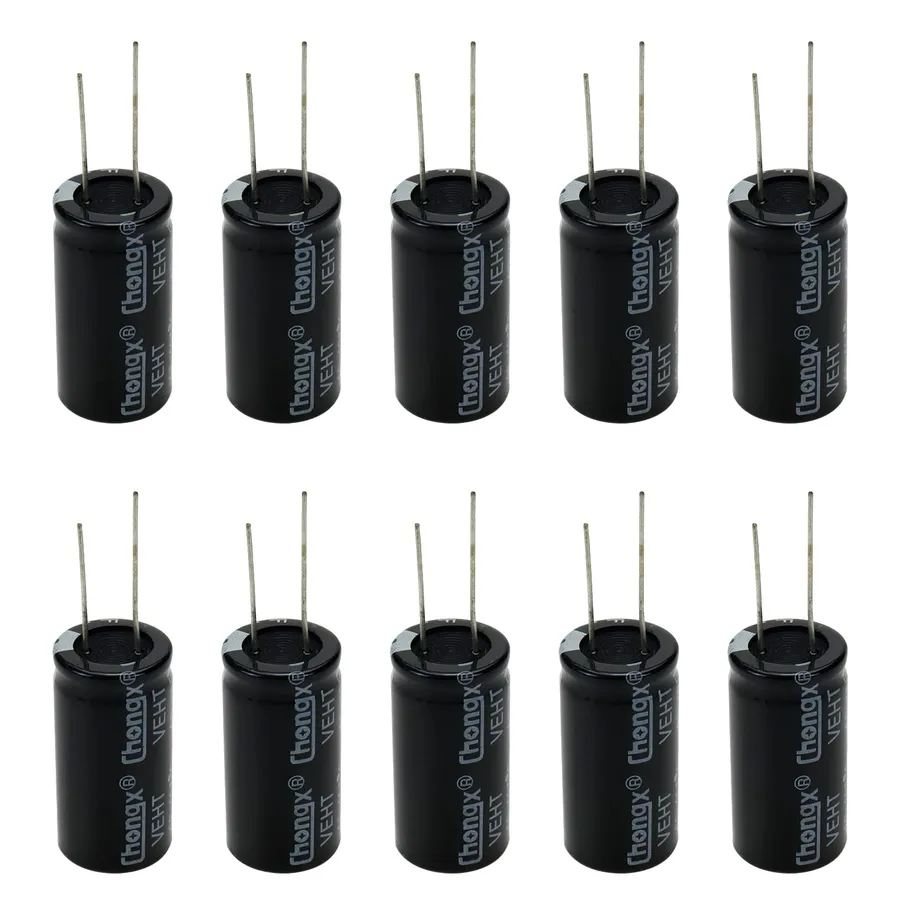
TV Capacitor
Capacitors are fundamental electronic components in televisions, serving as miniature energy reservoirs. They perform critical functions in the power supply circuitry, storing electrical energy and releasing it as needed to maintain a consistent voltage. This action acts like a filter and ensures the stable operation of various TV components by preventing voltage fluctuations, and mitigating electrical noise to deliver a smooth and dependable performance.
Common Symptoms of a Failing TV Capacitor
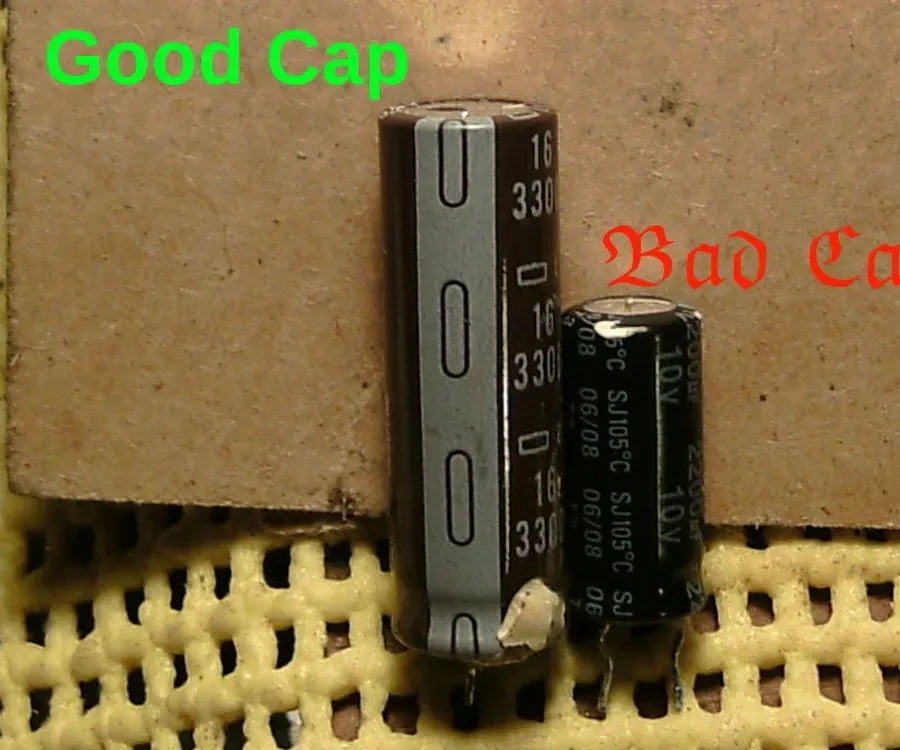
Bulging Capacitor
Capacitor failure in televisions manifests in various noticeable ways, often stemming from their critical role in voltage regulation and energy storage. Identifying these symptoms early is crucial for timely repair and preventing further damage to your TV.
Flickering Screen A fluctuating screen brightness or intermittent flickering can indicate a capacitor struggling to maintain a stable voltage supply to the display panel. This symptom is often one of the first signs of a failing capacitor.
Power Cycling or Inability to Power On If the TV turns itself off and on repeatedly, or fails to power on at all, a faulty capacitor in the power supply unit may be the cause. Capacitors are crucial for starting and maintaining power delivery; failure disrupts this process.
Distorted Picture Visual artifacts such as lines, blurring, color abnormalities, or a generally degraded picture quality can result from a capacitor's inability to filter electrical noise effectively, leading to signal interference.
Strange Noises Unusual sounds, such as buzzing, hissing, or clicking from the TV, often accompany capacitor issues. These sounds are produced when a capacitor is failing and components try to compensate for the irregular power supply.
TV Overheating A failing capacitor can increase the heat output of the television's circuitry. If you notice the television is hotter than usual, or overheating in general, there is a chance that a capacitor is having issues.
Causes of TV Capacitor Failure
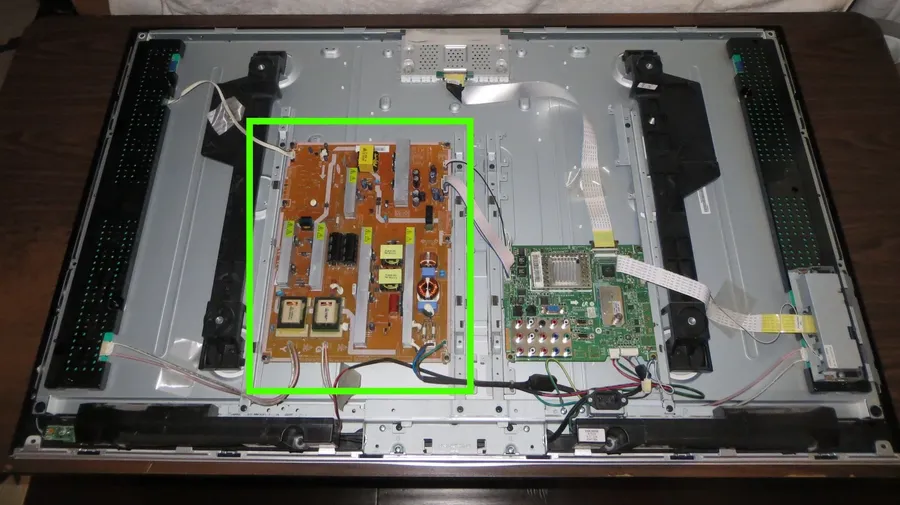
Damaged Circuit Board
TV capacitors, while designed for a specific lifespan, can fail due to a confluence of factors. Understanding these causes is critical for effective troubleshooting and preventative maintenance. The primary reasons for capacitor failure include natural degradation over time, manufacturing flaws, detrimental environmental conditions such as excessive heat, and electrical stresses like voltage surges.
Age and Degradation Capacitors, like most electronic components, have a finite operational life. Over time, the electrolytic material inside the capacitor can dry out or degrade, leading to a loss of capacitance and increased internal resistance. This process is accelerated by heat and can eventually cause the capacitor to fail.
Manufacturing Defects Occasionally, capacitors may have manufacturing defects that compromise their integrity. These defects can include inconsistencies in the materials, improper sealing, or issues with the internal construction. Such flaws can lead to premature failure even under normal operating conditions.
Excessive Heat Heat is a major contributor to capacitor failure. Elevated temperatures accelerate the degradation of the electrolytic material within the capacitor, causing it to dry out more rapidly. Poor ventilation within the TV chassis, nearby heat-generating components, or high ambient temperatures can exacerbate this issue.
Voltage Surges Sudden spikes in voltage, often resulting from lightning strikes or power grid fluctuations, can overstress the dielectric material inside the capacitor. This can lead to dielectric breakdown, a condition where the capacitor loses its ability to hold a charge, resulting in a short circuit or open circuit failure.
Ripple Current Capacitors in power supplies are subject to ripple current, which is alternating current superimposed on the DC current. Excessive ripple current generates heat within the capacitor due to its internal equivalent series resistance (ESR). This can lead to the electrolyte drying out and premature capacitor failure
How to Safely Check a TV Capacitor
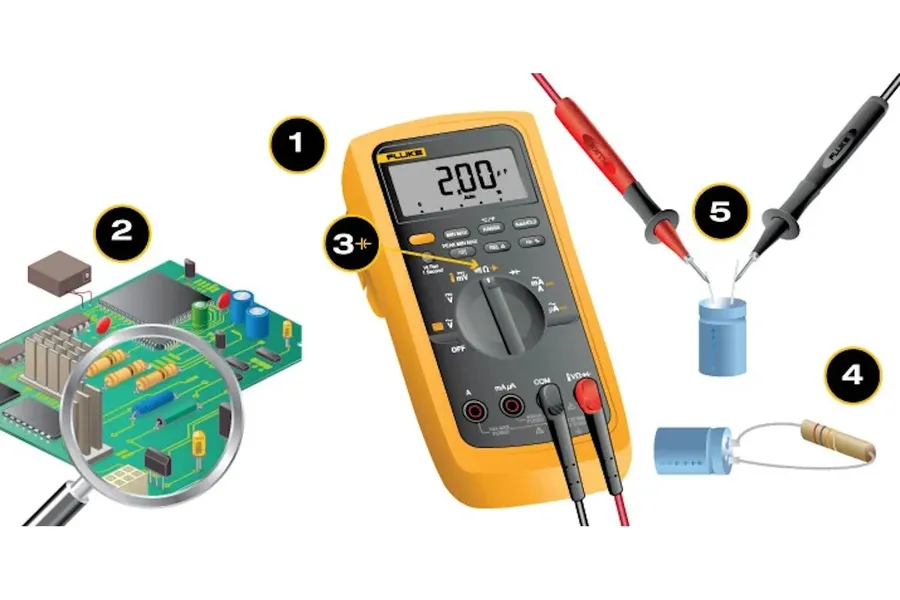
Measuring Capacitor
Accurately assessing a TV capacitor requires careful procedures to ensure personal safety and reliable results. This involves using tools like a multimeter or a dedicated capacitance meter, and always prioritizing safety when dealing with electrical components. Misdiagnosis can lead to unnecessary part replacements, or worse, electrical shock, thus, a meticulous approach is critical.
Here's a breakdown of how to safely check a TV capacitor:
Safety First Before starting, unplug the TV from the power outlet. Allow sufficient time for the TV's internal capacitors to discharge, as these can hold a potentially dangerous electrical charge even after the power is off. This is crucial to prevent electrical shock. It's advised to wait at least 15 minutes, or longer if unsure, before beginning any work on the internal components.
Gather Tools You will need a multimeter that can measure capacitance, a capacitance meter (if you have one), a non-conductive work surface, insulated gloves or tools if needed, and possibly a desoldering tool if you plan to remove the capacitor for testing.
Visual Inspection Before using any tools, carefully examine the capacitor for visible damage like bulging, cracking, leaking fluid, or burn marks. These are signs of a failing capacitor. A visual inspection can often quickly identify a severely damaged capacitor without the need for further testing.
Using a Multimeter to Test Capacitance Set your multimeter to the capacitance setting (usually marked with 'F' for Farads). Connect the multimeter leads to the capacitor's terminals. Ensure the polarity is observed if the capacitor is polarized. The multimeter will display the capacitor's capacitance value. Compare this measured value with the capacitor's rated value. If the reading is significantly lower (e.g., more than 20% below) or is erratic, the capacitor might be faulty. Note that some low value capacitors can be challenging to accurately measure with a standard multimeter due to internal meter capacitance.
Using a Capacitance Meter If you have a dedicated capacitance meter, it often provides more accurate readings, particularly for smaller capacitors. Connect the meter to the capacitor, ensure polarity, and read the measured value from the meter. Compare this against the specification of the capacitor. A deviation of over 20% from the stated rating indicates a problem.
Testing Capacitors In-Circuit When testing a capacitor while it's still soldered to the TV circuit board (in-circuit), keep in mind that other components might affect the readings. For more precise measurements, it's often best to desolder one leg of the capacitor before testing. This removes parallel paths that might cause inaccurate results. Note that using a desoldering tool requires a certain level of skill to avoid damaging the circuit board. Always check the schematic of the TV to determine if testing 'in-circuit' is possible.
Discharging Capacitors After testing, if you removed the capacitor for testing, it may hold a charge, even after being removed from the circuit. You should discharge the capacitor using a high-value resistor or a capacitor discharge tool. Never short the terminals with a metal object, as it can cause sparks and damage the capacitor. This is paramount for safety.
Identifying the Correct Replacement Capacitor
Capacitor Types
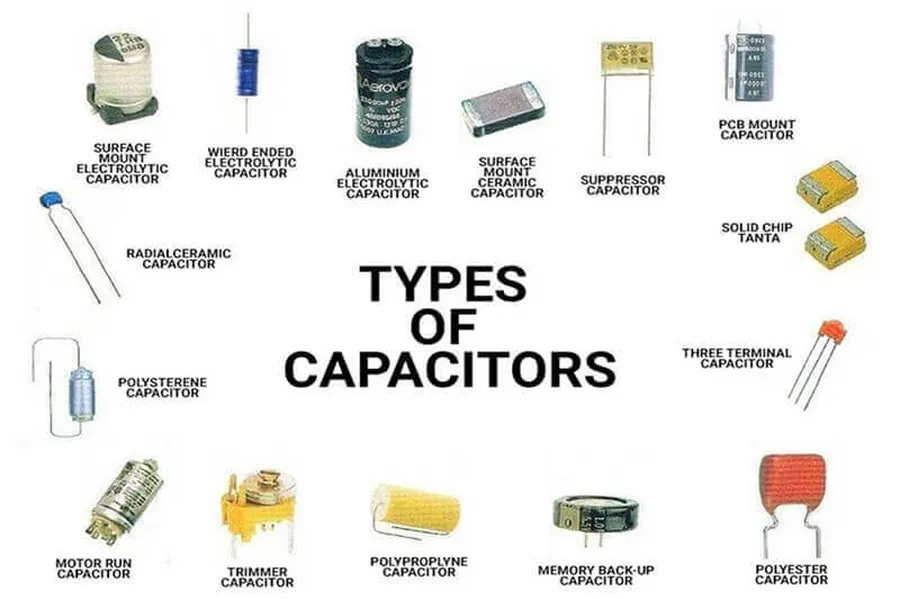
Selecting the correct replacement capacitor for your TV is crucial for a successful repair. This involves matching several key specifications to ensure proper functionality and avoid further damage. The primary considerations include voltage rating, capacitance, physical size, lead spacing and temperature rating. Incorrect specifications can lead to component failure or even pose safety hazards.
Parameter
Description
Importance
Consequence of Incorrect Value
Voltage Rating
The maximum voltage the capacitor can safely handle.
Critical to prevent dielectric breakdown and capacitor failure.
Overvoltage can cause capacitor to explode or fail catastrophically.
Capacitance
The amount of electrical charge a capacitor can store, measured in farads (F) or microfarads (μF).
Essential for proper circuit function, often directly related to timing and filtering.
Incorrect capacitance can lead to circuit malfunction or improper operation.
Physical Size
The dimensions of the capacitor body (diameter and length).
Must fit within the available space on the circuit board.
Physically larger capacitors may not fit on the circuit board while smaller may have inadequate performance.
Lead Spacing
The distance between the capacitor's leads.
Needs to match the holes on the PCB for correct installation.
Incorrect lead spacing will prevent proper soldering or cause damage to the PCB.
Temperature Rating
The maximum operating temperature of the capacitor.
Must withstand operating temperatures to ensure long life.
Operating at high temperatures above the rated temperature reduces the life of the capacitor.
Capacitor markings often include a combination of numbers and letters that represent these parameters. It's essential to understand these markings to make an informed replacement. For example, a marking might indicate the capacitance value (e.g., 100μF), voltage rating (e.g., 250V), and manufacturer-specific codes. Additionally, confirm the capacitor type (e.g., electrolytic, ceramic, film) and its polarity (for polarized capacitors like electrolytics, where the leads need to be inserted in the correct orientation on the board).
Step-by-Step Guide to Replacing a TV Capacitor
Replacing Capacitor
Replacing a TV capacitor, while requiring care, can be a manageable DIY project. This section provides a structured guide for safely and effectively replacing faulty capacitors within your television, focusing on a methodical approach to disassembly, component replacement, and reassembly.
Preparation and Safety Before starting, unplug the TV from the power outlet and allow ample time for any residual charge to dissipate. Gather necessary tools: a Phillips head screwdriver, a small flat-head screwdriver, a soldering iron with solder, desoldering braid or a desoldering pump, and the replacement capacitor. Wear appropriate safety glasses.
Disassembling the TV Carefully remove the screws from the back panel of the TV. Note their locations for reassembly. Gently pry the back panel away, taking care not to damage any internal components or wiring. It's good practice to take pictures at each stage of disassembly to remember how things fit together.
Locating the Faulty Capacitor Identify the capacitor you wish to replace. Refer to the previous section on recognizing a faulty capacitor. It may be physically bulging, leaking or exhibit other signs of damage. Note its orientation on the circuit board (positive and negative terminals) for proper replacement.
Desoldering the Old Capacitor Heat the solder joints of the old capacitor with the soldering iron. Once molten, use the desoldering braid or pump to remove the solder. Gently rock the capacitor back and forth to remove it from the board. Avoid applying excessive force which can damage the board traces.
Installing the New Capacitor Insert the new capacitor into the same position, ensuring the correct polarity (positive to positive, negative to negative), based on the markings on the circuit board or your notes from the old capacitor. Bend the leads slightly to hold it in place.
Soldering the New Capacitor Carefully solder the leads of the new capacitor to the circuit board. Ensure a good, clean solder joint. Avoid excess solder or touching adjacent components or traces. Allow the solder to cool before moving or touching it.
Reassembling the TV Carefully reassemble the TV by reversing the disassembly steps. Make sure all wires are neatly tucked away and the back panel is securely fastened with all the original screws.
Testing the TV Plug the TV back into the power outlet and turn it on. Observe if the issue is resolved. If the problem persists, check your solder joints and capacitor polarity or consider other potential causes.
Frequently Asked Questions About TV Capacitors
This section addresses common inquiries regarding TV capacitors, providing clear and concise answers to help you better understand their function, failure modes, and replacement considerations. We aim to clarify key aspects of TV capacitor issues, empowering you with the knowledge necessary for troubleshooting and repair.
What is the primary function of a capacitor in a TV? In a television, capacitors primarily act as energy storage devices, much like tiny rechargeable batteries. They accumulate electrical charge and release it as needed, smoothing out voltage fluctuations and ensuring a stable power supply to sensitive electronic components. This stabilization is critical for the proper operation of the TV's display, audio, and other circuits. Essentially, they act as filters, removing noise and ripples from the power signal.
What are the typical signs that indicate a TV capacitor has failed? Failing TV capacitors often manifest through several noticeable symptoms. These include a flickering or distorted screen, the TV randomly turning off and on (power cycling), the TV failing to power on at all, unusual noises (such as buzzing or humming) emanating from the TV, and a distorted or absent picture. These issues stem from the capacitor's inability to effectively store and release energy, which disrupts the normal electrical flow within the television.
How much can I expect to pay for a TV capacitor replacement? The cost to replace a TV capacitor can vary depending on several factors including the specific type of capacitor, the TV model, and whether you perform the repair yourself or hire a professional. The capacitor itself might cost anywhere from a few cents to a few dollars. The most significant cost arises from the labor charges if you seek professional repair, which can range from $50 to $200 or more, depending on the local rates and the complexity of the repair. DIY replacement can significantly reduce costs, but it requires necessary skills and tools.
What does a visually damaged or 'blown' TV capacitor look like? A blown capacitor typically exhibits visible signs of physical damage. These can include a bulging or swollen top (as opposed to a flat top), leaking electrolytic fluid (a viscous, sometimes brownish substance), or a completely ruptured casing. These visual cues indicate a catastrophic failure of the capacitor, often due to excessive heat or voltage, rendering it non-functional. These are readily distinguishable signs of a capacitor problem.
Can a faulty TV capacitor cause other components to fail? Yes, a failing capacitor can certainly lead to other issues in a TV. If a capacitor fails to regulate the flow of power, it can cause voltage surges or instability. These power fluctuations can stress other sensitive electronic components and cause them to fail prematurely. In addition, the heat generated by a failing capacitor can potentially damage nearby components through heat transfer. It's therefore important to address faulty capacitors promptly.
Is it safe to attempt a DIY TV capacitor replacement? Attempting a DIY TV capacitor replacement can be feasible if you have the necessary skills, tools, and experience in electronics repair. It's essential to understand the safety risks, specifically the danger of electric shock from residual charge in the TV components, which can be lethal. If you lack experience in soldering, de-soldering, and electronic circuit repair, it is advisable to seek professional help. Safety must always be the primary concern.
How can I prevent TV capacitor failures? Preventing capacitor failure involves taking measures to mitigate the causes of their degradation. Ensure your TV has adequate ventilation to prevent heat build-up, as heat accelerates capacitor degradation. Also using a surge protector can shield the TV from sudden voltage fluctuations from the mains, which can damage capacitors. Keeping your TV away from sources of extreme temperature and following the manufacturer's recommendations for usage can extend the capacitors lifespan.
When to Seek Professional Help for TV Capacitor Issues
While DIY TV capacitor replacement can be a cost-effective solution, it's crucial to recognize situations where professional intervention is necessary. Assessing your technical skills, the complexity of the repair, and the potential risks involved will help determine the most appropriate course of action.
Lack of Experience with Electronics Repair If you are not comfortable working with electrical circuits or soldering, it is advisable to seek professional help. Incorrect handling of electrical components can lead to further damage or personal injury.
Complex TV Models or Circuit Boards Modern TVs, especially those with advanced features like OLED or QLED displays, often have complex circuit boards. Attempting repairs without the proper expertise can cause irreversible damage, therefore it's wise to seek a professional's help.
Unavailability of Specialized Tools Replacing a capacitor requires tools such as a soldering iron, desoldering wick or pump, multimeter and, in some cases, a capacitance meter. If you lack access to these tools, it might be more economical to hire a professional.
Multiple Failing Components If you suspect that other components besides the capacitor are faulty, a professional technician is better equipped to diagnose and address all underlying issues.
Time Constraints If you need a quick fix and do not have the time to learn the repair process, contacting a professional service may be the most efficient approach.
Factor
DIY Repair
Professional Repair
Technical Skill Level
Requires basic to intermediate electronics knowledge and soldering skills
Requires no technical skill from the end user
Cost
Lower, primarily cost of replacement capacitor and tools if needed
Higher, includes labor and diagnostic fees
Time
Requires time for learning, disassembly, and reassembly
Faster, professionals can diagnose and repair quicker
Risk of Damage
Higher risk if inexperienced, can result in further damage to the TV
Lower risk, professionals have the expertise to avoid common errors
Warranty
May void TV warranty
May offer a warranty on repairs
Tool Availability
Requires access to soldering iron, desoldering tools, and multimeter
Tools and equipment are included
Choosing between DIY and professional repair often involves balancing cost, time, and risk. If the potential consequences of failure outweigh the savings, it's best to seek help from an expert. In situations where you are comfortable with the repair process and can exercise the necessary precautions, DIY is a viable solution. Evaluate your options based on your individual circumstances and make the choice that best aligns with your capabilities and resources.
Extending the Lifespan of Your TV Capacitor
The longevity of TV capacitors is crucial for ensuring the continued performance and reliability of your television. Several preventative measures can be taken to mitigate the risk of premature capacitor failure, thereby extending their operational lifespan. This section outlines key strategies focusing on thermal management and electrical protection.
Ensure Adequate Ventilation Heat is a primary cause of capacitor degradation. Make sure the TV is positioned in a location with sufficient airflow, keeping vents unobstructed to allow heat to dissipate efficiently.
Avoid Direct Sunlight or Heat Sources Prolonged exposure to direct sunlight or placement near heat-generating appliances increases the ambient temperature around the TV, which can hasten capacitor failure. Position your TV away from these sources.
Use a Surge Protector Power surges are dangerous for all electronic components, including capacitors. Using a high-quality surge protector will shield your TV from voltage spikes and transients that could damage capacitors.
Maintain Stable Voltage Ensure the electrical supply is stable and within the TV's operating parameters. Fluctuations in the voltage supply can cause undue stress on the capacitors, leading to premature degradation.
Regularly Dust Your TV Dust accumulation can impede heat dissipation. Routine cleaning of the TV, particularly around ventilation openings, helps to maintain optimal thermal performance.
Understanding the role of the TV capacitor is essential for any TV owner. A faulty capacitor can cause various issues, but diagnosing and replacing it is possible, even at home with the right guidance. Whether you decide to DIY or seek a professional, being aware of the symptoms, causes, and replacement methods empowers you to extend the lifespan of your TV, preventing unnecessary replacements. It’s about leveraging our knowledge to keep the show going, showcasing the unsung heroes behind our daily entertainment, like the often overlooked TV capacitor.