Air Compressor Capacitor: Troubleshooting, Replacement, and Upgrades
2025.02.09
Just like the heart of a car, the capacitor is crucial to the smooth operation of your air compressor. These often-overlooked components store and release energy, essential for the reliable startup and running of your compressor's motor. Whether you're experiencing starting problems or noticing a drop in performance, understanding your air compressor capacitor is the key to keeping your equipment humming. This article delves into the intricacies of these capacitors, covering troubleshooting, replacement, and upgrades to enhance your air compressor's efficiency and lifespan, bridging everyday maintenance with engineering principles.
Understanding the Role of an Air Compressor Capacitor
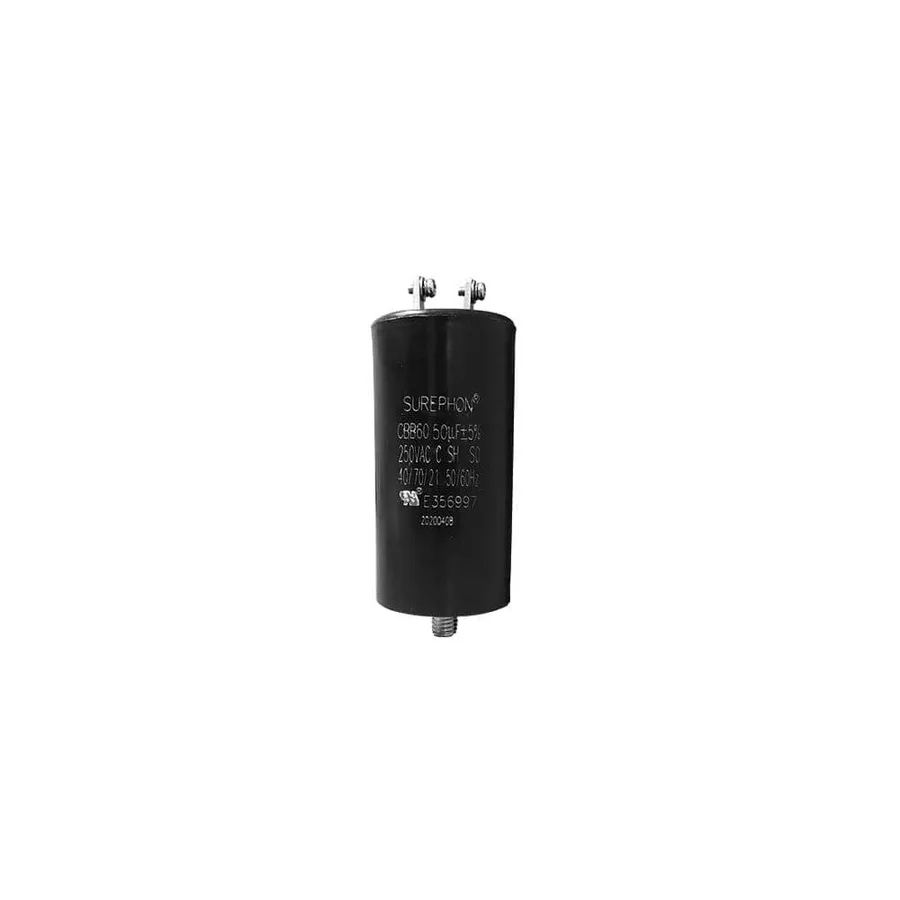
Air Compressor Capacitor
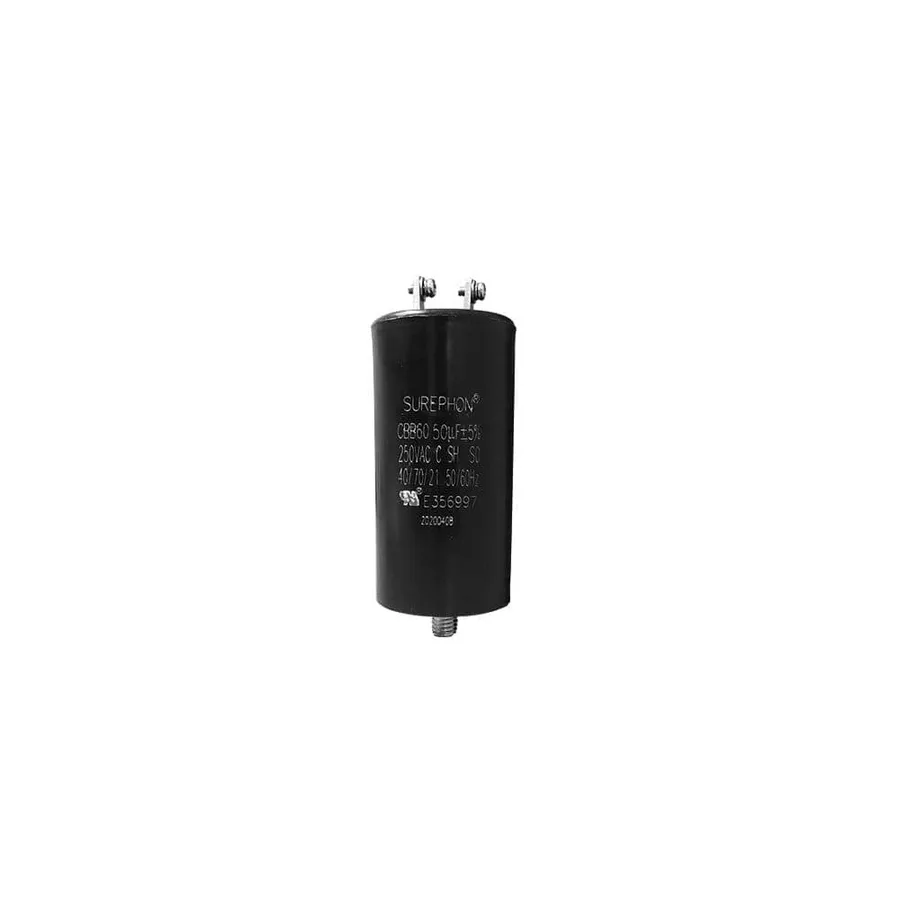
An air compressor capacitor is a crucial electrical component responsible for facilitating the startup and continuous operation of the compressor's motor. It functions primarily by providing the initial surge of electrical energy required to start the motor and then helps to maintain a consistent electrical current for efficient running, thereby optimizing overall performance and preventing motor damage.
The capacitor’s role can be further broken down into two key stages:
Motor Startup During startup, the capacitor delivers a high-energy jolt, or torque, that the motor needs to overcome inertia and begin rotating. This is particularly important for single-phase induction motors commonly used in air compressors, which rely on a phase shift to produce rotational force. Without the capacitor, these motors may hum or fail to start.
Continuous Operation Once the motor is running, the capacitor helps maintain a consistent electrical current, ensuring the motor operates smoothly and efficiently. This continuous contribution not only maintains the motor's performance but also helps to prevent overheating and potential damage. Different types of capacitors fulfill varying functions, the most common being 'start' and 'run' capacitors.
Understanding the difference between these types is essential for proper maintenance and troubleshooting of your air compressor.
Types of Air Compressor Capacitors: Start vs. Run
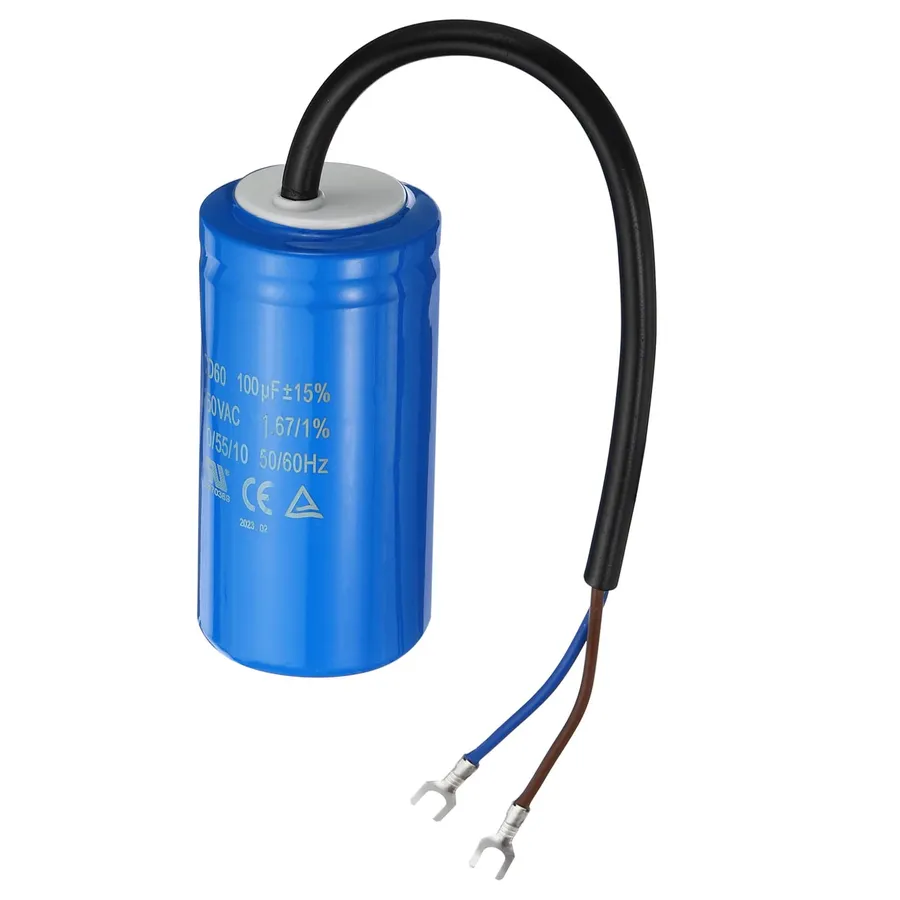
Start and Run Capacitors
Air compressors utilize two primary types of capacitors: start capacitors and run capacitors. These components are vital for the efficient operation of the compressor motor, each fulfilling a distinct purpose. Start capacitors provide the initial surge of energy required to overcome inertia and get the motor rotating, while run capacitors ensure the motor operates smoothly and efficiently while running.
Feature
Start Capacitor
Run Capacitor
Primary Function
Provides high initial torque for starting the motor.
Maintains efficient motor operation during running.
Duty Cycle
Intended for short-term use during start-up.
Designed for continuous use while the motor is running.
Construction
Typically has higher capacitance and is often electrolytic.
Usually has lower capacitance and is typically film or oil-filled.
Typical Lifespan
Shorter lifespan due to the high stress during starting. They are not designed for continuous operation and can overheat and fail quickly if operated for longer than a few seconds.
Longer lifespan, designed for continuous operation and higher reliability.
Connection to Motor
Connected in series with the starting winding, generally disconnected during normal running
Connected in series with a motor winding and remains engaged during normal operation.
Capacitance (uF)
Higher, typically in the range of 100-500 uF.
Lower, typically in the range of 20-80 uF.
Voltage Rating (V)
Often rated for higher voltages to handle the initial surge
Rated for lower voltages sufficient for running operation.
Understanding the differences between start and run capacitors is crucial for troubleshooting and maintenance. Using the wrong type of capacitor can lead to poor performance, damage to the motor, and a shortened lifespan of the compressor. The physical size and terminal types are also factors when replacing capacitors. Start capacitors are often physically larger due to their higher capacitance requirements. Run capacitors are designed for long-term, continuous electrical current support.
Recognizing the Symptoms of a Faulty Air Compressor Capacitor
Faulty Capacitor
A faulty air compressor capacitor often manifests through distinct symptoms, directly impacting the motor's ability to start and run efficiently. These symptoms range from subtle performance issues to complete motor failure, all stemming from the capacitor's inability to store and release energy effectively. Identifying these signs is crucial for timely repair and preventing further damage to the compressor.
Slow Start or No Start One of the primary functions of a capacitor is to provide the initial surge of energy needed to start the motor. A failing capacitor might not deliver this surge, resulting in a slow start, where the motor struggles to reach its operating speed, or in a complete inability to start, with the motor remaining stationary despite power being supplied. In these cases, the motor will often emit a humming sound.
Humming Noise During Start-up A persistent humming sound when attempting to start the air compressor often indicates that the motor is receiving power but lacks the necessary torque to begin rotating. This is a classic symptom of a failing capacitor, as it's unable to provide the starting boost needed for the motor to overcome inertia.
Motor Overheating A faulty capacitor can cause the motor to draw excessive current as it struggles to start or maintain its speed. This leads to overheating, which can not only damage the motor windings but also pose a safety risk. Overheating should be addressed quickly to prevent long term damage and potential fire hazards.
Intermittent Operation An air compressor that starts and runs inconsistently, or stops shortly after starting, can also be a symptom of a failing capacitor. This can manifest as the motor randomly starting and stopping, or it might start up, then suddenly cut out for a few seconds or even minutes.
Visible Capacitor Damage In some cases, visual inspection of the capacitor itself can reveal signs of damage. Bulging, leaking, or cracked casings are clear indicators of a failed capacitor. Note that capacitor damage should be addressed by a professional. Discharging a capacitor requires a particular safety procedure before touching it.
How to Test an Air Compressor Capacitor
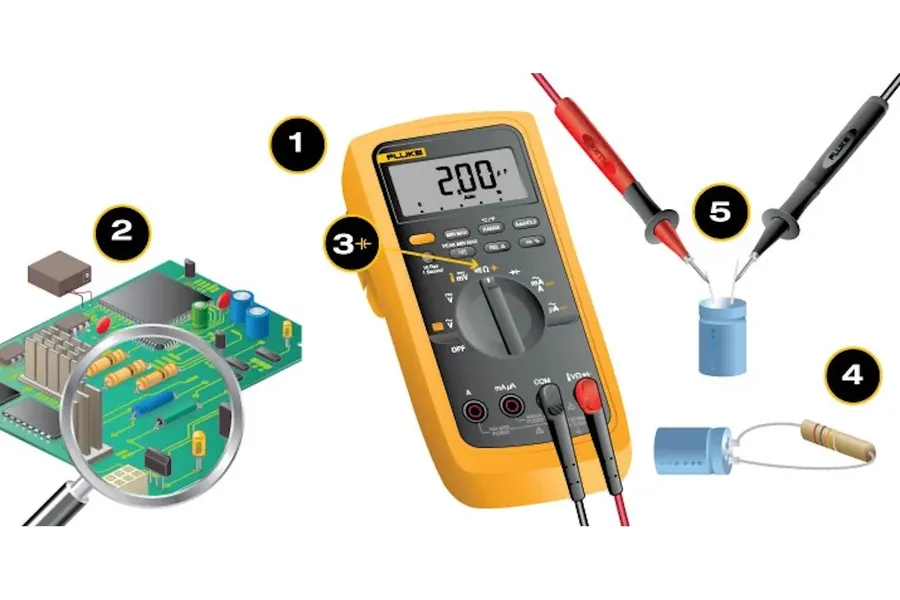
Testing a Capacitor
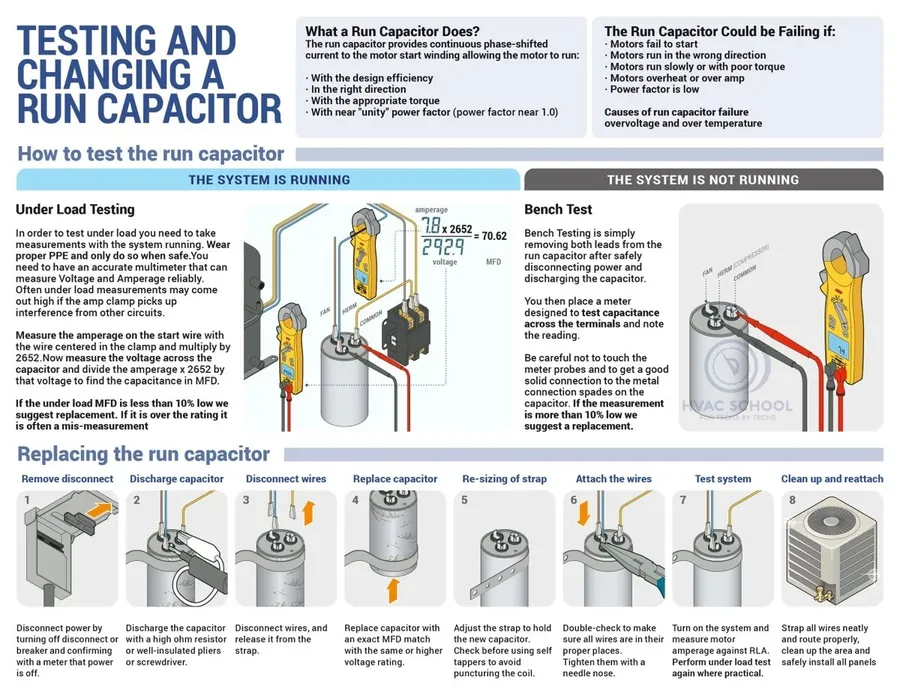
Testing an air compressor capacitor is a crucial step in diagnosing motor issues, and primarily involves using a multimeter to measure its capacitance. This process determines if the capacitor is within its specified range and therefore functioning correctly, or has degraded and is causing the motor to perform erratically or fail to start. Accurate measurement and diagnosis require meticulous adherence to safety protocols, because capacitors store significant electrical energy.
Here's a step-by-step guide to safely and accurately test your air compressor capacitor:
Safety First: Disconnect Power Before handling the capacitor, disconnect the air compressor from the power supply. This measure is critical to avoid electrical shock.
Discharge the Capacitor Use a screwdriver with an insulated handle to short the capacitor terminals. Shorting the terminals will discharge any residual electrical energy, ensuring safe handling during testing. Be careful to avoid direct contact with the metal parts.
Set Up Your Multimeter Turn on your digital multimeter and set it to the capacitance measurement setting, which is usually indicated by 'uF' or a similar symbol. If your multimeter does not have a capacitor setting, you cannot perform the capacitor test directly, but can still use the ohmmeter function to identify a dead short or open circuit which will cause the capacitor to be faulty.
Connect the Multimeter Connect the multimeter probes to the capacitor terminals. The polarity does not matter for most motor capacitors.
Read the Capacitance Measurement Note the reading on the multimeter. Compare the reading with the microfarad (µF) rating printed on the capacitor label. This comparison is crucial to determine if the capacitor is operating properly.
Interpret the Reading A capacitance reading within 10% of the specified rating indicates a healthy capacitor. A significantly lower value, or a reading of zero, indicates a faulty capacitor that will likely need to be replaced. Capacitors that are higher than their nominal rating are also a sign of damage due to internal shorting, this is not as common as the capacitance degrading below its rating due to dielectric degradation. Any reading that fluctuates or does not settle can also indicate that there is an issue with the capacitor.
Inspect Physically Inspect the capacitor for signs of damage. Look for bulging, leaks, cracks, or other signs of physical damage. Any signs of physical damage indicate that the capacitor should be replaced even if the electrical test shows the capacitor as 'good'.
It is important to note that an ohmmeter test can be used to identify if a capacitor has an open circuit, which would mean a very high resistance or infinite resistance between the terminals, or a short circuit, which would be a low resistance, usually around zero ohms, between the terminals. This test can quickly identify catastrophic failure, but will not provide specific capacitance readings. If the capacitor has passed the ohmmeter test, a multimeter with a dedicated capacitance function is needed to measure the capacitance. Capacitance is the stored electrical charge measured in farads, and its submultiple the microfarad(uF), the unit used for motor capacitors.
Safety Precaution Checklist:
Power Disconnection: Always disconnect the air compressor from the power source before any inspection, or test, or replacement.
Use Insulated Tools Ensure that all tools used are insulated to prevent electrical shock.
Discharge the Capacitor Discharge the capacitor carefully before handling. Using an insulated tool, short across the capacitor terminals.
Proper Meter Settings Verify the correct multimeter settings before testing. Failure to do so can cause incorrect measurements or damage to the meter.
Avoid Contact Avoid touching the metal parts of the capacitor or the multimeter probes while the meter is connected.
Replace if Damaged If you observe any physical damage such as swelling, leaks, or cracks on the capacitor, replace the capacitor immediately.
By following these steps, you can accurately test your air compressor capacitor and ensure that it's working correctly.
Selecting the Correct Replacement Air Compressor Capacitor
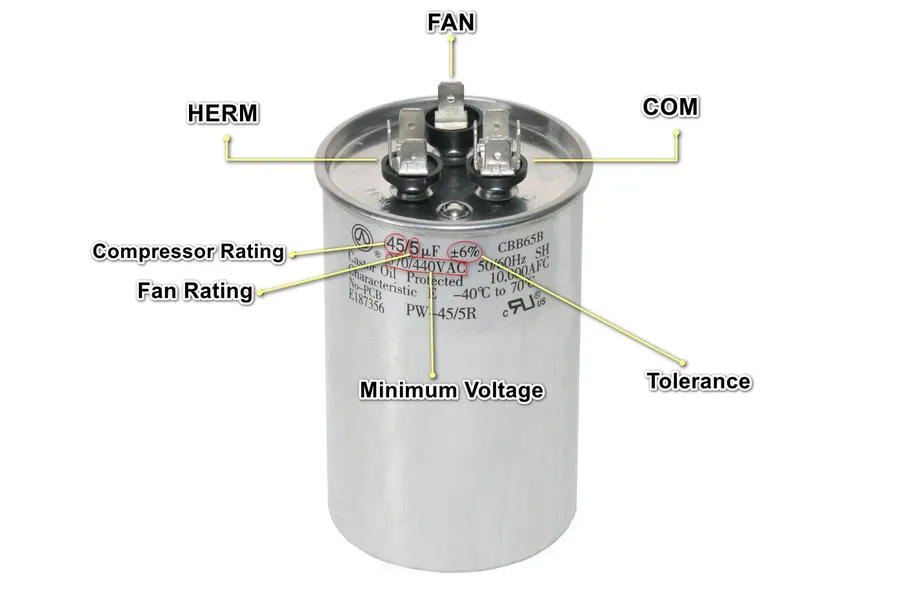
Replacement Capacitors
Selecting the correct replacement capacitor for your air compressor is crucial for ensuring proper motor function and preventing potential damage. The key is to match the specifications of the original capacitor, primarily focusing on capacitance (measured in microfarads, or µF), voltage, physical dimensions, and terminal types. Using an incorrectly specified capacitor can lead to inefficient operation, premature failure, or even damage to the motor.
Capacitance (µF): This is the most critical parameter. The replacement capacitor must have the same or very close microfarad rating as the original. A slightly higher rating (within 10%) is generally acceptable, but going lower will cause problems. The capacitance value dictates the amount of energy the capacitor can store, which is essential for the compressor motor's starting torque and running stability.
Voltage: The replacement capacitor must have a voltage rating equal to or higher than the original capacitor. Using a capacitor with a lower voltage rating can result in failure, as exceeding the rating can cause the capacitor to break down or even explode. It is also important to note that capacitors have both AC and DC voltage ratings and that you must match the AC voltage rating for replacement.
Physical Size and Terminal Type: Ensure the physical dimensions of the replacement capacitor allow for it to fit within the compressor housing and that the terminal types (e.g. spade, screw, wire leads) match the existing wiring to allow for proper electrical connection. Mismatched physical size can make installation impossible, and incorrect terminal types will lead to connection issues and potential electrical hazards.
Specification
Importance
Consequences of Incorrect Specification
Capacitance (µF)
Critical for motor starting torque and running stability
Motor not starting, slow start, or overheating
Voltage (VAC)
Must be equal to or greater than original
Capacitor failure, potential explosion
Physical Size
Ensures capacitor fits within compressor housing
Installation difficulties
Terminal Type
Ensures proper electrical connection
Connection issues and potential electrical hazards
When selecting a replacement capacitor, it is always best to consult your air compressor's manual, or check the original capacitor for its specification label. If the original capacitor label is unreadable or if the part number is obsolete you can cross-reference your air compressor motor specification plate to find the required specifications. Reputable brands such as Aerovox, GE, and Packard are often used in air compressors and using cross-referencing charts on their websites can help you locate the correct replacement.
It's highly recommended to source replacement capacitors from trusted suppliers to ensure quality and authenticity. Avoid generic or unbranded parts from unverified sources, as these may not meet the required standards and could fail prematurely. Furthermore, always verify that the part number and specifications match the air compressor motor requirements before installation. Consider also using higher quality, UL Listed products which will ensure a longer service life.
Step-by-Step Guide to Replacing an Air Compressor Capacitor
Capacitor Installation
Replacing an air compressor capacitor, whether start or run, is a manageable task that can often restore your compressor to full functionality. This detailed guide outlines the necessary steps, emphasizing safety and proper procedures. Following these instructions ensures a safe and effective replacement.
Tools and Materials Required Before starting, gather the necessary tools: a non-contact voltage tester, insulated screwdriver(s) (both flathead and Phillips), a new capacitor matching the original's specifications, safety glasses, and work gloves. Ensure your workspace is well-lit and clear of obstructions.
Safety Precautions Safety is paramount. Always disconnect the air compressor from the power source and verify that no voltage is present using a non-contact voltage tester. Capacitors can store a dangerous electrical charge even after the power is disconnected. Never touch the terminals directly or allow them to come into contact with each other without following the discharge procedure. Wear safety glasses and gloves throughout the process.
Step 1: Discharge the Capacitor Using an insulated screwdriver with an insulated handle, carefully short the capacitor terminals to ensure any remaining charge is discharged. This can be done by placing the metal shaft of the insulated screwdriver across both capacitor terminals for several seconds. Be sure you do not touch the metal shaft of the screwdriver during this procedure and keep your fingers on the insulated handle only. Repeat this step to be extra certain the capacitor has been discharged. Always test the terminals with a non-contact voltage tester again to make sure no current remains before proceeding.
Step 2: Access the Capacitor Locate the capacitor, usually housed within a compartment on the motor housing. Remove any access panel(s) or covers by unscrewing or unclipping them. Take note of the existing capacitor's wire connections, and photograph or diagram the existing setup for reference during re-installation.
Step 3: Disconnect the Old Capacitor Carefully disconnect the wires from the old capacitor, one at a time. Never pull on the wires themselves and use insulated tools to disconnect each wire from its terminal. Note the position of each wire for correct re-installation. If labels are not on the wires, use masking tape to label each wire for easy re-installation. Do not cut the wires.
Step 4: Install the New Capacitor Position the new capacitor in the same manner as the old one. Connect the wires to the new capacitor terminals, ensuring the connections match the original setup. Double-check your wiring using the diagram or picture taken earlier. Make sure the connections are snug but not overtightened.
Step 5: Reassemble Secure the capacitor within its compartment. Replace any access panels or covers. Ensure all screws are tightened and secure.
Step 6: Test the Compressor Plug the air compressor into a power outlet and start the compressor. Observe if it starts smoothly. If the compressor starts correctly and runs smoothly, the capacitor replacement was successful. Monitor the unit to ensure it runs without issue.
Air Compressor Capacitor Upgrades for Improved Performance
Upgrading your air compressor's capacitor can significantly enhance its performance, leading to more reliable starts, improved motor efficiency, and extended operational life. This section delves into the strategic selection of upgraded capacitors, focusing on how enhanced specifications translate to tangible improvements in your compressor's function. The primary goal is to ensure long-term efficiency and reliability, ultimately reducing maintenance costs and downtime.
Higher Quality Capacitors: Opting for capacitors constructed with superior materials and more robust internal designs can lead to a longer operational life and more stable performance under stress. These capacitors can withstand higher temperatures and more frequent cycling, which are common in heavy-use scenarios, significantly extending the reliability of the air compressor.
Extended Lifespan Capacitors: Capacitors designed with an emphasis on longevity can drastically reduce the frequency of replacements. These are manufactured to resist degradation, thereby maintaining their rated capacitance for extended periods and reducing the likelihood of premature failure. Investing in such components can be a prudent strategy, particularly for compressors that see daily use.
Enhanced Voltage Tolerance: Selecting capacitors with a higher voltage rating than the standard requirement provides added protection against voltage spikes and surges. This is particularly beneficial in environments where power fluctuations are common, preventing damage to the capacitor and the associated motor components. Such upgrades contribute to a more robust electrical system, capable of withstanding variable conditions.
Upgrade Type
Benefit
Considerations
Higher Quality Materials
Increased lifespan, improved temperature resistance
Initial cost may be higher, but long-term savings offset it
May have a slightly larger footprint or require careful specification check
Higher Voltage Tolerance
Protection against power fluctuations, extended motor life
Ensure compatibility with the system's electrical specifications to prevent over-voltage issues.
Frequently Asked Questions About Air Compressor Capacitors
This section addresses common inquiries regarding air compressor capacitors, aiming to clarify typical issues, troubleshooting steps, and best practices for maintenance and replacement. By answering these questions, we aim to provide a comprehensive understanding, dispel myths, and reinforce safe procedures related to air compressor capacitors.
How do I know if my air compressor capacitor is bad? A faulty capacitor often manifests through several symptoms. These include slow starting of the compressor motor, a humming sound without the motor actually turning, the motor's inability to start at all, or overheating during operation. These issues arise because a failing capacitor struggles to provide the necessary initial electrical boost for starting or maintaining the motor's rotational speed.
What does a capacitor on an air compressor do? The capacitor in an air compressor plays a vital role in both starting and running the motor. It stores electrical energy and releases it in a powerful surge to overcome the initial inertia of the motor's rotor. Additionally, it helps to maintain a consistent current, ensuring smooth motor operation. It is essential for efficient compressor function.
Can an air compressor run without a capacitor? No, an air compressor cannot typically run without a functional capacitor. The capacitor is crucial for initiating the motor’s rotation by providing the necessary starting torque. Without a working capacitor, the motor will likely hum, but fail to start. Replacing a faulty capacitor is essential for the air compressor's normal functionality. In some rare cases, with very specific motor designs (not commonly used in air compressors), the motor may be able to turn on by pushing or spinning the motor shaft manually, but the motor will not run reliably or reach its intended speed or power.
What are the typical symptoms of a faulty air compressor capacitor? Common symptoms include the compressor motor being slow to start, making a humming noise without actually turning, being unable to start, or overheating. These issues are usually related to an inadequate electrical charge provided by the capacitor or a malfunction of its ability to regulate energy flow.
Can I replace my air compressor capacitor myself? Yes, replacing a capacitor is a manageable task for most individuals with basic mechanical knowledge and an understanding of electrical safety. It's crucial to follow correct procedures and precautions. First, always disconnect the power to the compressor. Then, carefully note the capacitor's specifications and match them with the replacement, and follow a step by step procedure. If there's any doubt, it is highly recommended to seek professional help.
How long does an air compressor capacitor typically last? The typical lifespan of an air compressor capacitor can vary significantly based on usage, environmental conditions and quality, but typically lasts between 3 to 10 years. Factors that can shorten its life include frequent starts and stops of the compressor, exposure to high temperatures and voltage fluctuations. It is a good idea to check regularly and to replace preventively when signs of malfunction begin.
What are some common misconceptions about air compressor capacitors? One common myth is that all capacitors are interchangeable. They are not. The correct capacitance (measured in uF), voltage, and physical size must match to ensure proper and safe operation of the air compressor. Another misconception is that a capacitor that is only showing minimal symptoms can still be used. A failing capacitor should be replaced as soon as symptoms appear to prevent further damage. Ignoring a failing capacitor can cause a cascade of issues, such as motor damage and overheating, which may require further complex or expensive repairs.
The air compressor capacitor, though a small component, plays a vital role in the reliable operation of your compressor. From ensuring a smooth start to providing the required power for ongoing performance, a healthy capacitor is indispensable. By understanding its functions, recognizing the symptoms of failure, and taking the necessary steps for proper diagnosis and replacement, you can avoid downtime and extend the life of your equipment. Whether it's selecting the correct capacitor replacement or enhancing your system with upgrades, a proactive approach to air compressor capacitor maintenance will pay dividends in terms of both cost and efficiency. Remember, proper maintenance, starting with a healthy capacitor, ensures your air compressor continues to serve you well.