2SC5200 & 2SA1943 Amplifier Board: Price, Performance & DIY Guide
In the world of audio amplification, the 2SC5200 and 2SA1943 transistors are revered for their power and reliability, making them a cornerstone of high-quality amplifier circuits. Whether you are a seasoned audiophile or a hobbyist, understanding the landscape surrounding 2SC5200 2SA1943 amplifier circuit board price and their implementation is crucial. This article delves into the pricing, performance, and practical considerations of these amplifier boards, illuminating how they drive the heart of your sound system and enabling you to find your perfect match.
Understanding 2SC5200 and 2SA1943 Transistors
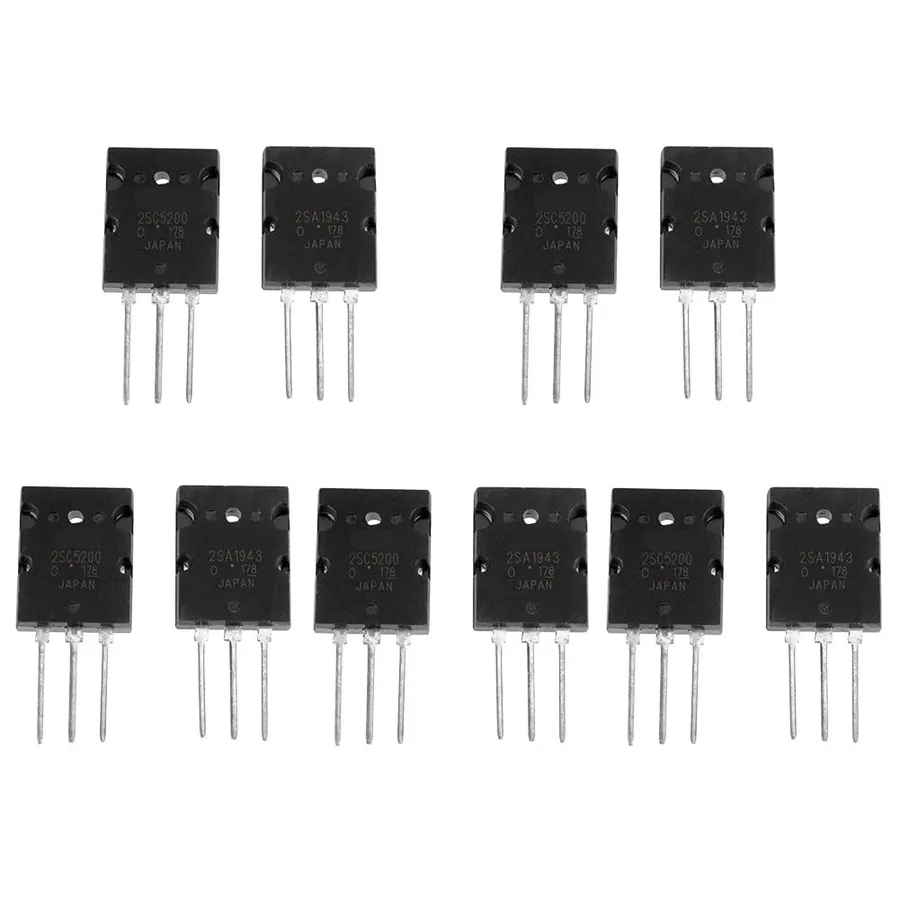
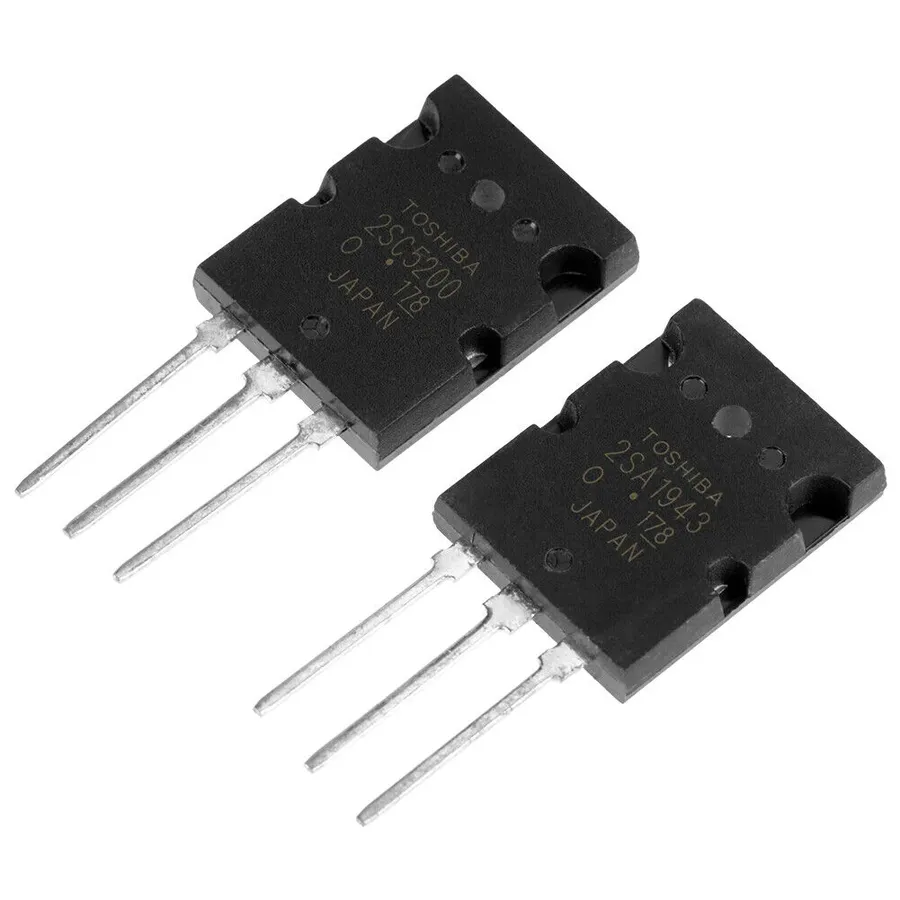
The 2SC5200 (NPN) and 2SA1943 (PNP) transistors are highly regarded in audio amplification due to their robust performance characteristics, particularly in push-pull configurations. These transistors are pivotal in achieving high power output, excellent linearity, and reliable operation, making them a staple in both high-fidelity and high-power audio amplifier designs. Their popularity stems from their ability to deliver clean, powerful audio signals while maintaining exceptional stability and thermal management.
These devices are complementary power transistors, designed to work together in a push-pull configuration, a topology commonly employed in class AB amplifiers. In this configuration, the NPN transistor (2SC5200) handles the positive half of the audio signal waveform, while the PNP transistor (2SA1943) handles the negative half. This arrangement provides an efficient way to amplify the signal with minimal distortion.
| Characteristic | 2SC5200 (NPN) | 2SA1943 (PNP) |
|---|---|---|
| Polarity | NPN | PNP |
| Collector-Emitter Voltage (VCEO) | 230V | 230V |
| Collector Current (IC) | 15A | 15A |
| Peak Collector Current (IC Peak) | 30A | 30A |
| Power Dissipation (PC) | 150W | 150W |
| Transition Frequency (fT) | 30MHz | 30MHz |
| Current Gain (hFE) | 50-200 | 50-200 |
| Package Type | TO-3PL | TO-3PL |
The high power ratings of 150W for each transistor, combined with a collector current rating of 15A and peak collector current of 30A, allow for substantial power amplification suitable for driving high-output audio systems. Their relatively high transition frequency of 30 MHz indicates that they are suitable for the entire audio frequency spectrum. The TO-3PL package ensures efficient thermal management with a large contact area for heat dissipation.
In summary, the 2SC5200 and 2SA1943 transistor pair offer a potent combination of high-power handling, high-frequency response, and inherent reliability, making them the preferred choice for audio enthusiasts and professionals when creating robust and high-performance audio amplification solutions. The matched characteristics of the two transistors, as complementary devices, provide efficient and high-fidelity audio amplification.
Factors Influencing 2SC5200 2SA1943 Amplifier Board Prices
The price of amplifier boards utilizing 2SC5200 and 2SA1943 transistors is subject to considerable variation due to a multitude of factors. Understanding these elements is crucial for making informed purchasing decisions, whether for DIY projects or professional audio applications. The following analysis provides a comprehensive overview of the key drivers behind these price fluctuations.
| Factor | Description | Impact on Price |
|---|---|---|
| Power Output | The maximum power the amplifier board can deliver (e.g., 100W, 200W, 300W, 800W). | Higher power output generally corresponds to a higher price due to the need for more robust components and heat management systems. |
| Configuration (Mono vs. Stereo) | Whether the board provides a single (mono) channel or two (stereo) channels of amplification. | Stereo boards typically cost more than mono boards, due to the duplication of circuitry. |
| Additional Features | Inclusion of speaker protection circuits, Bluetooth modules, tone control circuits, VU meters, and other auxiliary features. | The presence of additional features will increase price due to the extra components and complexity. |
| Brand Reputation | The market recognition and perceived quality of the manufacturer. | Established brands known for quality and reliability often command premium prices. |
| PCB Quality | The quality of the printed circuit board (material, layer count, trace width, etc.). | High-quality PCBs, such as those using FR4 material with thicker copper traces, contribute to higher costs but also offer better performance and longevity. |
| Component Quality | The quality and source of the components used, such as capacitors, resistors, and operational amplifiers. | Higher-grade components impact price but also significantly improve performance and reliability. |
| Sourcing Location | The geographical region where the board is manufactured and sourced from (e.g., China, USA, Europe). | Sourcing location affects cost due to labor rates, material costs, and shipping fees. Boards from established brands often have higher cost. |
Price Comparison: Where to Buy 2SC5200/2SA1943 Boards
The price of 2SC5200 and 2SA1943 amplifier boards varies significantly across different online marketplaces. This variation is influenced by several factors, including the board's power output, features, manufacturer, and the retailer's location. A thorough price comparison is crucial to make an informed purchasing decision, considering both the board specifications and the total cost, including shipping and delivery times.
| Retailer | Typical Board Power Output | Price Range (USD) | Shipping Cost (USD) | Lead Time (Days) | Additional Notes |
|---|---|---|---|---|---|
| Amazon | 100W - 300W | 25 - 80 | 5 - 20 | 3 - 7 | Variety of brands and features; Prime shipping available |
| eBay | 50W - 800W | 20 - 150 | 5 - 30 | 5 - 15 | Wide range; check seller ratings carefully |
| AliExpress | 50W - 800W | 15 - 100 | 0 - 15 | 15 - 45 | Lower prices; longer shipping times, consider custom fees |
| Alibaba | 100W - 800W | 10 - 90 | Variable based on supplier | 20-60 | Bulk purchasing options, direct from manufacturer |
It's important to note that these prices are indicative and may fluctuate based on current market conditions, promotions, and the specific configurations offered. Always confirm the exact specifications of the board (e.g., mono vs. stereo, inclusion of features such as speaker protection), review the seller ratings, and pay close attention to the total cost after shipping before finalizing a purchase.
DIY vs. Pre-built 2SC5200/2SA1943 Amplifier Boards
The decision between constructing a 2SC5200/2SA1943 amplifier board from scratch (DIY) or purchasing a pre-assembled unit involves careful consideration of various factors, including cost, skill level, time investment, and desired performance. Both approaches offer unique advantages and disadvantages that cater to different user needs and technical expertise.
| Factor | DIY Amplifier Board | Pre-built Amplifier Board |
|---|---|---|
| Cost | Potentially lower cost for components, but additional expenses for tools and materials may add up. | Higher initial cost due to assembly and manufacturer overhead, but total cost might be lower due to optimization. |
| Skill Level | Requires intermediate to advanced electronics knowledge, soldering skills, and troubleshooting abilities. | Requires minimal technical skills; mostly plug-and-play functionality. |
| Time Investment | Time-consuming; involves designing, sourcing parts, assembly, testing, and troubleshooting which could take days, or weeks depending on complexity. | Minimal time investment; requires only connection to power and audio sources. |
| Customization | Allows for full customization of the design, components, and features according to project needs. | Limited customization options, depends on the manufacturer's design and component selection. |
| Learning Opportunity | Provides a significant learning opportunity for electronics design, amplifier theory, and troubleshooting. | Limited learning opportunities; mostly user-focused on operational aspects. |
| Troubleshooting | Requires the ability to diagnose issues at component level; higher likelihood of mistakes and troubleshooting. | Less likely to have issues; troubleshooting might be simpler with manufacturer support. |
| Component Selection | Allows for control of components selection based on personal choice or quality requirement. | Components are already selected by the manufacturer; quality can vary between manufacturers. |
| Performance Optimization | Performance can be optimized for specific applications, with the ability to fine-tune the circuit parameters. | Performance is dependent on the manufacturer design and components; usually fixed parameters. |
| Component Sourcing | Requires sourcing components from various suppliers; can be time consuming and might require minimum order quantities. | Component selection is done by the manufacturer; parts are readily available in the assembled board. |
| Pitfalls | High risk of wiring errors, thermal management issues, oscillations and other performance problems. | Risk of receiving a faulty board, or board that does not meet the promised performance. |
For those inclined towards the DIY route, several resources can aid in the process. DIY kits are sometimes available, which provide a pre-selected bill of materials and sometimes the required PCB, which significantly reduces the time spent on sourcing components and also eliminates the risk of manufacturing errors associated with PCB fabrication. However, a solid understanding of amplifier circuit principles, good soldering technique and the ability to accurately assemble a schematic are essential for successful DIY projects. Pre-built boards, on the other hand, offer the advantage of simplicity, ensuring users can quickly integrate high quality amplification into their audio system with minimal effort.
Key Features and Specifications of a Quality Amplifier Board

When selecting or designing an amplifier board utilizing 2SC5200 and 2SA1943 transistors, several critical features and specifications directly influence its performance, reliability, and longevity. A well-engineered board should not only amplify the audio signal effectively but also protect the speakers, and operate efficiently within specified parameters.
| Feature | Description | Importance |
|---|---|---|
| Speaker Protection Circuit | Includes overcurrent, short-circuit, and DC offset protection. | Essential to prevent damage to speakers due to amplifier malfunctions. |
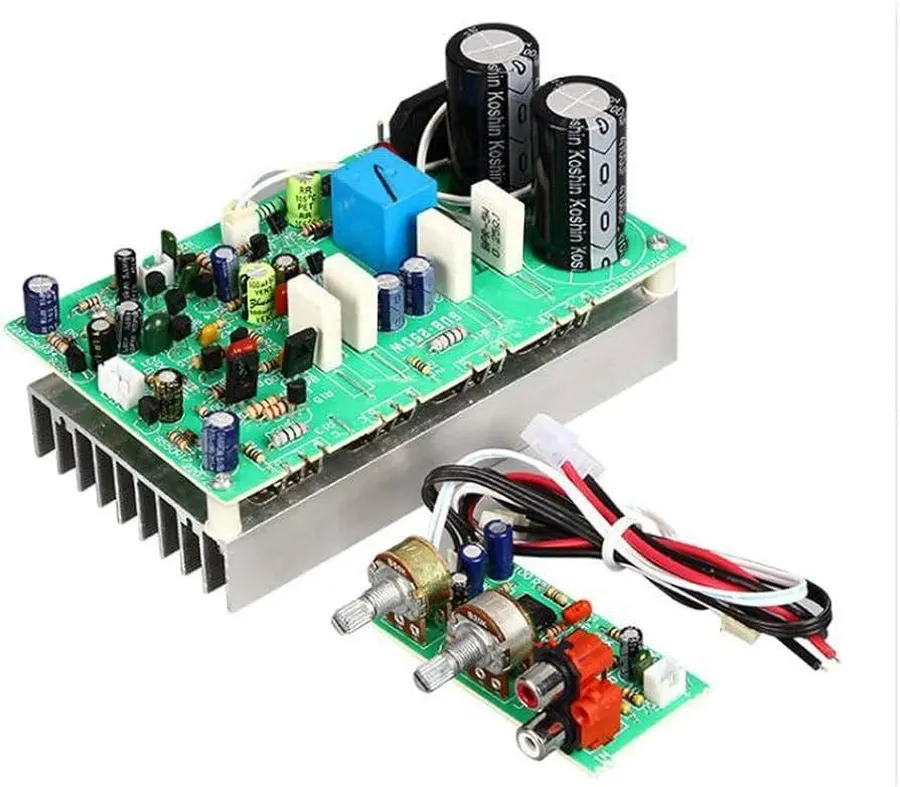
| Heat Sinks | High quality heat sinks with adequate surface area | Crucial for dissipating heat generated by power transistors. Proper heat dissipation ensures stable operation and prevents thermal runaway. |
| PCB Design | Optimized PCB layout, including track width, and component placement. | Minimizes noise, ensures efficient current flow, and improves overall performance and stability. |
| Component Quality | Use of high-quality resistors, capacitors, and other components with low tolerances. | Affects signal clarity, reduces noise, and ensures long-term reliability. |
| Power Supply Filtering | Adequate filtering capacitors in the power supply section. | Reduces noise from power supply ripples and ensures a clean, stable power source for the amplifier. |
| Input and Output Connectors | High-quality, secure connectors for audio input, speaker output, and power input. | Ensures reliable connections and minimize signal losses. |
| Bias Adjustment | Trimmer pots for adjusting the bias current of the output transistors. | Allows fine tuning of the amplifier for optimum performance and minimizing crossover distortion. |
Frequently Asked Questions About 2SC5200 & 2SA1943 Amplifier Boards
This section addresses common queries regarding 2SC5200 and 2SA1943 amplifier boards, providing clear, concise answers to help you make informed decisions and optimize your audio setup. We will delve into the practical aspects of using these powerful components.
- What are the key advantages of using a mono configuration versus a stereo configuration?
Mono configurations are primarily used when you only require one channel of amplified audio, suitable for applications like subwoofers or single-speaker setups. Stereo configurations, on the other hand, provide two distinct audio channels, creating a wider soundstage and a more immersive listening experience. Choosing between the two depends entirely on the intended application. - What type of power supply is required to operate a 2SC5200/2SA1943 amplifier board effectively?
The specific power supply requirements depend on the desired output power of the amplifier. Generally, a dual polarity DC power supply is needed, typically ranging from ±30V to ±60V, along with a current rating that is consistent with your intended output power (e.g., 5A, 10A etc..). Always refer to the board's documentation for precise voltage and current specifications. - How do I select the appropriate heat sink for a 2SC5200/2SA1943 amplifier board?
Selecting the correct heat sink is crucial for preventing overheating and potential damage to the transistors. The heat sink's thermal resistance should be low enough to dissipate the heat generated by the transistors at the required power output. As a rule of thumb, a larger heat sink provides better cooling. Always refer to manufacturer's specifications for the amplifier board and the heat sink to ensure proper cooling under normal operating conditions. - What differentiates one 2SC5200/2SA1943 amplifier board brand from another?
Differences between brands can manifest in the quality of components used (e.g., capacitors, resistors), the PCB material and layout, the inclusion of additional features (e.g., speaker protection), and the overall manufacturing quality. Better brands will typically have tighter tolerances on their parts, better circuit traces, and more robust heatsinks which result in higher performance and reliability. - How does a 2SC5200/2SA1943 push-pull amplifier board work?
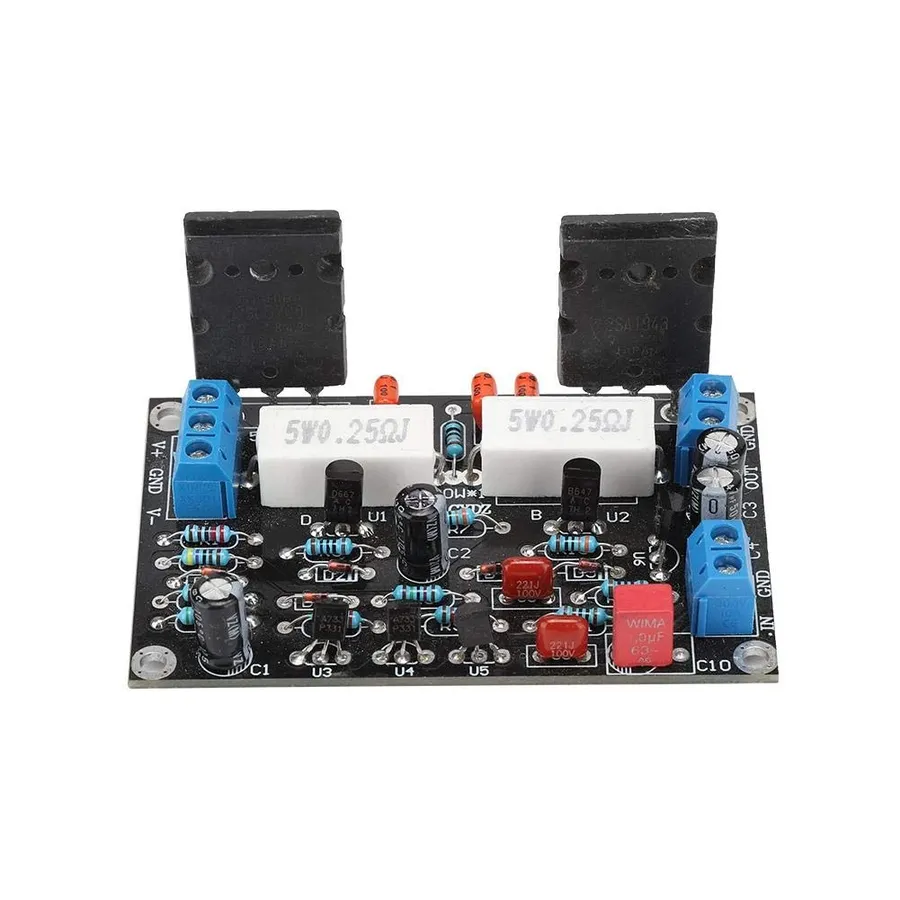
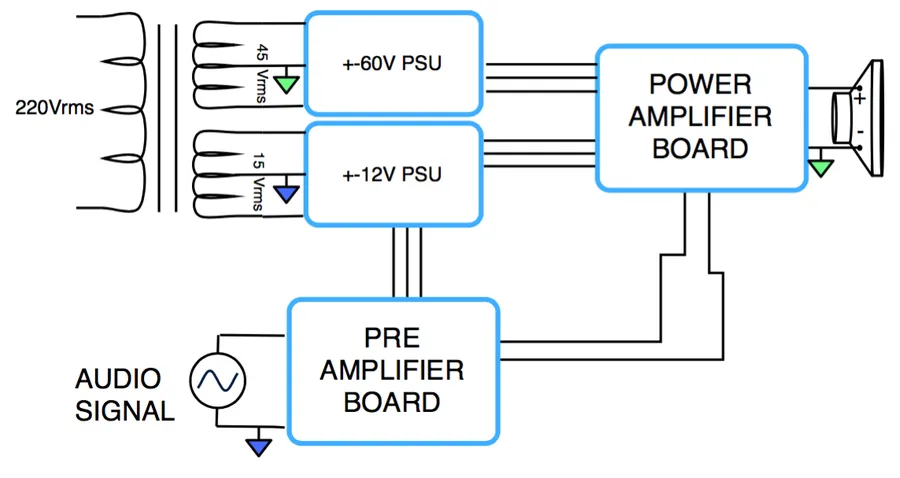
These amplifier boards typically use the 2SC5200 and 2SA1943 transistors in a push-pull configuration. This arrangement allows each transistor to amplify half of the input waveform, which are then combined to produce a larger output signal. This provides higher power and efficiency compared to single-ended amplifiers. The input signal is typically fed through a preamplifier to set the correct signal input for the power transistors. - What are the safety precautions when handling a 2SC5200/2SA1943 amplifier board?
Always ensure the power is OFF before connecting or disconnecting any components. Be aware that heatsinks can become extremely hot, so avoid touching them during operation. When testing an amplifier board, it is advisable to connect to a low-power test speaker initially to verify correct function before connecting to expensive equipment. Additionally, observe proper ESD handling practices. Incorrect wiring and setup could cause short circuit or over current damage, and must be verified. - How can I integrate my 2SC5200/2SA1943 amplifier board into my existing audio system?
Integration typically involves connecting your audio source (e.g., pre-amplifier, mixer, DAC) to the board's input, and then the board's output to your speakers. Pay attention to impedance matching, wiring connections, and always verify input level is safe for the board. Proper grounding is essential to minimize noise. Ensure you use suitable gauge wiring and connectors for reliable signal and power transfer. Proper polarity and voltage supply is crucial. - What are some of the most common issues that arise with 2SC5200/2SA1943 amplifier boards?
Common issues include thermal overload due to insufficient heatsinking, transistor failure due to over-driving, distorted output due to poor gain stages or improperly matched components, excessive noise due to ground loops, and low output due to poor voltage regulation, or incorrectly matched impedance for the load.
Step-by-Step Guide to Setting Up a 2SC5200/2SA1943 Amplifier Board
Setting up a 2SC5200/2SA1943 amplifier board requires careful attention to detail to ensure optimal performance and safety. This guide provides a structured approach to connecting the amplifier board to power, speakers, and audio sources, including essential troubleshooting tips and safety precautions.
- Prepare the Workspace and Gather Tools
Ensure you have a clean, well-lit workspace. Gather essential tools such as a multimeter, soldering iron (if required), wire strippers, screwdrivers, and appropriate gauge wiring. - Inspect the Amplifier Board
Before starting, visually inspect the board for any damage, loose components, or soldering issues. Check the heatsink is properly attached. - Connect the Power Supply
Identify the power input terminals on the amplifier board. Typically, these will be marked for positive (+VCC) and negative (GND) connections. Connect the power supply using appropriate gauge wiring. Ensure the power supply voltage and current ratings match the board's requirements. Verify the polarity to avoid damaging the board. Never connect the power supply whilst it is powered on. - Connect the Audio Input Source
Connect your audio source to the input terminals of the amplifier board. These might be RCA connectors, a 3.5mm jack, or screw terminals, depending on the board design. Ensure that the correct channels are connected for stereo output, if required. Be sure to connect ground to the correct ground pin, to avoid noise. - Connect the Speakers
Connect your speakers to the output terminals of the amplifier board. Ensure correct polarity (+ and -) for each speaker to prevent phase cancellation, and impedance matching to ensure the amplifier does not drive an unstable load. Ensure all speaker connections are secure. - Initial Power-Up and Testing
Double-check all connections before powering on the system. Start with a low-volume input signal. Gradually increase the volume and monitor the output for any distortion, overheating, or unexpected behavior. Use a multimeter to test for voltage drop and current draw at various points of the circuit. - Troubleshooting and Basic Maintenance
If the amplifier board is not working correctly, check all connections again. If issues persist, check the board's components using the multimeter to test voltage levels, continuity, and if needed, resistance. Make sure the heatsink is installed properly. Ensure the board is in an environment with proper ventilation, and that there is no excess dust or other debris on the board.
Safety Precautions: Always disconnect the power supply before making any adjustments to wiring. Never expose the amplifier board to moisture or excessive temperatures. Ensure the heatsink is installed correctly and that the device has proper ventilation, as the transistors will get hot during operation. If you are unsure about any step of the process, consult the board's documentation or seek assistance from a qualified technician.
Testing the Amplifier Circuit: The best way to test if your amplifier circuit is working is to measure the output signal at various test points, especially if the amplifier is not operating as intended. Measure the voltage at the input, at the base, collector, and emitter pins of each transistor. Compare the measured values to the expected values from a theoretical circuit diagram. The use of an oscilloscope will allow you to view and test the output sine wave (or other input signals). If the signal is distorted, then there is an issue which you will need to resolve.
Optimizing Performance: Tips and Tricks
Achieving peak performance from a 2SC5200/2SA1943 amplifier board requires more than just proper connections; it necessitates a nuanced understanding of thermal management, signal integrity, and component interactions. This section provides advanced strategies to elevate your amplifier's performance, focusing on heat dissipation, noise reduction, and sound customization.
- Effective Heat Dissipation
Proper heat management is critical for the longevity and stability of your amplifier. The 2SC5200 and 2SA1943 transistors, while robust, generate significant heat. Always use a properly sized heat sink with thermal paste. Active cooling, such as fans, may be necessary for high-power applications. Ensure there is sufficient airflow around the heat sink, and the surrounding components. Monitor the temperature using a thermal gun. Aim for operating temperatures below 80°C. - Grounding for Noise Reduction
Ground loops and electromagnetic interference (EMI) can introduce unwanted noise into your amplifier. A proper grounding strategy is essential. A star grounding configuration, where all ground connections converge at a single point, minimizes ground loops. Shielded cables will reduce EMI. Consider using ferrite beads on input and output cables to suppress high-frequency noise. - Component Selection and Matching
The quality of passive components—capacitors, resistors, and inductors—can significantly affect sound quality. Use high-quality components with tight tolerances. Carefully match the input impedance of the preamplifier to the amplifier stage to optimize signal transfer. Consider using low-ESR (Equivalent Series Resistance) capacitors for power supply decoupling and filtering for reduced noise. - Power Supply Filtering
A clean, stable power supply is crucial for optimal performance. Employ a robust power supply filter to minimize ripple and noise. Consider using additional smoothing capacitors near the amplifier stage. A linear power supply is generally preferred over switching power supplies for lower noise. - Biasing and Operating Point Adjustment
Correctly biasing the transistors to their optimal operating point is essential. Adjust bias to minimize distortion and maximize efficiency. You might need to fine-tune the bias for specific operating conditions or when changing components. Use an oscilloscope to verify the output signal, and minimize distortion. Ensure you have the correct multimeter readings and adjust the trim potentiometers accordingly. - Signal Integrity and Cable Quality
High-quality interconnect cables are essential to maintain signal integrity. Use low-capacitance, shielded cables to minimize signal loss and external noise. Shorten signal paths where possible to reduce signal degradation. Ensure that connections are soldered correctly and that there are no cold joints. Clean flux residue after soldering. - Component Placement and Layout
Strategic placement of components will help reduce feedback loops and noise coupling. Place high-frequency components, such as op-amps, away from power supply components. Avoid long parallel traces on PCB layouts to reduce inductance. If you are designing a PCB, ensure that ground planes are solid and continuous. - Optimizing Audio Components for Synergy
Experiment with different audio components to find the optimal synergy with your amplifier board. The pre-amplifier, DAC, and speaker choice can all impact sound quality. Adjust the amplifier's input impedance to match your source for best signal transmission. Consider using a buffer between pre-amp and amp. Carefully match the speaker impedance to the amplifier's output capability. Use a good quality digital to analog converter (DAC).
The 2SC5200 and 2SA1943 transistors remain a solid choice for those seeking high-fidelity audio amplification. Whether you opt to build your own system from a DIY kit or purchase a pre-assembled 2SC5200 2SA1943 amplifier circuit board, understanding the crucial role each component plays and what to look for when selecting each part will ensure a high-quality, reliable and budget conscious approach. By carefully navigating the 2SC5200 2SA1943 amplifier circuit board price variations and specifications, you can enhance your audio experience and bring your sound system to life. By following this comprehensive guide, you are now equipped to confidently select and implement your next audio amplifier project.