Luminous Inverter PCB Board Price: A Comprehensive Guide
In today's world, reliable power backup systems are indispensable, and at the heart of these systems lies the inverter's PCB board. For users of Luminous inverters, understanding the 'luminous inverter pcb board price' is crucial for maintenance and repairs. This article will demystify the factors impacting the price of these critical components, explore different types, and guide you through finding the right replacement. We'll delve into the inner workings of inverter PCB boards, ensuring a balance between technical understanding and practical advice, helping you make informed choices.
Understanding the Luminous Inverter PCB Board
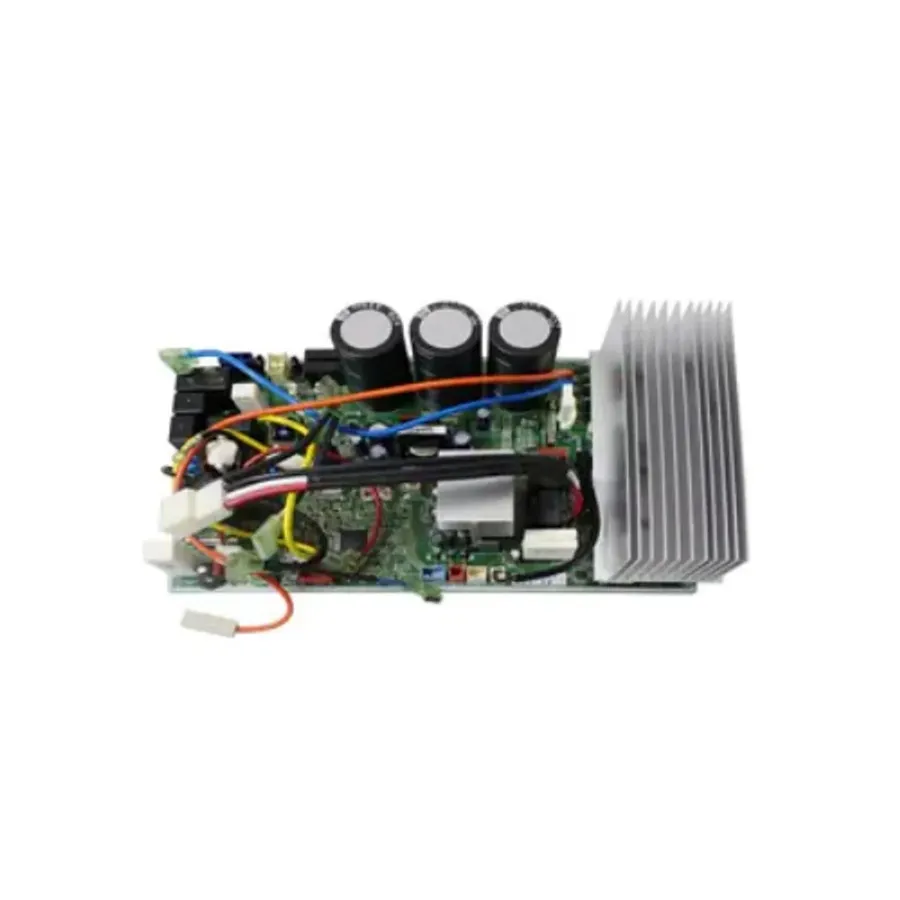
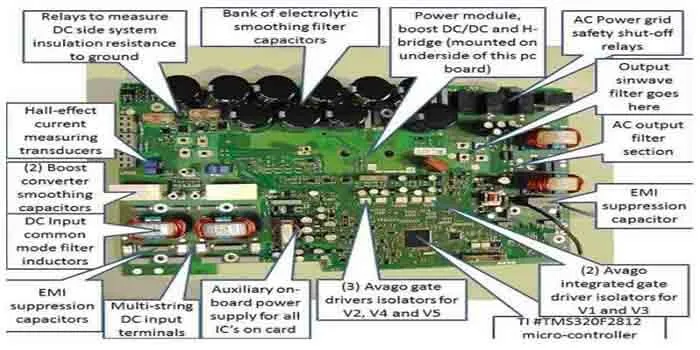
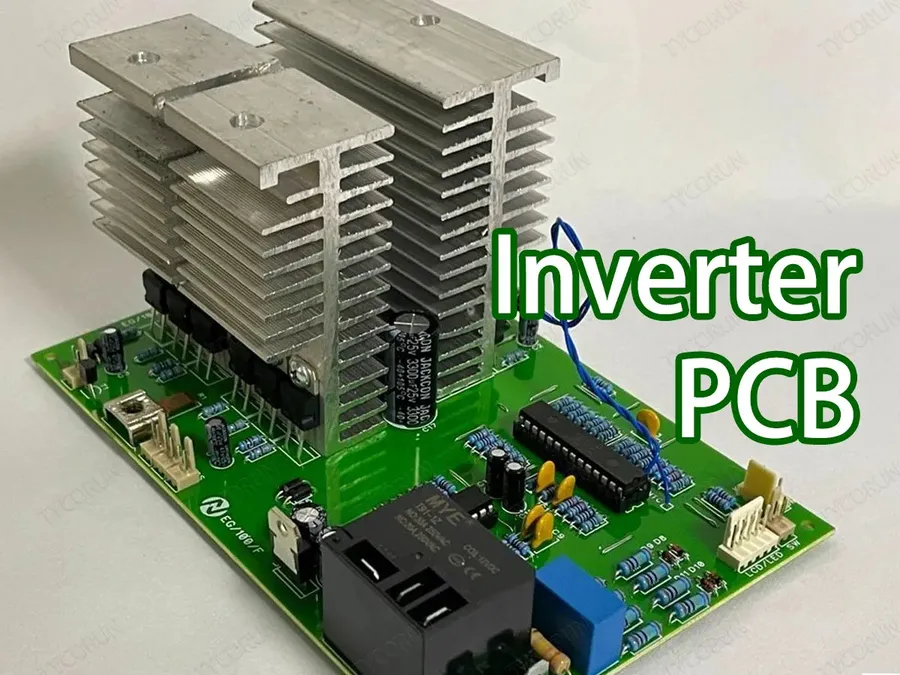
The Printed Circuit Board (PCB) within a Luminous inverter is the central component facilitating the conversion of Direct Current (DC) power from the battery to usable Alternating Current (AC) power for your home or office. It is the brain of the inverter, orchestrating all electrical functions and ensuring efficient energy conversion. This complex board houses numerous electronic components which work in concert to manage charging, power output, and overall system protection.
At its core, a PCB provides both mechanical support and electrical connections for electronic components. In a Luminous inverter, the PCB houses crucial components such as microcontrollers, power transistors, capacitors, and resistors. These elements work together to regulate voltage, current, and frequency, enabling the inverter to provide stable and reliable AC power. The functionality of the PCB is crucial for the inverter’s overall operation; any malfunction in the board can lead to complete system failure or inconsistent performance.
Factors Influencing Luminous Inverter PCB Board Price
The price of a Luminous inverter PCB board is not fixed; it fluctuates based on several interconnected factors. Understanding these elements is crucial for both consumers and technicians to grasp the cost drivers behind these essential components.
| Factor | Description | Impact on Price |
|---|---|---|
| Board Complexity | Refers to the intricacy of the circuit design, number of layers, and the density of components on the PCB. | Higher complexity typically translates to higher manufacturing costs and thus a higher price for the PCB. |
| Inverter Capacity (VA Rating) | The power handling capability of the inverter. Higher VA ratings require more robust and complex PCBs. | Larger capacity inverters necessitate more expensive PCBs due to larger components and higher power handling requirements. |
| Component Quality | The quality of electronic components like capacitors, transistors, and ICs used on the PCB. | Higher-quality, more reliable components increase the cost but also enhance performance and lifespan. |
| Manufacturing Processes | The technology and precision involved in the PCB fabrication process, including layer count, track width/spacing, and surface finish. | Advanced manufacturing processes, including automated assembly and testing, might have a higher cost but results in more durable boards and are less prone to failure, reducing costs long term |
| Brand Reputation and Margins | Established brands often have higher prices due to perceived quality, brand recognition, and warranty services offered. | A well-known brand may command a premium due to better quality control and after-sales support, impacting the final price. |
| Supply and Demand | The availability of the specific PCB board in the market. Scarcity can drive prices up. | High demand or limited availability can lead to inflated prices, while oversupply may result in price reductions. |
Common Issues Requiring PCB Board Replacement
A failing or damaged PCB (Printed Circuit Board) within a luminous inverter can manifest in several ways, often disrupting its normal operation. Recognizing these symptoms early is crucial to prevent further damage and ensure timely replacement. These issues typically stem from component failure, electrical surges, or physical damage to the board.
- No Power Output
The inverter fails to provide any AC power to connected devices, despite being powered and switched on. This often indicates a fundamental issue with the PCB's power conversion circuitry. - Frequent Shutdowns or Tripping
The inverter shuts down or trips frequently, often without any apparent reason. Such behavior could be due to a faulty component triggering the overcurrent protection circuit. - Overheating
Excessive heat generation from the inverter, even during normal operation, can signify a problem with the PCB. Overheating is often caused by short circuits or inefficient power conversion, which can be very dangerous. - Charging Problems
The inverter does not charge the batteries properly or at all. These charging malfunctions may come from a malfunctioning component in the charging circuit on the PCB board. - Erratic or Unstable Output
The inverter's output is not stable; there may be fluctuations in voltage or frequency. These issues usually point to a faulty control circuit. - Visible Damage
Visible signs such as burnt components, cracked traces, or swollen capacitors on the PCB board indicate physical damage. If you see visual evidence, you need to change the PCB board to avoid causing further damage
Luminous Inverter PCB Board Types & Compatibility
Luminous inverters utilize a variety of Printed Circuit Boards (PCBs), each tailored to specific inverter models and series, such as the Eco Watt and NXG lines. Selecting the correct PCB is critical for optimal inverter functionality and longevity. Understanding the nuances of these PCB variations and their compatibility is essential for effective maintenance and repair.
| Luminous Inverter Series | Typical PCB Board Features | Compatibility Notes |
|---|---|---|
| Eco Watt Series | Standard protection circuits, may include basic transformer-based topology | Ensure the PCB model number matches the inverter's specific Eco Watt model. |
| NXG Series | Advanced micro-controller-based boards, more integrated control features, often includes MOSFET based topologies | NXG boards are typically not interchangeable with Eco Watt series due to different control logic and component configurations. |
| Sine Wave Series | More robust components for handling pure sine wave output, advanced filtering and protection circuits. | Boards are designed for higher performance and may be incompatible with standard models. Refer to model number |
| Solar Inverter Series | Include additional circuitry for solar charging and battery management, often have MPPT(Maximum Power Point Tracking) features. | Boards are specifically designed for solar integration and are not compatible with standard inverter models. |
| Hybrid Inverter Series | Complex boards with multiple functionalities, including solar charging, grid power management and energy storage. | Check specifications carefully before replacing this type of board as it is often customized for different system |
Key considerations for ensuring compatibility include: * **Model Number:** The most critical factor. PCB boards are designed for specific inverter models, identified by a unique number, usually found on the inverter casing and the PCB itself. * **Series Compatibility:** Ensure that the replacement PCB is from the same series (e.g., Eco Watt, NXG) as your inverter. Mixing series can lead to severe malfunctions. * **Component Specifications:** While less critical for basic replacements, ensure the board's voltage, current and component specifications match your inverters requirements for its rated power output. * **Visual Inspection:** Compare the connector placements and components on the new board with the old one to confirm compatibility. Minor differences can indicate a non-compatible replacement. Failing to match the correct board may cause immediate failure, poor performance or even more severe damage to the inverter and may void warranties. Always refer to the manufacturer's documentation and technical support if you are unsure about the compatibility of a particular PCB.
Where to Buy Luminous Inverter PCB Boards and Luminous Inverter PCB Board Price Comparison
Sourcing a replacement PCB board for a Luminous inverter requires careful consideration of both price and reliability. This section outlines various purchasing channels, from online marketplaces to local shops and authorized service centers, providing a balanced perspective on the advantages and drawbacks of each.
| Source | Pros | Cons | Price Range (Estimated) | Considerations |
|---|---|---|---|---|
| Online Marketplaces (e.g., Alibaba, Amazon, IndiaMART) | Wide selection, Often competitive pricing, Convenient shopping | Potential for counterfeit parts, Variable seller reliability, Shipping times may vary, Warranty issues can be complex | ₹500 - ₹3000 | Check seller ratings, confirm product specifications, pay attention to return policies. |
| Local Electrical Shops | Immediate availability, Opportunity for inspection before purchase, Support local businesses | Potentially higher prices, Limited stock availability, May not have boards for all inverter models | ₹800 - ₹3500 | Confirm board compatibility with your specific inverter model. Check for local warranty. |
| Authorized Service Centers | Guaranteed genuine parts, Professional assistance available, Reliable warranty support | Usually the most expensive option, May have longer lead times for parts acquisition | ₹1000 - ₹4000+ | Best option for complex inverters or if you want to ensure proper support and parts are genuine. |
Installation and Maintenance of Luminous Inverter PCB Boards
Proper installation and regular maintenance are crucial for the longevity and optimal performance of your Luminous inverter PCB board. This section provides guidance on safely installing a replacement board and offers essential maintenance tips to maximize its lifespan, emphasizing the importance of professional assistance for complex installations to ensure safety and functionality.
Before commencing any work on the inverter, ensure that the power supply is completely disconnected and the inverter is switched off. This measure is crucial for personal safety and prevents damage to the unit or other equipment.
Below is a step-by-step guide for installation and maintenance, this process is generic and may vary slightly based on your inverter model. Always consult the specific manual for the exact steps.
- Preparation
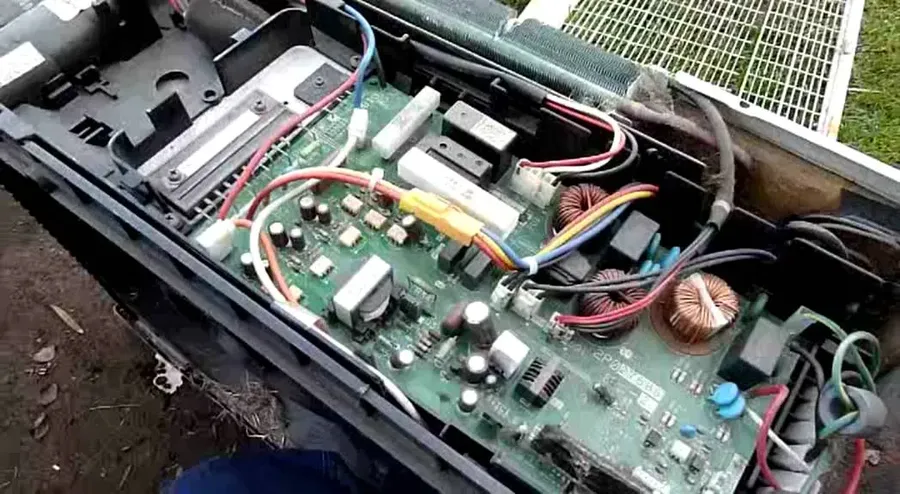
Turn off the inverter and disconnect it from the power source. Allow some time for any stored energy in the capacitors to dissipate. Gather the necessary tools: a screwdriver (likely Phillips head), possibly a multimeter, and the replacement PCB board. Verify the replacement board is compatible with your inverter model. - Accessing the PCB Board
Open the inverter casing by unscrewing the screws. Usually, the PCB board is easily accessible once the case is opened. Take note of the placement and orientation of the old board before removal. Take pictures if necessary. Gently disconnect any wires or connectors that are attached to the old PCB, observing their original positions. If unsure, mark or take notes of where each wire is connected for proper reinstallation. - Installing the New PCB Board
Carefully align the replacement PCB board with the mounting brackets or designated slots in the inverter. Reconnect all wires and connectors to their proper locations on the new PCB board, ensuring secure and proper connections. Double-check all connections based on the previous observations or notes. Ensure that all connections are firm to prevent any issues later. - Securing and Testing
Close the inverter casing and screw it back on. Reconnect the inverter to the power source, turn it on, and perform initial testing to ensure that the new board functions properly. Check that there is power output and that the inverter operates smoothly. If problems occur, double-check wiring, connectors or call a professional. - Routine Maintenance
Keep the inverter and its components free from dust and debris by regularly cleaning the unit with a soft brush or a vacuum cleaner. Ensure that the inverter is kept in a well-ventilated area to avoid overheating. Periodically check wiring and connections for any loose or corroded terminals. If you notice any unusual noises, smells, or performance issues, consult a professional electrician or service technician to avoid long-term damages.
It is paramount to be cautious and precise when installing or handling the PCB board to avoid causing any damage. If you are not comfortable or have limited experience in handling electrical components, always opt for professional help.
By carefully following these steps and performing routine maintenance, you can maximize the lifespan and performance of your luminous inverter's PCB board, resulting in reliable operation and reduced frequency of replacements.
Frequently Asked Questions About Luminous Inverter PCB Boards
This section addresses common queries regarding Luminous inverter PCB boards, providing clear and concise answers to help users understand their function, issues, and replacement.
- What exactly is a PCB in an inverter?
A Printed Circuit Board (PCB) in a Luminous inverter is the central component that houses the electronic circuitry responsible for converting Direct Current (DC) power from the battery into Alternating Current (AC) power for use in your home. It manages critical functions like power conversion, charging, and protection. - What should I do if my Luminous inverter stops working?
If your Luminous inverter is not working, first check the power connections, battery terminals, and ensure the mains power supply is active. If these are fine, inspect the inverter for any error messages or indicators. A non-functional inverter might have a faulty PCB, but a professional diagnosis is essential to confirm this. - What is the typical price range for a 1050 watt inverter PCB?
The price of a 1050 watt inverter PCB varies based on the model, brand (even within Luminous), and the retailer. It's essential to get an exact quote for your model from authorized service centers or reputable suppliers. Expect to spend more on a complex board. Always make sure the PCB is brand new and not a refurbished one. - What does the inverter control board do?
The inverter control board, another term for the PCB, regulates the inverter's operational logic. It handles charging control, overload protection, battery management, and the actual DC to AC conversion process. It is critical for the inverter's safe and reliable operation. - How can I identify if the PCB board is faulty?
Common signs of a faulty PCB include the inverter not turning on, frequent shutdowns, overheating, failure to charge the battery, or erratic power output. These issues could also be linked to other components; therefore, a professional diagnosis is necessary to pinpoint the cause. - Can I replace the Luminous inverter PCB board myself?
Replacing an inverter PCB board requires good knowledge of electronics and proper safety precautions. If not handled correctly, it can cause severe harm and invalidate warranties. It is always advisable to seek the services of a professional for this procedure. - Where can I get a PCB for my Luminous inverter?
You can find replacement PCB boards at authorized Luminous service centers, online marketplaces such as Amazon or Indiamart, or at your local electrical component suppliers. When shopping around for a PCB, it is imperative to make sure you get a genuine one by checking the reviews, and the authenticity of the seller to avoid being scammed.
DIY vs. Professional PCB Repair or Replacement
Deciding between a do-it-yourself (DIY) approach and seeking professional help for Luminous inverter PCB board repair or replacement is a critical decision that balances cost, safety, and expertise. While the lure of saving on labor costs is attractive, the technical intricacies of PCB repair and the potential hazards of incorrect handling necessitate a careful evaluation of the advantages and disadvantages of each approach, especially when considering the price of a new board.
| Factor | DIY Repair/Replacement | Professional Repair/Replacement |
|---|---|---|
| Cost | Potentially lower initial cost (only parts), but risk of mistakes leading to higher costs. | Higher initial cost due to labor charges, but likely lower total cost because of correct diagnosis and repair. |
| Safety | Significant risk of electrical shock, short circuits, and damage to the inverter due to inexperience. | Lower risk of electrical shock or further damage as professionals are trained to handle these components safely. |
| Expertise | Requires good understanding of electronics and soldering skills; mistakes can cause irreparable damage. | Professional technicians have expertise and experience, resulting in accurate diagnosis and effective repair. |
| Time | Can be time-consuming, especially for first-timers, with no guarantee of success. | Quicker turnaround time because of expertise; professionals can diagnose and repair efficiently. |
| Warranty | No warranty on DIY work and components, no recourse if something goes wrong | Professional repair often comes with warranty on both parts and service, guaranteeing peace of mind. |
| Tools | Requires specialized tools like soldering iron, multimeter, etc, that may have to be purchased. | Professionals have all the necessary tools and equipment. |
| Diagnosis | Difficult to diagnose the root cause of the problem accurately without expertise, may replace the wrong component | Professionals can quickly diagnose the issue, ensuring right parts are replaced. |
Future Trends in Inverter PCB Technology
The future of inverter PCB technology is geared towards enhancing efficiency, performance, and sustainability, with corresponding trends influencing the luminous inverter PCB board price. Innovations focus on smarter designs, materials, and manufacturing processes to improve the power conversion efficiency, reduce environmental impact, and enhance reliability. This section explores these emerging trends.
Key trends include:
- Advanced Materials:
Moving beyond traditional FR-4 substrates to materials like ceramics, metal-core PCBs, and advanced polymers. These offer better thermal management, improved heat dissipation, and reduced risk of failure. The adoption of composite materials for lighter yet robust designs is also gaining traction. - Enhanced Power Density:
Developments in component miniaturization and advanced packaging techniques will allow for higher power densities on smaller PCB boards. This means more efficient power conversion in a smaller footprint, reducing the overall size of inverters and allowing for integration into more compact devices. The luminous inverter PCB board price is expected to increase initially with these advanced components but could see cost reductions with increased production and scalability. - Improved Energy Efficiency:
Future designs will incorporate highly efficient power electronic components and advanced control algorithms to minimize power losses during DC-AC conversion. Techniques such as soft-switching and active power factor correction (APFC) will be implemented to reduce wasted energy, making inverters more efficient. These advanced algorithms and smart circuits will allow for dynamic adjustments of power output based on real-time demand, optimizing performance and further enhancing efficiency and reducing luminous inverter pcb board price in the long run. - Smart Control and Monitoring:
Integration of microcontrollers, sensors, and communication interfaces (e.g., IoT) will allow real-time monitoring of inverter performance, diagnostics, and remote control. Predictive maintenance based on usage data will improve reliability and extend the life span of the PCB board and overall inverter system. Features such as thermal monitoring, overload protection, and fault diagnosis will become standard, ensuring safe and efficient operation. The addition of advanced processing power could increase the luminous inverter PCB board price but will provide long term value and savings due to its efficiencies. - Focus on Sustainability:
Growing focus on eco-friendly materials and manufacturing processes. This will include using RoHS-compliant materials, lead-free soldering, and recyclable PCB substrates. Energy-efficient production and recycling programs will contribute to the sustainability goals of inverter manufacturers and reduce the environmental impact of inverter production and eventual disposal. These sustainable practices may influence luminous inverter PCB board price.
These future trends collectively aim at creating more efficient, reliable, and sustainable inverter systems. While initial adoption of these technologies may lead to higher luminous inverter PCB board prices, mass production and technological advancements will eventually contribute to reducing costs and increased availability.
Understanding the 'luminous inverter pcb board price' is a key part of maintaining your power backup system. From identifying the crucial function of the board to evaluating repair options, this guide has covered essential aspects. As you navigate the replacement process, consider your inverter model, the different price points across vendors, and the value you'll receive. Ultimately, a well-informed decision based on this knowledge ensures your Luminous inverter operates efficiently, securing power when you need it most, with the best value at the most efficient [luminous inverter pcb board price].