Unleash Creativity with the Adafruit Circuit Playground: A Comprehensive Guide
The Adafruit Circuit Playground is more than just a piece of hardware; it's a gateway to a world where electronics and coding intersect, fostering creativity and innovation. Imagine transforming everyday ideas into interactive realities with a single, versatile board. This article will guide you through everything you need to know about the Adafruit Circuit Playground, from its various versions to getting started on your first project, blending practical knowledge with the spirit of discovery that lies at the heart of making.
What is the Adafruit Circuit Playground?
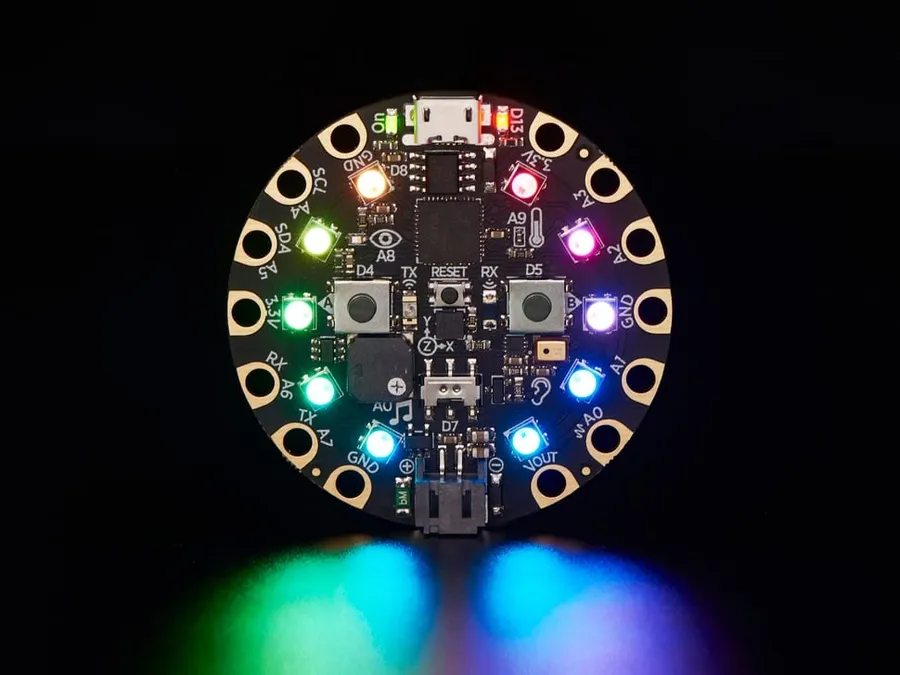
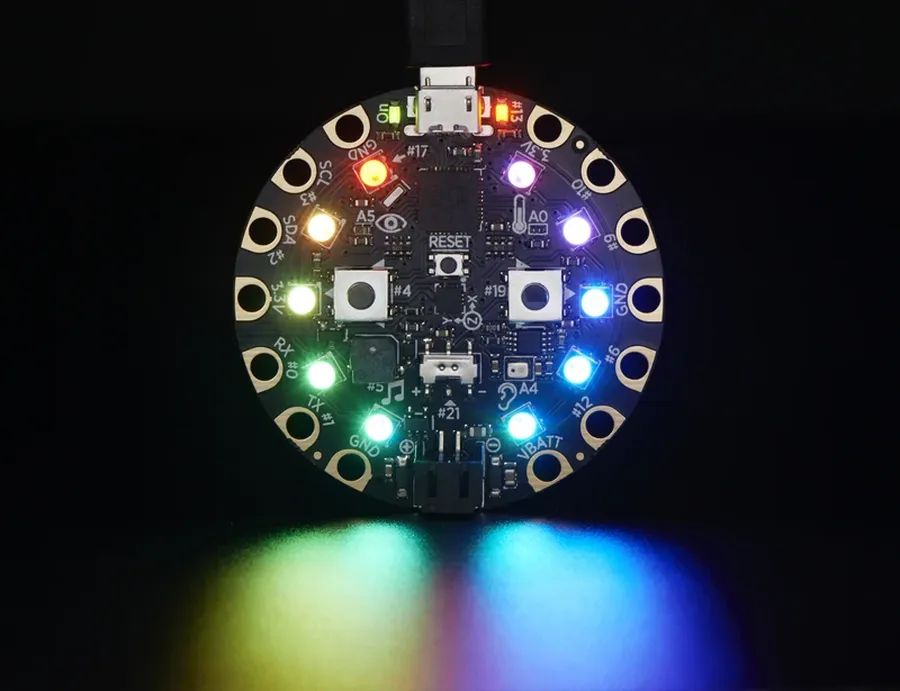
The Adafruit Circuit Playground is a versatile, all-in-one microcontroller board designed for beginners and educators, emphasizing ease of use and rapid prototyping. It integrates multiple sensors, LEDs, and input/output options into a single, compact circular platform, making it an ideal launchpad for learning electronics and coding, and a powerful tool for creative projects.
- Beginner-Friendly Design
Its user-friendly design makes it accessible to individuals with no prior experience in electronics or programming. - Integrated Components
The board includes built-in sensors (light, temperature, sound, accelerometer), programmable LEDs, buttons, and a slide switch. - Versatile Applications
It serves as a platform for a wide range of projects, from basic interactive art to complex sensor-based systems. - Educational Tool
It is widely used in classrooms and workshops for teaching fundamental concepts in coding, electronics, and STEM. - Multiple Programming Options
It can be programmed using block-based languages like MakeCode and text-based languages like Arduino C/C++, offering flexibility for different skill levels.
Circuit Playground Express vs. Classic: Key Differences
The Adafruit Circuit Playground comes in two primary versions: the Express and the Classic. While both serve as excellent platforms for learning electronics and coding, they differ significantly in their hardware, capabilities, and target applications. Understanding these differences is crucial for selecting the right board for your projects.
| Feature | Circuit Playground Express | Circuit Playground Classic |
|---|---|---|
| Processor | SAMD21 (32-bit ARM Cortex M0+) | ATmega32u4 (8-bit AVR) |
| Clock Speed | 48 MHz | 16 MHz |
| RAM | 32 KB | 2.5 KB |
| Flash Memory | 256 KB | 32 KB |
| Bluetooth | BLE (Bluetooth Low Energy) Capable | Not Available |
| Programming Languages | MakeCode, CircuitPython, Arduino | Arduino |
| Audio Input/Output | Digital Microphone | None |
| Touch Pads | 7 Capacitive Touch Pads | None |
| Infrared | IR Receiver and Transmitter | None |
| Price | Higher | Lower |
The Circuit Playground Express, powered by the SAMD21 processor, offers a more robust performance with its higher clock speed, larger memory capacity, and Bluetooth capability. The inclusion of a digital microphone and capacitive touch pads further enhance its functionality and opens up avenues for more complex interactive projects. It also supports MakeCode, a visual block-based programming environment, which is exceptionally beginner-friendly. In contrast, the Circuit Playground Classic, based on the ATmega32u4 processor, is more streamlined, with less processing power and memory. It is suitable for projects that require lower processing requirements. It is commonly programmed with the Arduino IDE, which uses the C++ language. The Classic lacks the advanced features like Bluetooth, touch pads, and digital microphones found on the Express but is still an excellent platform for many educational and maker-focused applications. The Express board's enhanced capabilities make it better suited to projects that benefit from increased processing power and wireless communication.
Getting Started with Your Circuit Playground

The Adafruit Circuit Playground is designed for ease of use, making the initial setup process straightforward. This section will guide you through the necessary steps to get your board connected and running its first program, ensuring a smooth start to your creative electronics journey.
- Software Installation
Begin by downloading and installing the required software. For MakeCode, this involves accessing the online editor. For the Arduino IDE, ensure you have the correct board support package installed, which allows the Arduino IDE to communicate with the Circuit Playground. Visit the Adafruit website for the most up-to-date links and detailed tutorials. - Connecting Your Circuit Playground
Connect your Circuit Playground to your computer using a USB cable. The board should be recognized by your operating system, and the necessary drivers should be installed automatically. If prompted to install drivers manually, refer to the Adafruit website for specific instructions based on your operating system. - Programming Environment Selection
Choose your programming environment: MakeCode or Arduino IDE. MakeCode is a block-based platform ideal for beginners, while Arduino IDE offers C++ coding for more advanced users. Select the environment that best fits your experience level and project goals. - Running Your First Program (MakeCode)
For MakeCode, connect your board and create a simple 'blink' program that toggles the on-board LEDs. Download the program to the Circuit Playground by drag-and-drop from your browser or using the download button; the board should start flashing immediately. - Running Your First Program (Arduino IDE)
In Arduino IDE, select your board type and port. Copy a basic example program to blink one of the built-in LEDs. Upload the code to the board, and your Circuit Playground should start flashing as programmed. Ensure the correct libraries are included for your program to compile and run without errors.
Exploring the Built-in Sensors and Features
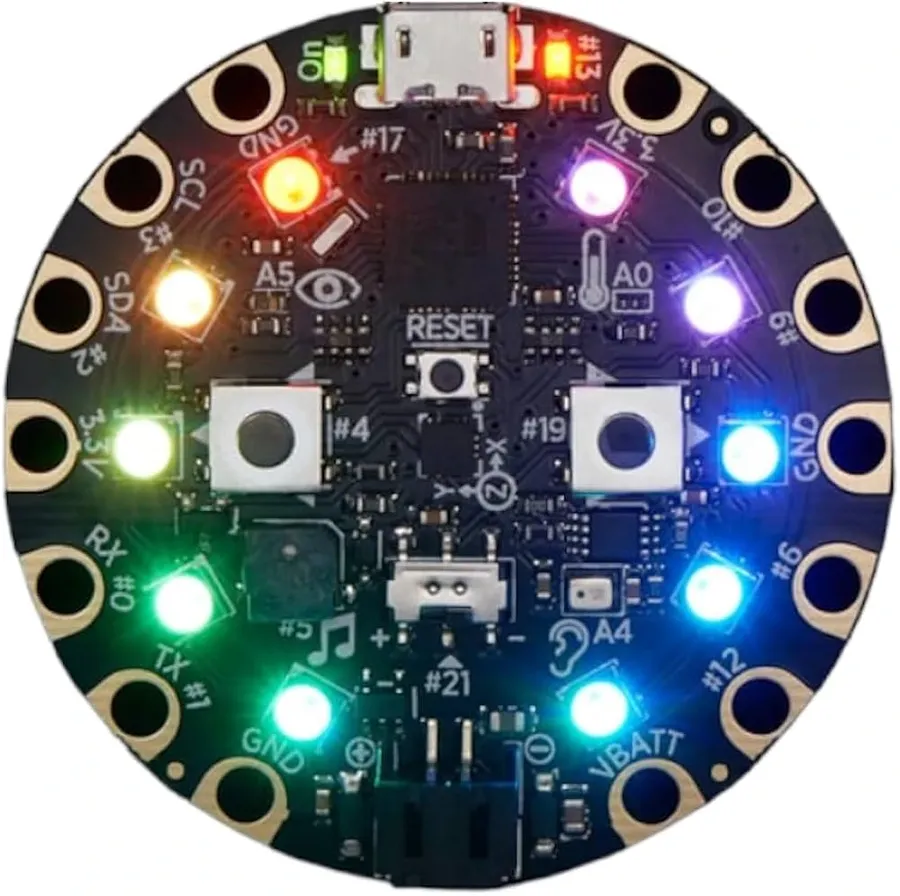
The Adafruit Circuit Playground is equipped with a diverse array of built-in sensors and features, making it an exceptional platform for interactive projects and educational explorations. These components facilitate direct interaction with the physical environment and enable the development of sophisticated applications by leveraging their combined functionalities. Understanding each component's specific function is essential for effectively integrating them into various projects.
| Component | Description | Use Cases |
|---|---|---|
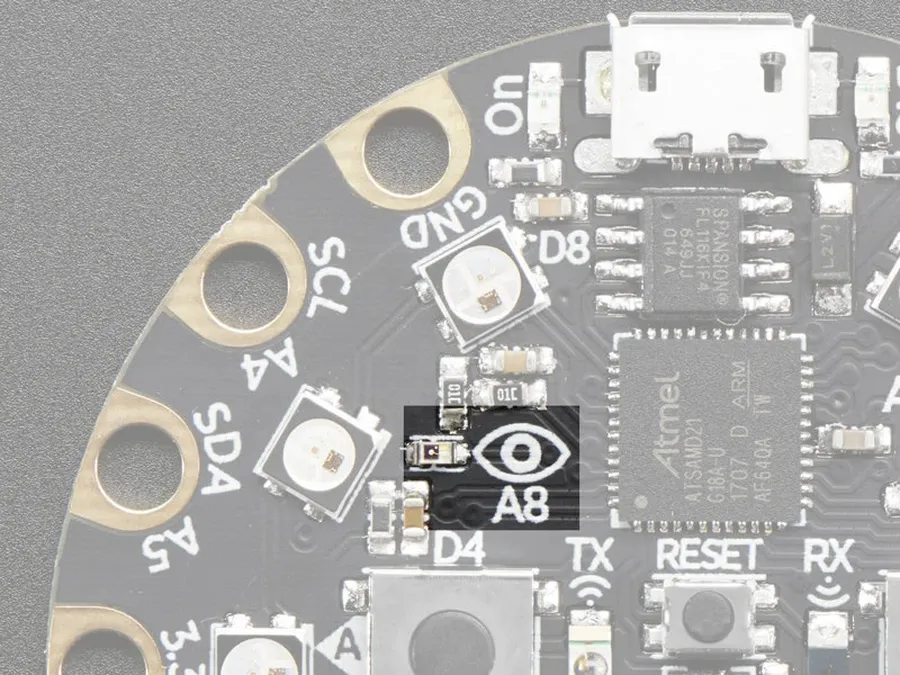
| Light Sensor | Measures the intensity of ambient light. | Creating light-sensitive projects, adjusting LED brightness based on light levels, interactive art. |
| Temperature Sensor | Measures ambient temperature. | Monitoring room temperature, creating weather stations, activating devices at specific temperatures. |
| Sound Sensor (Microphone) | Detects the presence and intensity of sound. | Clap detection, sound-activated responses, creating basic music visualizers. |
| Accelerometer | Measures acceleration and tilt in three axes. | Motion-based games, detecting movement and orientation, tracking steps, and creating gesture-based interaction. |
| 10 Neopixel LEDs | Individually addressable RGB LEDs. | Creating colorful light displays, animated patterns, visualizing sensor data through colors. |
| Two Push Buttons | Tactile push buttons for input. | Interactive games, controlling sequences, triggering actions and modes. |
| Slide Switch | Physical on/off switch. | Enabling or disabling functionalities, selecting different operational states. |
These sensors and features are not merely individual components, but rather, they are part of an integrated system. For instance, the data from the light sensor can be used to modulate the brightness of the NeoPixel LEDs, or the accelerometer can trigger different light patterns or sounds. By effectively combining these components, users can engage in creative projects that are both innovative and educational.
Programming the Adafruit Circuit Playground: MakeCode and Arduino IDE
The Adafruit Circuit Playground offers versatile programming options catering to different experience levels: MakeCode, a block-based visual programming language ideal for beginners, and the Arduino IDE, a C++ based environment that provides more control for advanced users. Choosing the appropriate environment is key to maximizing your project's potential.
| Feature | MakeCode | Arduino IDE |
|---|---|---|
| Programming Language | Block-based (JavaScript Underneath) | C++ |
| User Level | Beginner-Friendly | Intermediate to Advanced |
| Learning Curve | Low | Steeper |
| Control | Simplified high-level control | Fine-grained control over hardware |
| Project Complexity | Suited for simple to medium complexity projects | Suitable for complex projects and custom hardware interaction |
| Code View | Visual blocks or JavaScript | Text-based C++ code |
| Hardware Abstraction | Higher level abstraction | Direct hardware access |
| Community support | Extensive beginners and educational support | Vast community and advanced resources |
MakeCode's visual approach simplifies the programming process for newcomers, making it easy to grasp fundamental coding concepts. Conversely, the Arduino IDE, provides access to the board's low-level functions and is favored by experienced programmers requiring fine control and optimal resource management.
Here's how to use each environment to its fullest potential:
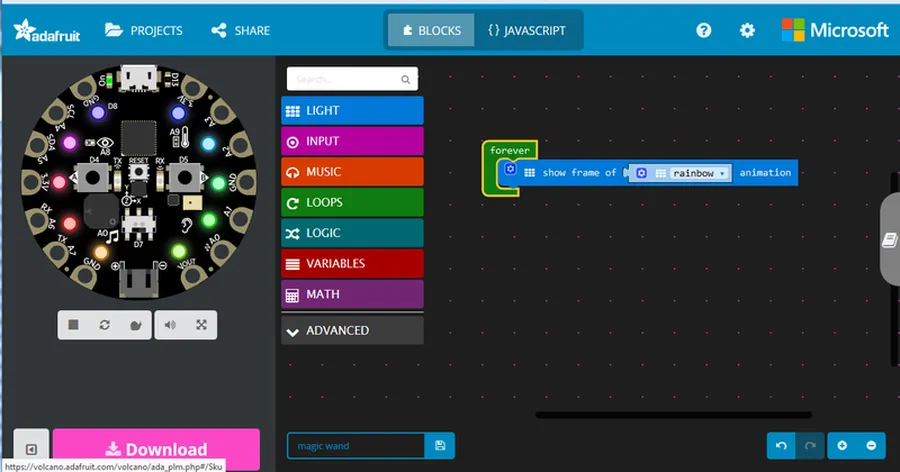
- MakeCode
Access the MakeCode editor via a web browser. The drag-and-drop interface lets you build programs using logical blocks, simplifying coding for beginners. This approach makes it easier to understand and debug your code and also helps beginners learn the fundamental principals of programming - Arduino IDE
Download and install the Arduino IDE, ensure you add the Adafruit Circuit Playground board support and the relevant libraries. The Arduino IDE requires a basic understanding of the C++ language syntax but gives access to all the peripherals on the Circuit Playground including the sensors, LEDs, buttons, etc.
Practical Project Ideas for the Adafruit Circuit Playground
The Adafruit Circuit Playground is an exceptional platform for hands-on learning, offering a diverse range of project opportunities for all skill levels. From basic introductions to complex interactions, these project ideas leverage the board's integrated sensors and features to provide both educational value and engaging experiences.
- Blinking LEDs: The Basics of Output Control
Begin with the classic blinking LED project to understand digital output control. Use either MakeCode's simple block interface or Arduino IDE's direct pin manipulation to control one or multiple of the built-in NeoPixels, creating a simple yet fundamental interaction. - Interactive Light Show: Introducing Patterns and Timing
Advance to creating more complex lighting patterns, utilizing a combination of different colored LEDs, varying timing, and looping structures. This project not only enhances coding skills but also encourages exploration of creative sequences and visual effects using the built-in NeoPixels. - Temperature-Based Color Display: Integrating Sensor Data
Use the built-in temperature sensor to control the NeoPixel colors. For example, the color of the LEDs could shift from blue to red based on temperature readings, demonstrating real-time sensor input and data visualization. This also demonstrates the concept of mapping sensor ranges to output values. - Sound-Activated Light Display: Responding to External Stimuli
Utilize the microphone sensor to detect sound levels and trigger the NeoPixels. The intensity of the lights can correspond to the level of sound, creating an interactive display that reacts to its environment. This highlights the use of analog input and reactive programming. - Motion-Controlled Interaction: Exploring Accelerometer Data
Tap into the accelerometer to control lights or other outputs. Tilting the board might change the color of LEDs, or shaking it could trigger a distinct animation. This project demonstrates the use of three-axis sensor data and event-based programming in interactive applications. - Simple Game Creation: Combining Multiple Inputs and Outputs
Combine inputs from the onboard buttons, switch, and sensors to create simple interactive games. Examples include 'Simon Says' using different LEDs and inputs, or a simple 'reaction' game, challenging timing and response. These projects integrate various features of the board into a fun activity. - Data Logging: Using the Board as a Sensor Platform
Utilize the Circuit Playground’s sensors to collect data over time and store it for analysis. The data, including temperature, light, and sound levels, can be saved and later displayed. This project uses data accumulation and time-series data concepts.
Circuit Playground Libraries and Resources
The Adafruit Circuit Playground's versatility is greatly enhanced by its extensive libraries and online resources. These resources empower users, from beginners to advanced makers, by providing pre-written code, project inspiration, and community support.
- Adafruit's Official Libraries
Adafruit provides well-documented and maintained libraries for both the Circuit Playground Express and Classic. These libraries simplify interaction with onboard sensors and peripherals, making it easier to write code for your projects. - MakeCode Resources
For users who prefer a block-based programming environment, MakeCode offers a rich set of tutorials, project examples, and documentation specific to the Circuit Playground. It’s a great starting point for beginners. - Arduino IDE Libraries
For advanced users, the Arduino IDE allows access to many libraries written for the Circuit Playground. These can be accessed using the library manager within the Arduino IDE. - Community Forums
The Adafruit community is a vibrant place to share ideas, get help, and see what other makers are building with the Circuit Playground. Forums are often the best place to find unique applications, use cases and support for advanced projects. - Project Tutorials and Guides
Numerous online tutorials and project guides are available that provide detailed, step-by-step instructions for specific Circuit Playground projects. These resources are invaluable for learning new skills and getting inspiration. Adafruit Learning System provides excellent tutorials to get started. - GitHub Repositories
Many developers share their Circuit Playground projects and library extensions on GitHub. This allows for a large open source community contribution to a wide range of project applications. Here users can find code examples and modify it for their own specific application.
Frequently Asked Questions About the Adafruit Circuit Playground
This section addresses common inquiries regarding the Adafruit Circuit Playground, providing clarity on its features, applications, and related aspects for both beginners and advanced users. These questions range from its core functionalities to more nuanced usage scenarios, offering a comprehensive understanding of the device.
- What exactly is the Adafruit Circuit Playground?
The Adafruit Circuit Playground is a microcontroller board designed for educational purposes, rapid prototyping, and creative electronic projects. It integrates various sensors, LEDs, and input/output elements into a single, user-friendly platform that makes it easier to get started with programming and electronics. - Is Adafruit a reliable company and still in operation?
Yes, Adafruit Industries is a well-established and highly reputable company in the electronics and maker community. Founded by Limor Fried ('Ladyada'), Adafruit is known for producing high-quality, open-source hardware and providing robust educational resources. They continue to operate and innovate, offering a variety of products and support for electronics enthusiasts. - Where is Adafruit based and is it a Chinese company?
Adafruit Industries is an American company headquartered in New York City. It is not a Chinese company. They design, develop, and manufacture the majority of their products in the United States, emphasizing open-source hardware and education. - What sensors are built into the Circuit Playground?
The Adafruit Circuit Playground incorporates several built-in sensors, including a light sensor, a temperature sensor, a sound sensor, and an accelerometer. It also includes a microphone for audio input. These sensors allow users to create interactive projects that respond to various environmental stimuli. - What are the primary applications of the Adafruit Circuit Playground?
The Circuit Playground is primarily used for educational purposes, teaching coding and electronics concepts to beginners. It's also ideal for prototyping interactive projects, wearables, artistic installations, and sensor-based applications. Its ease of use makes it suitable for diverse skill levels. - Is the Circuit Playground compatible with different programming environments?
Yes, the Adafruit Circuit Playground is compatible with different programming environments, primarily MakeCode and the Arduino IDE. MakeCode offers a block-based interface suitable for beginners, while Arduino IDE allows more advanced users to write code in C++. This dual compatibility offers a broad range of capabilities and flexibility. - Where can I purchase the Adafruit Circuit Playground?
You can purchase the Adafruit Circuit Playground directly from the Adafruit website (adafruit.com) or from authorized distributors like Digi-Key or Sparkfun. It’s also available on platforms such as Amazon and other online retailers that specialize in electronics and maker hardware. Buying from authorized sources ensures product authenticity and quality.
Tips and Tricks for Advanced Adafruit Circuit Playground Users
For seasoned makers and educators, the Adafruit Circuit Playground offers a wealth of opportunities to push its boundaries. This section explores advanced techniques that leverage its full potential, including the creation of custom libraries, seamless integration with other devices, and innovative expansions of its hardware capabilities. By mastering these advanced techniques, users can elevate their projects from standard applications to innovative creations.
- Custom Library Development
Developing custom libraries for specific functionalities enables code reuse and reduces development time. This involves encapsulating complex logic into reusable modules. For instance, developing a library for a complex sensor reading routine or creating a custom animation function can streamline future projects. - Inter-Device Communication
Integrating the Circuit Playground with other microcontrollers and devices can open doors to sophisticated projects. This can be accomplished through serial communication, I2C, or SPI. Consider connecting the Circuit Playground to a Raspberry Pi for data processing or to another microcontroller for distributed sensing and control. You can create sensor networks or even automate complex processes. - Expanding Hardware Capabilities
Extending the capabilities of the Circuit Playground using external components allows for projects beyond the board's native sensors and features. Connect external sensors, actuators, or displays to broaden the range of possibilities. For example, adding an OLED display for more detailed readouts or using external potentiometers for greater control. - Advanced Power Management
Optimizing the power consumption of your Circuit Playground projects is crucial for long-lasting applications. This involves understanding the power requirements of different components and using low-power modes. Optimize your code for low current operation by putting your Circuit Playground to sleep when not actively needed. This enhances the battery life when running on portable power solutions. - CircuitPython for Advanced Features
CircuitPython unlocks advanced capabilities including direct file access, dynamic loading of modules, and native support for more peripherals. This can allow a more dynamic approach to project development by loading code or data from the file system on the device and using more complex device drivers.
The Adafruit Circuit Playground is an extraordinary device that democratizes electronics and programming, enabling anyone from curious novices to seasoned makers to explore the boundless possibilities of technology. Whether you're embarking on your first coding adventure or looking to add a versatile tool to your project arsenal, the Circuit Playground offers endless potential for creation and discovery. The Adafruit Circuit Playground is an excellent platform to understand the underlying concepts of digital electronics and programming, thus providing foundational knowledge in STEM for all ages.