Unlock Innovation: Finding Zero PCB Price & Perfect Boards for Your Projects
In the world of electronics, PCBs are the unsung heroes that bring our ideas to life. From simple circuits to complex systems, the right PCB is crucial. But what about the cost? This article dives deep into the realm of zero PCB price options, exploring the world of general-purpose and prototype boards, helping you find the perfect fit for your project without breaking the bank. Whether you're a hobbyist or a seasoned pro, understanding PCB options and their pricing is key to innovation.
Understanding Zero PCBs: What are They?
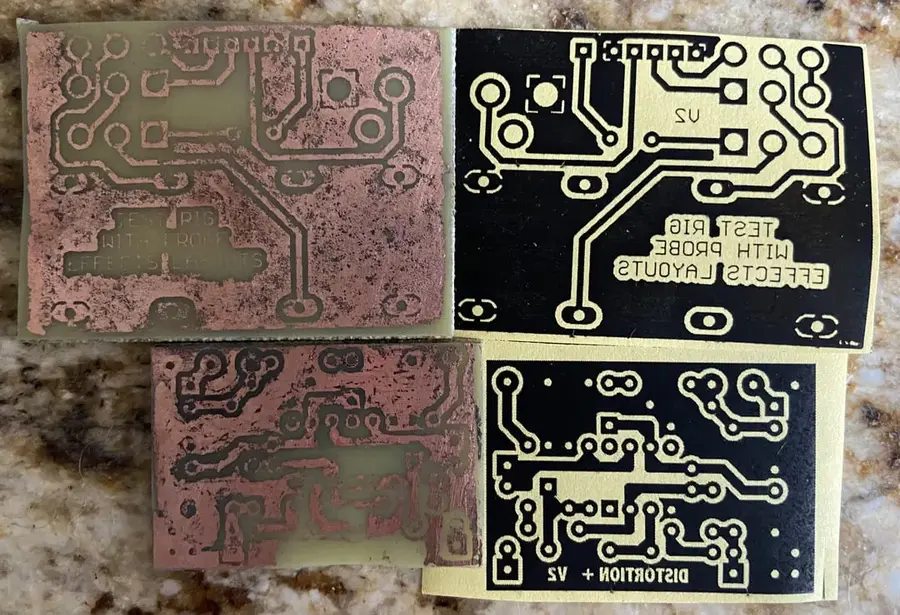
Zero PCBs, also known as general-purpose PCBs or perf boards, are foundational tools in electronics prototyping and experimentation. Unlike custom-designed PCBs, they feature a grid of pre-drilled holes, enabling the flexible assembly of electronic components for temporary or semi-permanent circuits. These boards are essential for quickly testing and verifying designs before committing to the expense and time of fabricating a custom PCB.
At their core, zero PCBs facilitate experimentation without the need for complex layout software or etching processes. They offer a readily available platform that allows engineers, hobbyists, and students to rapidly prototype circuits by soldering components onto a grid-like array of pads. This method dramatically accelerates the design cycle and is exceptionally useful for educational purposes, allowing for hands-on learning. The term 'zero' in zero PCB refers to the absence of predefined circuit tracks, giving users maximum freedom in circuit construction.
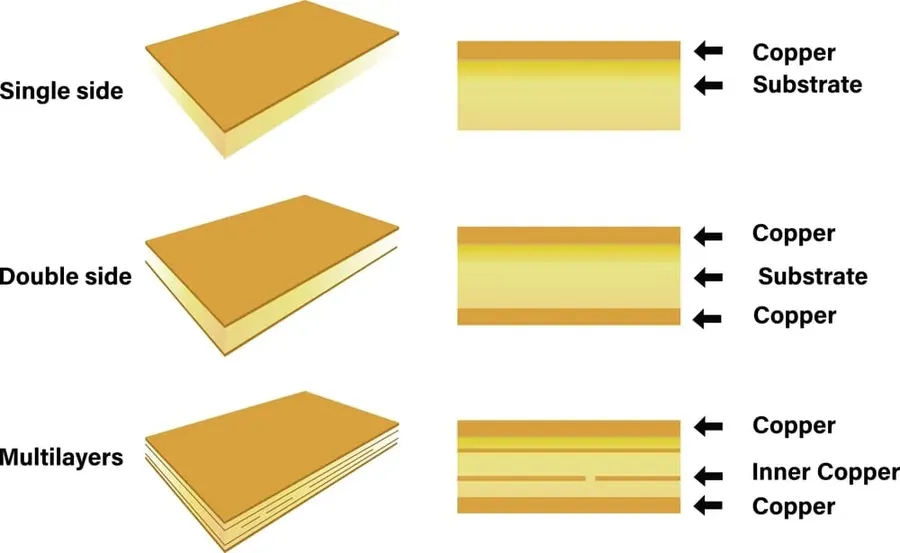
Types of Zero PCBs: Single-Sided vs. Double-Sided
Zero PCBs, also known as perf boards or prototyping boards, come in two primary configurations: single-sided and double-sided. The choice between these types significantly impacts the complexity and versatility of the electronic circuits you can prototype. Understanding their differences is crucial for effective project planning and cost management.
| Feature | Single-Sided Zero PCB | Double-Sided Zero PCB |
|---|---|---|
| Traces/Copper Layers | One layer of copper on one side | Two layers of copper on both sides |
| Complexity | Suitable for simpler circuits | Supports more complex circuits and higher component density |
| Cost | Generally less expensive | Slightly more expensive due to increased complexity |
| Routing | Limited routing options; connections mostly made on the component side or with jumpers | Offers more flexible routing; enables connections on both sides and through vias |
| Component Density | Lower component density | Higher component density due to connections on both sides and vias. |
| Ease of Use | Simpler to work with for basic projects | May require more advanced soldering and planning due to dual layer connections |
| Best for | Basic prototyping, low density circuits, educational purposes. | More complex circuits, higher density applications, and designs that require flexibility |
Single-sided zero PCBs are ideal for beginners and simple projects where space is not a premium. They typically have a grid of holes, often 0.1 inch spacing, with a copper pad or ring around each hole on one side, allowing for easy component placement and soldering. Double-sided zero PCBs feature copper pads on both sides of the board, which are often connected by vias (small plated through-holes), increasing the complexity of the design. This provides greater flexibility in circuit design and component placement, enabling more complex projects. However, working with double-sided boards requires careful planning and precision soldering.
Key Factors Affecting Zero PCB Price
The price of zero PCBs, often sought for their low-cost prototyping advantages, is influenced by several key factors. Understanding these factors is critical for optimizing costs while meeting project requirements. The primary determinants include the base material, board dimensions, thickness, and order quantity. Each of these elements interacts to define the final cost of a zero PCB.
| Factor | Description | Impact on Price |
|---|---|---|
| Material | Typically FR-4 (Fiberglass) or Phenolic. FR-4 is more durable and heat-resistant. | FR-4 generally more expensive than phenolic. |
| Size (Dimensions) | Refers to the length and width of the board. | Larger boards require more material and are thus costlier. |
| Board Thickness | Standard thicknesses range from 0.8mm to 1.6mm. | Thicker boards are more rigid but use more material, increasing cost. |
| Quantity | Total number of PCBs in an order. | Unit price decreases significantly with larger quantities. |
Where to Buy Zero PCBs: Online Retailers and Suppliers
Securing zero PCBs for your electronics projects often involves navigating various online retailers and suppliers. Selecting a reliable source is crucial not only for cost-effectiveness, but also for ensuring consistent quality. This section aims to provide guidance in choosing the best supplier for your zero PCB needs.
- Online Retailers
Major online retailers such as Amazon, eBay, and AliExpress offer a wide variety of zero PCBs at competitive prices. These platforms are often a good choice for smaller quantities and readily available standard sizes. However, the quality can vary significantly between suppliers, so it is critical to check seller reviews and product ratings thoroughly before making a purchase. Focus on sellers with high positive feedback and avoid those with numerous complaints about quality or delivery issues. - Specialized Electronics Suppliers
For more specialized needs, consider suppliers dedicated to electronics components like Adafruit, SparkFun, and Digi-Key. These suppliers tend to offer a more curated selection of zero PCBs, often with more rigorous quality control, as well as a larger range of sizes, thicknesses and board materials, which can lead to a superior product in terms of consistency. While their prices may be slightly higher, the assurance of quality is often worth the additional investment, especially for more sensitive projects or larger productions. These suppliers frequently provide datasheets and technical specifications that can be invaluable when choosing the right board. - Direct Manufacturers
For large orders, or if very specific custom board requirements are needed, reaching out to PCB manufacturers directly might be the best option. Companies like JLCPCB, PCBWay, or AllPCB offer both prototyping and mass manufacturing services. This route may be more economical for very high-quantity orders and allows for greater control over material, size, and thickness specifications. You would usually require to submit detailed manufacturing files such as Gerber files and other required design documents. - Tips for Comparing Prices and Quality
Before finalizing a purchase, compare prices from multiple suppliers. Be sure to factor in shipping costs, as these can significantly impact the final price. Also, examine the board specifications such as material (e.g., FR4), thickness, single or double sided and the dimensions. Look for suppliers offering detailed product information, datasheets, or any supporting technical documentation. For smaller and quicker projects, general online retailers might be sufficient, but for critical projects or larger production runs, consider using specialized electronics suppliers or direct manufacturers that can assure consistency and quality.
DIY PCB vs. Zero PCBs: Which is Right for You?
The choice between fabricating your own Printed Circuit Boards (PCBs) at home and utilizing pre-made zero PCBs hinges on a variety of factors, primarily cost, time investment, required skill level, and the complexity of your project. While DIY PCB fabrication can offer customization, it often demands a higher initial investment and a significant time commitment, whereas zero PCBs offer a quick, low-cost solution for prototyping and simple circuit development.
| Feature | DIY PCB Fabrication | Zero PCBs |
|---|---|---|
| Cost | Higher initial costs for materials and equipment (etching chemicals, UV exposure unit, etc.); variable per board cost. | Lower cost per board, readily available at a standard low price. |
| Time | Significant time commitment for design, etching, drilling, and preparation. | Ready to use instantly, no fabrication time involved. |
| Effort & Skill | Requires advanced skills in circuit design, chemical handling, and fabrication techniques. | Beginner-friendly, no complex fabrication skills needed. |
| Complexity | Suitable for both simple and complex circuits, offering high customization. | Ideal for prototyping and basic circuits, limited by fixed grid structure. |
| Customization | High level of customization in terms of board layout, trace width, and other specifications. | Limited to the fixed grid pattern. Customization limited to component placement. |
| Equipment | Requires specialized equipment such as etching tanks, UV exposure units, and drilling tools. | Requires no specialized equipment |
| Turnaround Time | Can range from hours to days depending on skill and complexity. | Immediately available, no lead time. |
For simple circuits, initial prototyping, or educational purposes where a fast and low-cost option is crucial, zero PCBs represent a practical and efficient approach. However, for projects requiring intricate layouts, specific performance characteristics, or mass production, DIY PCB fabrication or professional PCB manufacturing may be more appropriate.
Frequently Asked Questions About Zero PCBs and Their Costs
This section addresses common inquiries regarding zero PCBs, elucidating their distinctions from standard PCBs, typical applications, cost considerations, and optimal selection criteria for specific projects. We aim to provide clear and concise answers to guide your understanding and decision-making process when considering a zero PCB.
- How do zero PCBs differ from standard PCBs?
Zero PCBs, also known as perf boards or proto boards, lack pre-defined circuit traces and are designed for prototyping and experimentation, offering a grid of holes for component insertion and soldering. In contrast, standard PCBs have etched conductive pathways, specific to a circuit’s design, providing a more robust and less error-prone permanent solution. Zero PCBs emphasize flexibility; standard PCBs offer tailored precision. - What are the ideal applications for zero PCBs?
Zero PCBs are best suited for initial circuit prototyping, experimenting with new designs, and creating low-volume, non-critical circuit applications. Their flexibility and ease of modification make them ideal for learning electronics, testing circuit ideas, and implementing hobby projects. They are not recommended for high-volume, commercial production where reliability and durability are paramount. - What cost should I expect when buying zero PCBs?
The cost of zero PCBs is generally low, ranging from a few cents to a few dollars per board, depending on material, size, thickness, and purchasing quantity. The price of a single, small zero PCB can be extremely low, often negligible in small-scale projects. However, variations exist across retailers. Consider bulk purchasing for lower per-unit costs and factor in shipping when sourcing from online suppliers. - How do I select the right zero PCB for my project?
Selection should primarily be guided by the project's circuit complexity and physical dimensions. Single-sided boards may be sufficient for simpler projects. Double-sided boards are advantageous for more intricate circuits that require more interconnection capability. Consider the board's physical size, ensuring that it has sufficient area for your components and layout. Additionally, consider the hole spacing, with the standard 0.1 inch pitch suiting most through-hole components. - How much does 1 PCB cost?
The cost for a single standard custom PCB is not typically applicable to a zero PCB, as zero PCBs are purchased as standard, generic boards. However, a custom single standard PCB will depend heavily on complexity, layer count, quantity, material and manufacturing process, and could range from a few dollars to hundreds for a complex multi-layer design. - How much does a standard PCB cost?
The cost of a standard PCB varies greatly depending on a multitude of factors: these include board size, layer count (single, double, or multi-layer), material (such as FR-4, aluminum, etc.), the complexity of the design (trace width, via density), order quantity, and the manufacturer. Simple PCBs with low order volumes may cost a few dollars each, while complex, multi-layer designs in small quantities could cost significantly more, easily exceeding $100 per board in small quantities. - How much *should* a PCB cost?
The “correct” cost for a standard PCB is a balance between your project requirements and budget constraints. For prototyping or hobby work, zero PCBs are a cost effective solution. When estimating, obtaining multiple quotes from different PCB manufacturers is always a best practice. The project requirements are the foundation for this decision and the cost is a consequence. You should assess if the functional requirements necessitate a custom PCB or if a zero PCB will suffice.
Practical Tips for Using Zero PCBs
Effectively utilizing zero PCBs requires a methodical approach, focusing on component placement, soldering techniques, and diligent troubleshooting to ensure optimal performance and maintain a low overall project cost. These practices will ultimately maximize the value derived from using zero PCBs.
- Planning Component Placement
Before soldering, sketch out your circuit layout on the PCB. This prevents overcrowding and ensures the best trace routing for signal integrity and efficient use of space. - Component Preparation
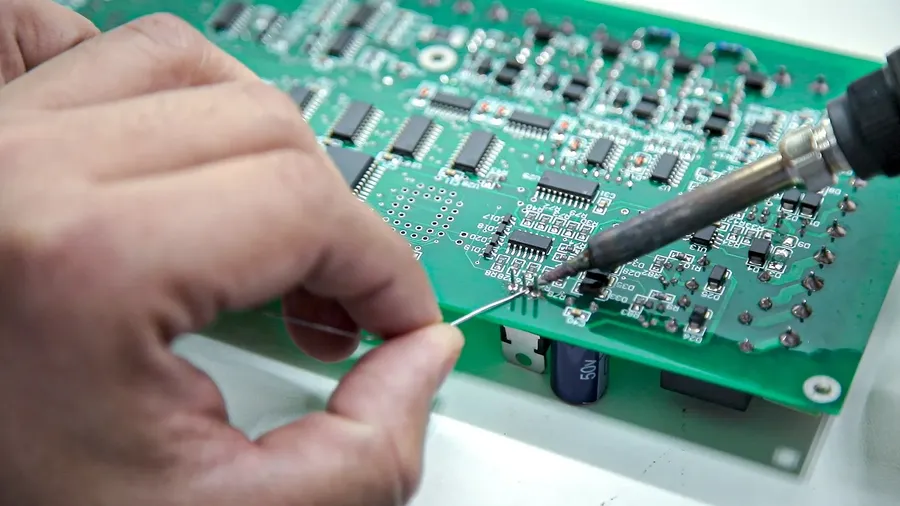
Clean the component leads, making sure they are free of corrosion or residue. Pre-tin the leads with a thin layer of solder to facilitate easy connection during soldering. This minimizes the risk of cold solder joints. - Soldering Techniques
Use a fine-tipped soldering iron and apply heat to both the component lead and the pad on the PCB simultaneously. Apply solder to the heated area, allowing it to flow evenly. Avoid excessive solder, which can create shorts or blobs. - Managing Heat
Be careful not to overheat components. Prolonged heat exposure can cause damage. Use a temperature-controlled soldering station and work in short intervals, allowing the components to cool down if necessary. - Wire Management
Use solid-core wire for durable connections and ensure they are properly insulated to prevent short circuits. Neatly organize your wires to avoid tangles and ensure easy access to components for testing and troubleshooting. - Testing and Troubleshooting
After soldering, meticulously test every connection using a multimeter to verify continuity. If a component fails to work as expected, verify the connection point and check its data sheet to ensure that the design is correct. - Document Your Work
Keep a detailed record of the component placement and wiring during assembly so that troubleshooting and maintenance will be easier for the long term. Consider using schematics or circuit diagrams.
Zero PCB Board Sizes: Choosing the Right Fit

Selecting the appropriate size of a zero PCB is crucial for project success, balancing the need for sufficient space to accommodate components with considerations for cost and availability. The 'right fit' is not a one-size-fits-all answer and depends significantly on the complexity and scale of the project at hand.
- Project Complexity
For simple circuits with few components, a smaller zero PCB will suffice. Complex projects with numerous components or integrated circuits will necessitate larger boards. - Component Density
Consider the physical size and spacing requirements of your components. SMD (Surface Mount Devices) may allow for more compact designs than through-hole components, influencing board size needs. - Enclosure Size
If the project will be enclosed, the PCB needs to fit comfortably within the intended housing, thus the enclosure’s size will influence the board's dimensions. - Availability
Common zero PCB sizes are widely available and tend to be more cost effective. Unique or less common sizes may be less readily available, more expensive and could increase lead times. - Cost Considerations
Larger PCBs generally cost more due to increased material usage. Choose the smallest size that adequately meets your project's requirements to minimize costs, without compromising functionality.
| Board Size | Typical Applications | Pros | Cons |
|---|---|---|---|
| Small (e.g., 5x5 cm) | Simple circuits, small sensors | Low cost, compact, ideal for simple projects | Limited space for complex circuits, less flexibility |
| Medium (e.g., 10x10 cm) | Intermediate projects, Arduino shields | Good balance of space and cost, good for prototyping | May be restrictive for large and complex projects |
| Large (e.g., 15x20 cm) | Complex circuits, multiple subsystems | Ample space, good for complex prototypes | Higher cost, less portable |
Finding the right zero PCB price for your electronic projects doesn't have to be daunting. By understanding the different types, factors affecting prices, and where to buy, you can save money and achieve your prototyping goals effectively. Whether you are a student, hobbyist or professional, making informed choices about your PCB selections is key to unlocking innovation and staying within budget. Keep exploring new technologies and ways to enhance your projects with the most affordable zero pcb price!