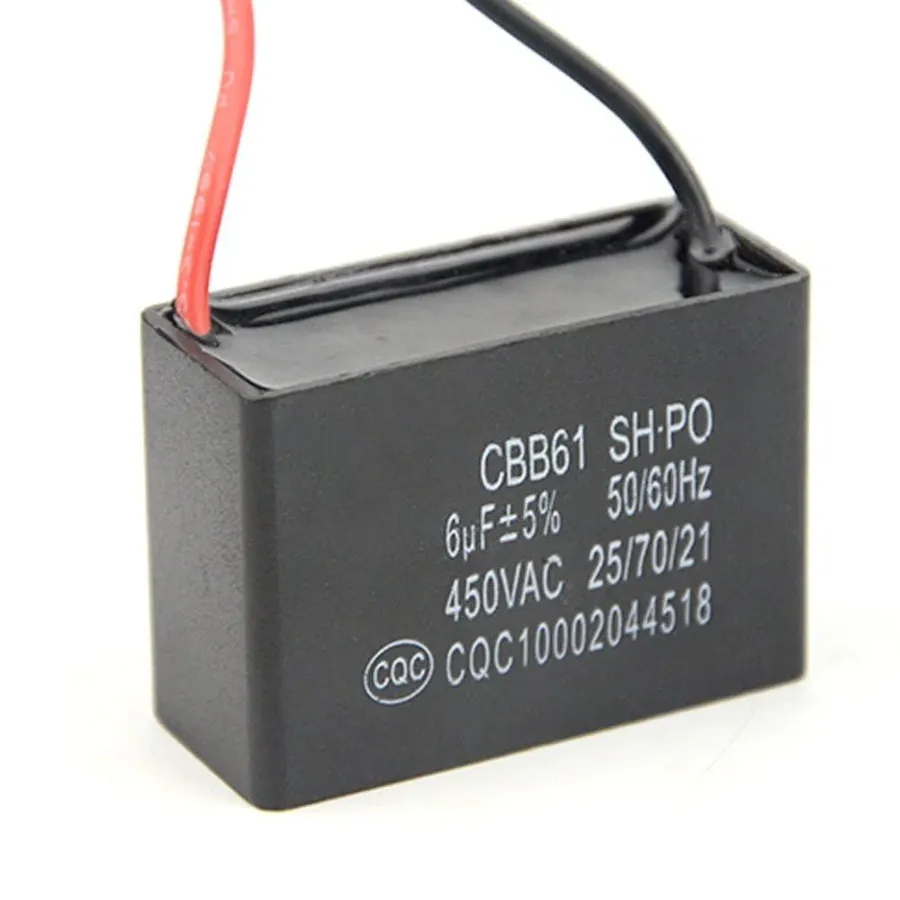
CBB61 Capacitor: Understanding, Troubleshooting, and Replacement Guide
2025.01.22
Have you ever wondered how your ceiling fan manages to hum along reliably day after day? Often, the unsung hero behind smooth, consistent operation is the CBB61 capacitor, a small but vital component that regulates motor function. In this article, we'll explore what a CBB61 capacitor is, its crucial role, how to identify problems, and provide a comprehensive replacement guide to keep your appliances running smoothly. We will delve into the science and practicality of this component, bridging the gap between technical understanding and everyday appliance maintenance.
What is a CBB61 Capacitor?
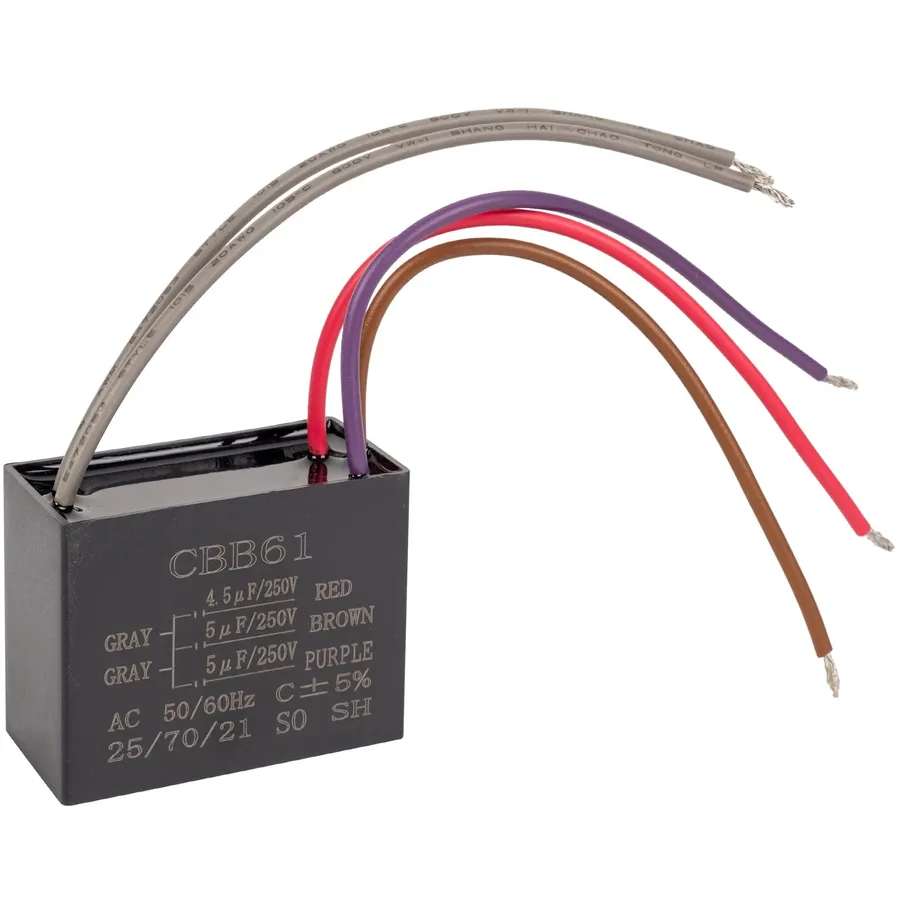
CBB61 Capacitor
A CBB61 capacitor is a crucial component, primarily functioning as a motor run capacitor within single-phase AC motors. Its core purpose lies in generating the necessary phase shift in the alternating current, which is vital for initiating and sustaining the rotation of the motor.
Common Applications of CBB61 Capacitors
Ceiling Fan Capacitor
CBB61 capacitors are primarily used as motor run capacitors, providing the necessary phase shift for single-phase AC motors to start and operate efficiently. Their specific electrical characteristics make them well-suited for a variety of applications beyond just ceiling fans.
Ceiling Fans The most prevalent application for CBB61 capacitors is in ceiling fans. They are crucial for creating the rotating magnetic field that allows the fan motor to start and maintain its speed. Different fan speeds often employ capacitors with varying capacitance values.
Air Conditioners CBB61 capacitors are also found in air conditioning units, powering the fan motors within the units. The capacitor provides the required phase shift to start and run the fan efficiently. They may be employed in both the indoor and outdoor units.
Small Appliance Motors Various small appliances that utilize single-phase AC motors, such as exhaust fans, range hoods, and some types of pumps, can use CBB61 capacitors. The specific capacitance and voltage ratings will be chosen based on the specific motor requirements and are critical for reliable operation.
Other Motorized Equipment Beyond common household appliances, CBB61 capacitors may appear in other specialized single-phase motor applications, like in some industrial equipment or in laboratory devices, where reliable and precise motor operation is needed. They are not as common as CBB60 for pumps but can be found.
The use of CBB61 capacitors is due to their electrical properties: low equivalent series resistance (ESR), high insulation resistance, low temperature dependence, and compact design. Their ability to withstand the typical voltage spikes associated with motor starts and stops is crucial in these applications.
CBB61 Capacitor Specifications: What to Look For
Selecting the correct CBB61 capacitor requires a thorough understanding of its specifications. These specifications directly influence the capacitor's performance and compatibility within the intended application, primarily single-phase AC motor circuits. Key parameters include capacitance, voltage rating, and tolerance, each playing a critical role in ensuring optimal motor operation.
Specification
Description
Importance
Capacitance (µF)
Measured in microfarads (µF), it indicates the capacitor's ability to store an electrical charge.
Critical for providing the necessary phase shift to start and run the motor. Incorrect capacitance will lead to poor performance or failure.
Voltage Rating (VAC)
The maximum AC voltage the capacitor can safely handle. Expressed in Volts AC (VAC).
The capacitor must have a voltage rating equal to or greater than the supply voltage of the motor circuit to prevent capacitor failure. Using a lower voltage capacitor will cause premature failure.
Tolerance (%)
The allowed deviation from the stated capacitance value, expressed as a percentage.
Indicates the acceptable range of capacitance that is critical for reliable motor performance. For precision applications, a lower tolerance is preferred, typically around 5% is common.
Physical Size
The physical dimensions of the capacitor, including length, width, and thickness or diameter.
Critical for fitting the capacitor within the space available in the equipment. Ensure the capacitor physically fits in place before purchasing a replacement.
Terminal Type
The type of electrical connection, e.g. wires, quick-connect tabs, or screw terminals.
Match the terminal type with your application to ensure proper and safe wiring.
Operating Temperature
The range of ambient temperatures at which the capacitor can operate safely and reliably.
Ensure that this temperature matches the operational environment for optimal performance and longevity.
Identifying a Faulty CBB61 Capacitor
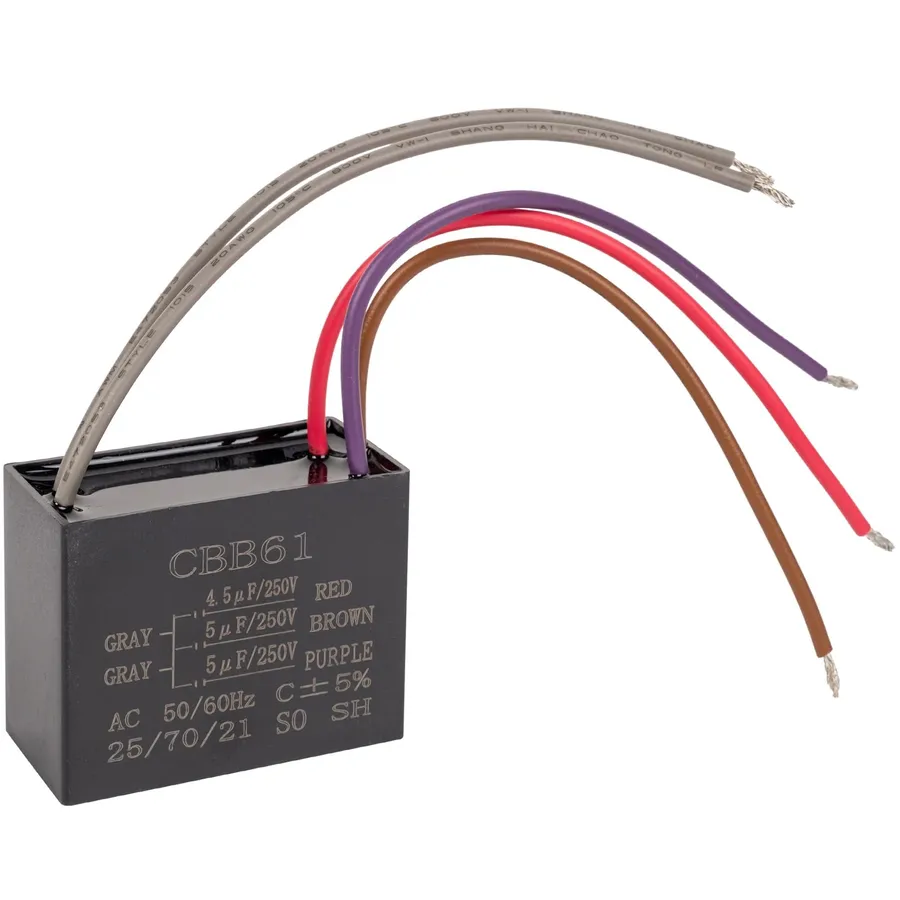
Faulty Capacitor
A failing CBB61 capacitor often manifests in noticeable performance issues with the motor it serves, primarily in ceiling fans. Recognizing these symptoms early can prevent further damage and ensure timely replacement. The core function of the CBB61 capacitor is to provide the necessary phase shift for the motor to start and run efficiently; when this capacitor degrades, these critical functions are compromised.
Here are common signs and troubleshooting steps to identify a faulty CBB61 capacitor:
Slow Fan Speed: One of the most common indicators of a failing CBB61 capacitor is a noticeable reduction in the speed of a ceiling fan. If the fan spins slower than usual, especially on the highest speed setting, it might be due to a degrading capacitor's inability to provide the necessary power.
Fan Humming or Buzzing: A humming or buzzing noise coming from the fan motor when it attempts to start or run is another symptom. This noise is usually due to the motor struggling to overcome the insufficient phase shift caused by the capacitor.
Failure to Start: If the fan motor fails to start at all and simply hums or remains completely unresponsive, it's a strong indication of a faulty capacitor. The capacitor may have failed completely, causing the motor's start windings to be ineffective.
Intermittent Operation: Sometimes, a failing CBB61 capacitor can cause the fan to work intermittently. It may run properly for a while, but then slow down, stop, or fail to start again without any change in setting or power.
Overheating of Motor: In some cases, a failing capacitor can cause the motor to overheat as it struggles to run. If the fan motor feels unusually hot to the touch, this could be a sign of a capacitor problem. Continuous operation under such conditions can further damage the motor.
Troubleshooting Steps: If any of these symptoms are observed, further testing of the capacitor should be done using a multimeter. Before starting any tests, remember to disconnect the power supply. Check if any wiring or connection is lose. After confirming that a faulty capacitor is the problem, replace the capacitor with the correct specifications.
Testing a CBB61 Capacitor: A Step-by-Step Guide
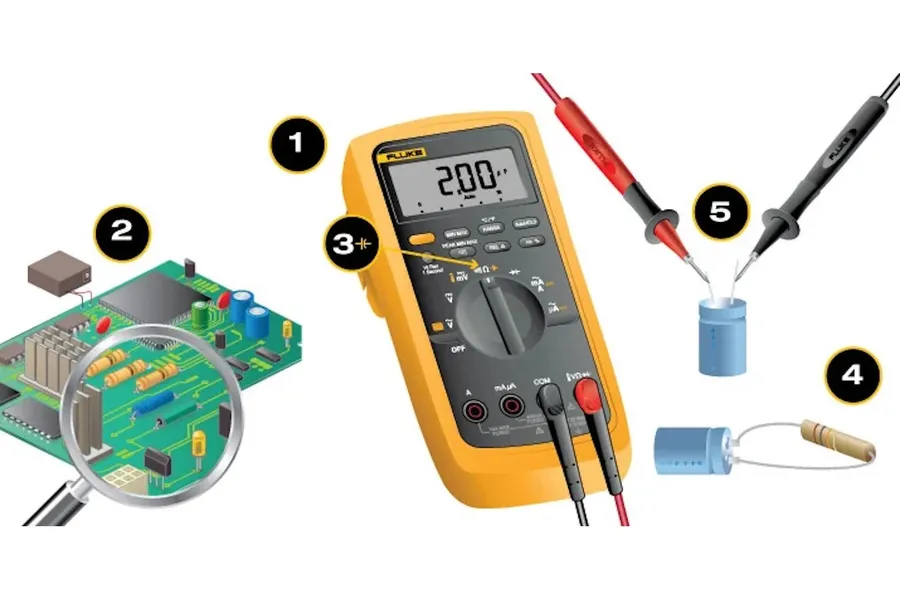
Capacitor Testing
Accurately testing a CBB61 capacitor is crucial for diagnosing motor issues in devices like ceiling fans. This procedure involves safely discharging the capacitor and using a multimeter to measure its capacitance, which should fall within the specified tolerance of its rating. Correct diagnosis ensures proper replacement, saving time and preventing further damage.
Before testing, always disconnect the power and discharge the capacitor to prevent electrical shock. Capacitors store electrical energy and can hold a dangerous charge even after the device is powered off. This step-by-step guide ensures you can safely and accurately test a CBB61 capacitor.
Safety First: Discharge the Capacitor Before handling the capacitor, ensure the device is disconnected from the power source. Use an insulated screwdriver or a resistor to short the capacitor terminals. This process dissipates any stored charge, minimizing the risk of electrical shock. Short the terminals for a few seconds.
Gather Your Tools You'll need a digital multimeter capable of measuring capacitance (in microfarads, or μF). Ensure that the multimeter is in good working order and that the battery is not low. Having the correct test leads and appropriate safety glasses.
Set the Multimeter Turn on your multimeter and select the capacitance measurement setting. The symbol for capacitance is usually marked as 'F' or 'μF' with a capacitor symbol. If your meter has range options, start with a range higher than the capacitor's rating (e.g., 20μF range for a 10μF capacitor) to avoid overloading the meter and get an accurate reading.
Connect the Multimeter Leads Carefully connect the multimeter test leads to the capacitor terminals. If the capacitor has multiple terminals, ensure that you are connecting across the two terminals that are used to deliver power. There is not polarity with CBB61 capacitors. Note that it does not matter which lead is connected to which terminal.
Read the Capacitance Observe the reading on the multimeter. Compare the measured capacitance value with the rated value printed on the capacitor. The measured value should be within the tolerance range specified on the capacitor (+/- 5% or 10% are common). A significantly lower reading indicates degradation or failure of the capacitor.
Interpret the Results A capacitor reading significantly below the rated capacitance suggests the capacitor is faulty and needs replacement. For example, a 2.5μF capacitor reading 1.5μF indicates a fault. A reading within the rated tolerance indicates the capacitor is functional but may still cause problems if it's at the extreme of its tolerance range. A reading of zero or infinity implies a failed capacitor which will need replacement.
Replacing a CBB61 Capacitor: Safety First
Replacing a CBB61 capacitor, while a straightforward task, demands strict adherence to safety protocols to prevent electrical shock and potential damage. Prioritizing safety ensures the well-being of the individual performing the replacement and the integrity of the equipment.
Disconnecting Power Prior to any work on electrical components, the power source must be completely disconnected. This involves switching off the circuit breaker or removing the fuse that supplies power to the appliance containing the CBB61 capacitor. Always verify the power is off using a non-contact voltage tester, touching each wire connection to confirm there is no current flow. Do not rely solely on the switch position.
Discharging the Capacitor CBB61 capacitors can store a potentially dangerous electrical charge even after the power is disconnected. Before handling, the capacitor needs to be safely discharged. Use a 100-ohm, 2-watt resistor with insulated leads to slowly discharge the capacitor. Connect one end of the resistor to one terminal of the capacitor and the other end to the other terminal. Allow at least 1 minute for the capacitor to discharge, double-checking with a multimeter that the voltage is below 5V before handling.
Personal Protective Equipment (PPE) When handling electrical components, use non-conductive gloves to insulate your hands from accidental contact with charged components. Wearing safety glasses or goggles protects the eyes from any flying debris or sparks during handling or accidental shorts.
Required Tools and Materials Gather all necessary tools and materials before beginning the replacement. This may include: A new CBB61 capacitor with identical specifications (capacitance, voltage rating, and dimensions), a suitable screwdriver (Phillips or flathead, depending on the screws used in the appliance), wire strippers, wire connectors (such as wire nuts or crimp connectors), non-contact voltage tester, 100-ohm 2-watt resistor with insulated leads, and a multimeter. Having all these items at hand reduces the risk of accidental shorts and ensures a smooth replacement process.
Step-by-Step Guide: Replacing a CBB61 Capacitor
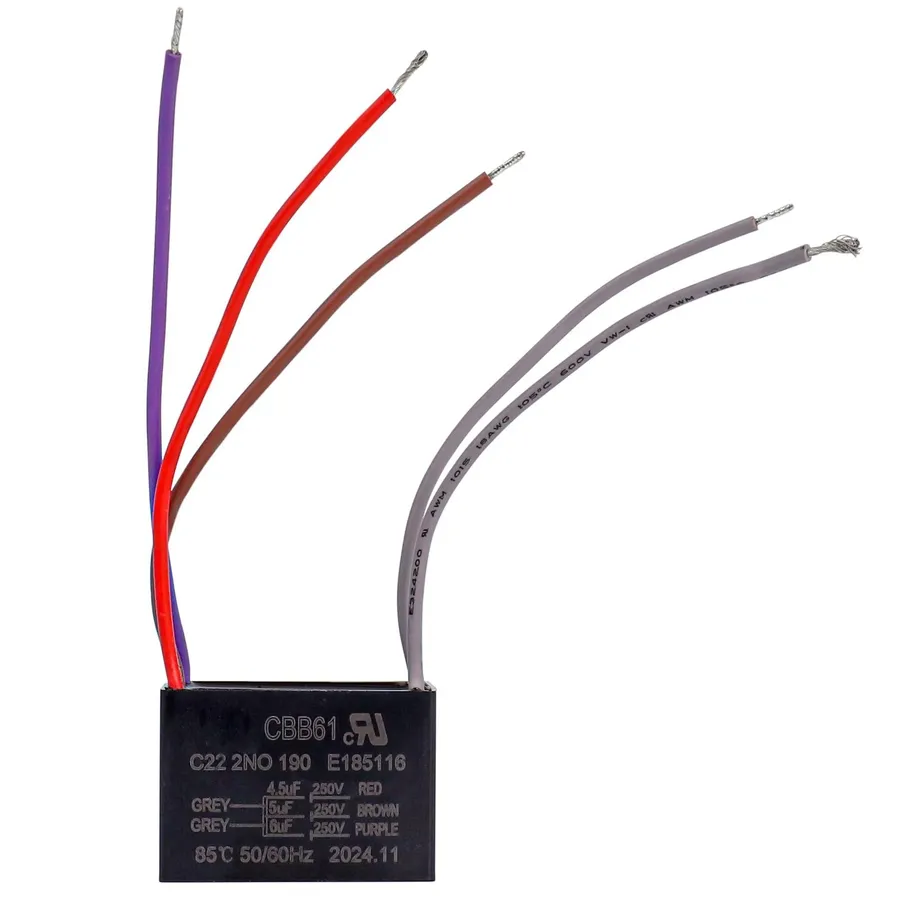
Replacing Capacitor
Replacing a CBB61 capacitor, while seemingly straightforward, requires careful execution to ensure proper functionality and safety. This step-by-step guide provides a detailed process for a successful replacement, emphasizing matching wire connections and securely mounting the new capacitor.
Safety Preparation Before beginning, ensure the power to the appliance (e.g., ceiling fan) is completely disconnected. This may involve switching off the circuit breaker or removing the fuse. Verify power is off with a non-contact voltage tester before proceeding. Discharge the old capacitor using a 100-200 ohm resistor rated for 2W or higher across its terminals. This step is critical for avoiding electrical shock.
Accessing the Capacitor Carefully remove the cover or housing of the electrical component to expose the capacitor. Depending on the device, you might need a screwdriver or other basic tools. Take photos before disconnecting anything to help in reassembling.
Disconnecting the Old Capacitor Note the position and color of each wire connected to the old capacitor. If the capacitor is wired via screw terminals, loosen the screws and detach the wires. If connected using quick connectors, note the positions, then carefully disconnect each wire from the capacitor. If wires are soldered, they will have to be desoldered with a soldering iron, taking care to avoid burns.
Preparing the New Capacitor Ensure the new capacitor matches the old one in terms of capacitance (µF) and voltage rating (VAC). Inspect the capacitor for any physical defects. If wires on the new capacitor do not match the previous connection method, you can add quick connect clips using appropriately sized connectors and a crimping tool, or solder using a soldering iron. Use heat shrink tubing over exposed metal on soldered connections for insulation.
Connecting the New Capacitor Attach the wires to the new capacitor, matching the positions of the wires from the old capacitor. Ensure connections are secure and wires are free from damage. If screw terminals are used, tighten them firmly, but do not over tighten them. If using quick connectors, snap each connector onto the appropriate capacitor terminal. If soldering, solder each wire in the correct location and use heat shrink to insulate.
Mounting the New Capacitor Secure the new capacitor in its original location or mounting bracket. Ensure it is stable and will not move or vibrate during operation. If needed, use tape or tie wraps to ensure proper mounting.
Reassembly and Testing Carefully reassemble the cover or housing of the electrical component. Turn the power on at the circuit breaker. Test the device (e.g. ceiling fan) to verify it operates smoothly and at its proper speed. If there are problems, recheck all connections and consult a qualified technician.
CBB61 vs CBB60 Capacitors: Understanding the Differences
While both CBB61 and CBB60 capacitors are AC motor run capacitors, their design and typical applications differ significantly. Understanding these differences is crucial for selecting the correct capacitor for a specific application. CBB61 capacitors are primarily designed for lower-torque applications like ceiling fans, whereas CBB60 capacitors are built for higher-torque applications such as pumps, compressors, and other similar motor-driven equipment.
Feature
CBB61 Capacitor
CBB60 Capacitor
Primary Application
Low-torque motors (e.g., ceiling fans, some small appliances)
Usually lower, typically from 1µF to 10µF, but some specific models might reach 20µF
Usually higher, typically from 4µF to 100µF
Voltage Rating
Commonly rated at 250VAC, 300VAC, 350VAC, or 450VAC, in line with requirements for home appliance motors.
Commonly rated at 250VAC, 300VAC, 450VAC or higher. Ratings often aligned with industrial motors.
Internal Construction
Film capacitor, usually with a specific winding style for low torque operation
Film capacitor, may incorporate heavier duty construction and designs to withstand higher start/run currents.
Physical Size
Generally smaller and lighter, design is for compact integration into smaller fan housings.
Generally larger and more robust, designed to fit into motor enclosures or to be mounted in industrial equipment.
Starting Torque
Designed to provide moderate starting torque for typical fan loads.
Designed for a higher starting torque for more demanding loads.
Interchangeability
Generally not a direct replacement for CBB60 due to differences in current and torque handling.
Generally not a direct replacement for CBB61 due to differences in current and torque handling.
The differences in torque requirements are key to understanding when each capacitor is appropriate. Attempting to use a CBB61 capacitor in place of a CBB60, or vice versa, is generally not recommended due to the differing operational demands and torque needs. The CBB60 is designed to withstand the higher operating currents of starting higher torque equipment, and thus has a very different internal build from the CBB61. Incorrect capacitor usage can lead to premature capacitor failure, reduced motor efficiency, or even motor damage.
Frequently Asked Questions About CBB61 Capacitors
This section addresses common inquiries regarding CBB61 capacitors, offering concise and authoritative answers to ensure clarity and understanding for users.
What is the primary function of a CBB61 capacitor? A CBB61 capacitor is primarily used as a motor run capacitor. It provides the necessary phase shift to the current flowing into the motor windings, enabling single-phase AC motors to start and run efficiently. Without it, the motor would not develop sufficient starting torque and would struggle or fail to operate.
What are the typical symptoms of a failing CBB61 capacitor in a ceiling fan? Common symptoms of a failing CBB61 capacitor include the fan running at a slower speed than usual, producing a humming sound instead of rotating smoothly, or failing to start at all. These issues arise from the capacitor's inability to maintain the required capacitance, which compromises the motor's operation.
How can I safely test a CBB61 capacitor? To safely test a CBB61 capacitor, begin by disconnecting power and using a suitable resistor to discharge it, preventing electrical shock. Then, utilize a multimeter with capacitance measurement capabilities to verify its capacitance value. An accurate reading should be within the capacitor's specified tolerance. Ensure safety by handling the capacitor by its non-conductive case and not the terminals.
Are all CBB61 capacitors interchangeable? While CBB61 capacitors share a common type, they are not universally interchangeable. The capacitance (measured in microfarads, μF) and voltage rating (VAC) must match the original capacitor's specifications for the appliance to function correctly and safely. Using a capacitor with different ratings can lead to damage to the motor or the capacitor, or pose a fire hazard.
What does the 'CBB' designation indicate in a CBB61 capacitor? The 'CBB' designation refers to the capacitor's construction and materials. Specifically, it indicates that the capacitor is a metallized polypropylene film capacitor, known for its durability and self-healing properties. These characteristics are essential for reliable performance in motor applications.
Can I replace a CBB61 capacitor with a different type of capacitor? It's generally not recommended to replace a CBB61 capacitor with a different type of capacitor, especially if that capacitor is not designed for AC motor applications. Different capacitor types possess distinct electrical characteristics, such as ESR (Equivalent Series Resistance) and impedance profiles, that may not suit the motor's requirements and can lead to issues. Using a capacitor with incorrect specifications can result in equipment damage or failure.
What is the typical lifespan of a CBB61 capacitor? The lifespan of a CBB61 capacitor depends on factors such as operating temperature, voltage stress, and load. Typically, these capacitors are designed for thousands of hours of operation under normal conditions. However, extreme conditions, such as overvoltage or operating at excessively high temperatures, can significantly shorten their lifespan. Regularly inspect capacitors in critical applications and replace them preventively if any signs of degradation are noticed.
The CBB61 capacitor, though often overlooked, is an essential component in many of our everyday appliances, particularly ceiling fans. By understanding its function, knowing how to troubleshoot problems, and being able to replace it safely, you can ensure the longevity and efficiency of your devices. We've explored everything from the basic functionality to advanced troubleshooting, providing you with the knowledge needed to maintain and repair your appliances confidently. As technology advances, the importance of components like the CBB61 capacitor in our devices will continue to remain central to our daily lives, proving it's vital to understand this component for optimal device performance.