Lennox AC Capacitor: Your Guide to Understanding, Replacing, and Maintaining

In the intricate dance of your Lennox air conditioning system, the capacitor plays a pivotal role, much like the conductor in an orchestra, orchestrating the start and smooth operation of the motor. Without it, your AC unit might struggle to cool effectively, leading to discomfort and potentially costly repairs. This article will explore everything you need to know about Lennox AC capacitors, empowering you to maintain your system effectively and understand what to do when issues arise.
Understanding the Role of a Lennox AC Capacitor
The Lennox AC capacitor is a critical component within your air conditioning system, acting as a temporary energy storage device crucial for the efficient operation of the compressor and fan motors. It provides the necessary electrical boost to initiate these motors, ensuring smooth start-up and consistent performance.
Capacitors are essential to AC systems because the motors require a surge of power to start, and they play different roles based on their type, which is fundamental to understanding how they work.
| Feature | Run Capacitor | Start Capacitor |
|---|---|---|
| Primary Role | Provides continuous power to keep the motor running efficiently. | Provides a high-voltage boost to start the motor. |
| Usage | Operational throughout the AC cycle, ensuring consistent motor performance. | Engages only during the motor's start-up, then disengages from the circuit. |
| Construction | Usually designed for continuous duty and made of durable materials. | Built for high-voltage surges but not meant for continuous operation. |
| Capacitance (uF) | Lower range of capacitance values, usually indicated on the capacitor itself. | Higher range capacitance values that are not meant to be used continuously. |
Identifying a Failing Lennox AC Capacitor: Common Symptoms
A failing Lennox AC capacitor can manifest in several ways, often signaling the need for replacement before a complete system failure occurs. Recognizing these symptoms early can prevent more costly repairs and ensure consistent cooling performance. These symptoms are not always definitive and might overlap with other issues, but they are strong indicators of potential capacitor problems.
- Humming Sounds from the AC Unit
A low, persistent hum, especially upon start-up, often indicates the capacitor is struggling to provide the necessary power to the compressor or fan motor. This sound can be a result of the motor attempting to run without the proper electrical charge from the capacitor. - Slow or Delayed Fan Motor Start
If the fan blades start noticeably slower than usual, or if there is a significant delay before they begin turning, it suggests the capacitor is losing its ability to provide the initial electrical boost required to start the motor. - Inconsistent Cooling or No Cooling
Sporadic cooling or a complete absence of cold air can point to a failing capacitor. A capacitor that is not functioning correctly cannot provide the energy required for the compressor to run, directly impacting the cooling capability of the AC unit. - AC Unit Not Starting At All
In severe cases of capacitor failure, the AC unit might not start at all. This is due to the inability of the capacitor to store and release the energy needed to initiate the compressor or fan motor. This is often accompanied by no activity from the unit after turning on power. - AC System Overheating
A failing capacitor can cause the motor to work harder, potentially leading to overheating. If the outside unit feels unusually hot, it may be due to a capacitor issue, although other factors could contribute. - Visible Signs on the Capacitor
Visually inspect the capacitor itself for physical damage, such as bulging, leaking fluid, or rust. These are clear indications of a faulty capacitor and require immediate attention.
Lennox AC Capacitor Types and Specifications
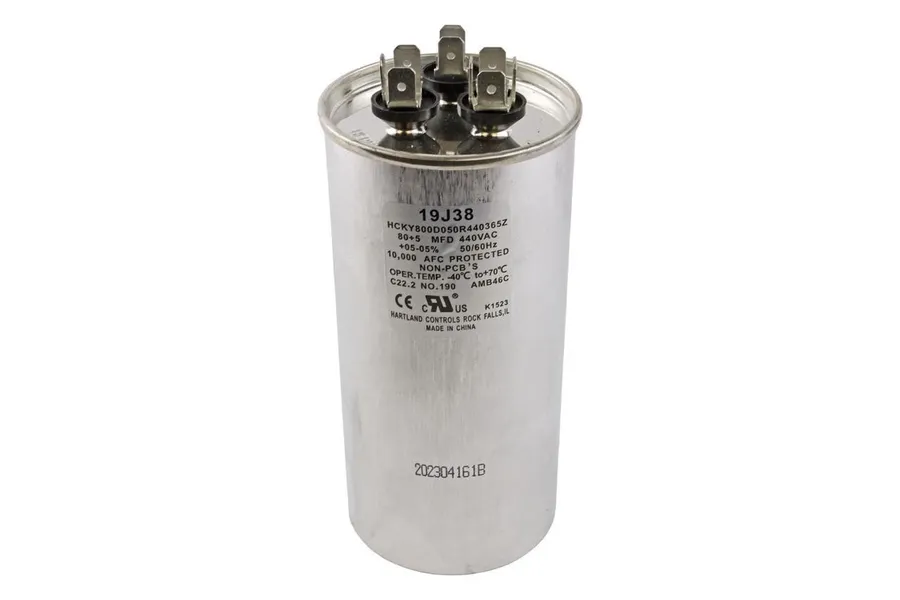
Selecting the correct capacitor for your Lennox AC unit is critical for its proper operation and longevity. Lennox AC capacitors primarily come in two types: run capacitors and start capacitors, each with distinct functions. Run capacitors, most commonly dual run capacitors, are essential for maintaining the continuous operation of both the compressor and the fan motor. Start capacitors provide the initial surge of energy required to start these motors, and are generally not used in residential Lennox systems. Understanding the specifications, particularly voltage (VAC) and capacitance (uF or MFD), is paramount to ensuring compatibility and avoiding damage to your unit. Using an incorrect capacitor can lead to performance issues, premature component failure, and potentially expensive repairs.
| Characteristic | Run Capacitor | Start Capacitor |
|---|---|---|
| Function | Maintains continuous motor operation (compressor, fan) | Provides initial energy burst to start motor |
| Typical Use in Lennox Systems | Primarily used as Dual Run capacitors (powering both fan and compressor) | Rarely used in residential Lennox AC systems. |
| Physical Characteristics | Generally permanently wired in circuit, designed for continuous use. | Often temporarily in circuit, higher failure rate. Larger capacitor for same power rating. |
| Application | Used during entire AC operating cycle. | Used only during motor start. |
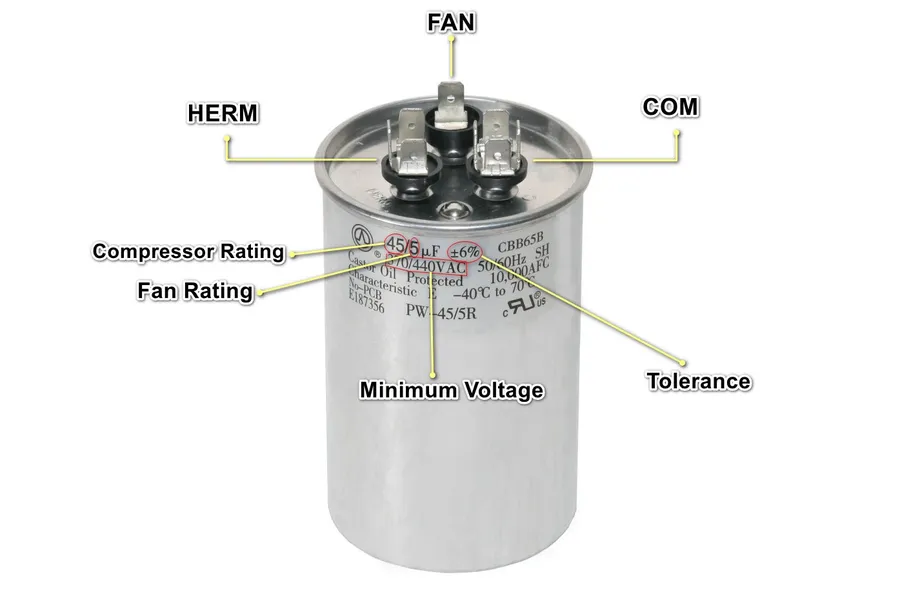
Capacitor specifications are typically printed directly on the capacitor casing. The most important parameters to consider are:
- Capacitance (uF or MFD)
Measured in microfarads (uF) or sometimes marked as MFD. This value determines the amount of electrical charge the capacitor can store. It must match the original capacitor within a small tolerance (typically +/- 5%). - Voltage (VAC)
The voltage rating indicates the maximum voltage the capacitor can safely handle. Always choose a capacitor with a voltage rating equal to or higher than the original. Using a capacitor with a voltage rating lower than required will lead to premature failure, possibly violent. - Terminal Count
Dual run capacitors have three terminals, labeled COM (common), FAN, and HERM (compressor). Single run capacitors have two terminals. It is critical to connect the appropriate wires to their designated terminals.
It is imperative to verify the original capacitor's specifications before selecting a replacement. Using a capacitor with incorrect specifications can result in reduced performance, damage to the AC unit's components (such as the compressor and fan motor), and reduced operational life. In cases where the original capacitor label is illegible, consult your Lennox AC unit's service manual or contact a qualified HVAC technician for assistance.
Step-by-Step Guide to Safely Replacing a Lennox AC Capacitor
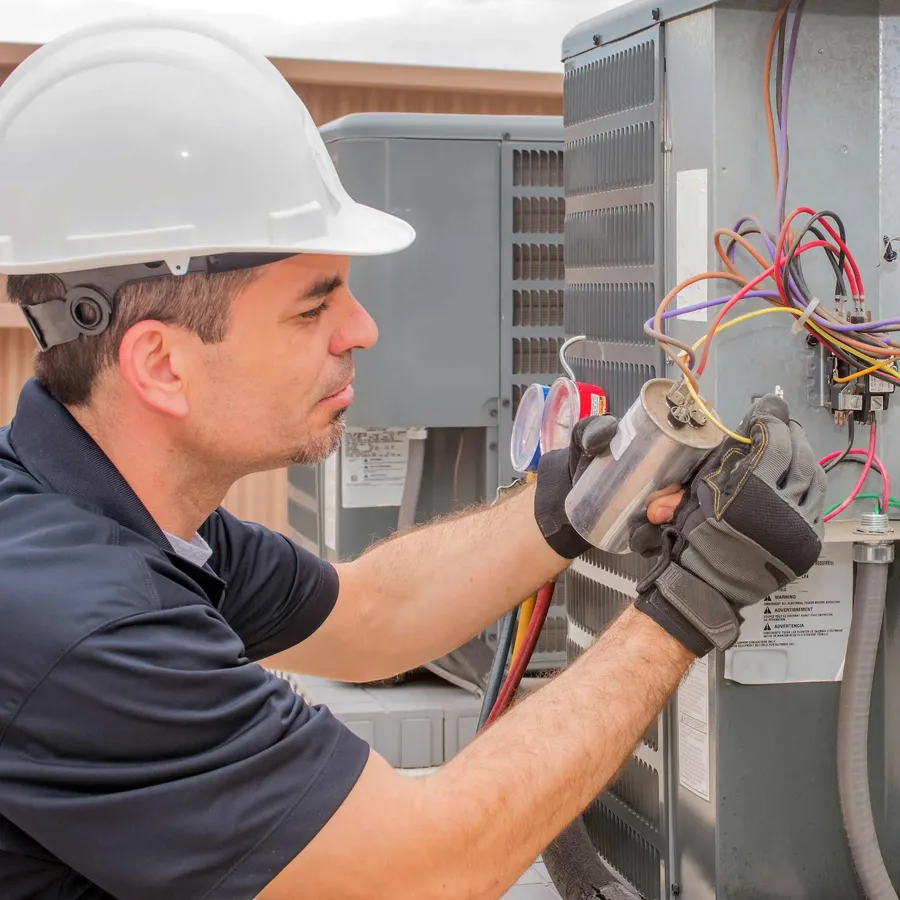
Replacing a Lennox AC capacitor, while seemingly straightforward, requires strict adherence to safety protocols to prevent electrical shock and damage to your HVAC system. This guide provides a detailed, step-by-step approach, emphasizing the critical safety precautions that must be observed throughout the process. If you are not comfortable working with electricity, it is highly recommended that you seek the assistance of a qualified HVAC technician.
Before initiating any work, gather all the necessary tools and materials. The essential tools include insulated screwdrivers (both flathead and Phillips), a multimeter capable of measuring DC voltage, and a camera or smartphone for documenting wiring configurations. You will also need the correct replacement capacitor, ensuring it matches the specifications of the old one exactly.
- Safety First: Disconnect Power
Begin by turning off the power to your AC unit at the circuit breaker. This step is critical to prevent accidental electrocution. Verify that the power is off by testing the disconnect box near your outdoor unit with a non-contact voltage tester. Do not proceed until you are absolutely certain that the power is off. - Locate and Access the Capacitor
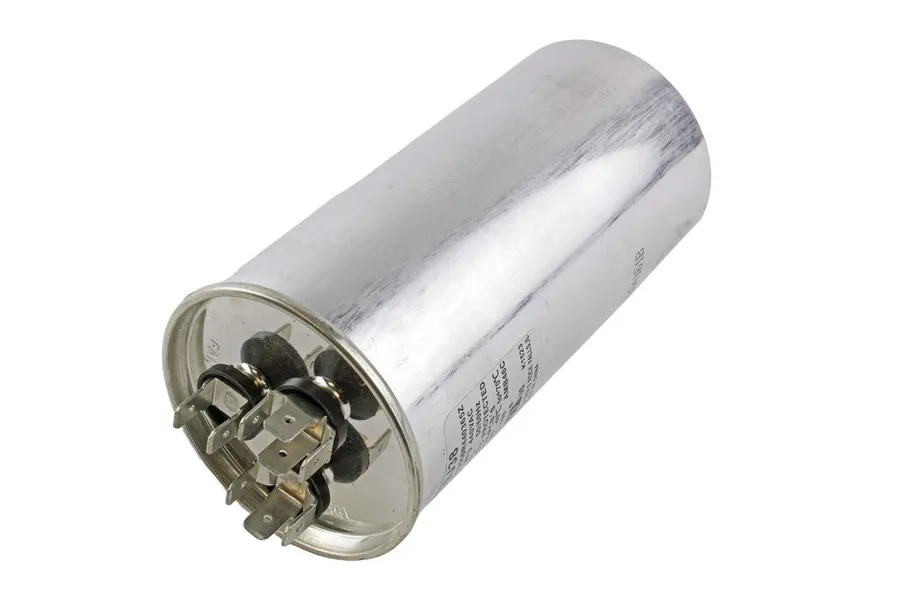
The capacitor is typically found within the control panel of the outdoor condenser unit. Carefully remove the access panel, taking care not to damage any wires or components. Once the access panel is removed, you will see the capacitor inside. It is commonly cylindrical and may be encased in a metal or plastic housing. Make a note of its position and orientation for reassembly. - Discharge the Capacitor
Even with the power off, capacitors can store a dangerous electrical charge. It is essential to discharge the capacitor before handling it. Using an insulated screwdriver with a plastic handle and a resistor (as a safety precaution), carefully touch the metal terminals of the capacitor to the metal casing to discharge it, or use a multimeter to check the voltage, if the voltage is still high use the insulated screwdriver to discharge the capacitor. Verify that the voltage is close to zero before proceeding. - Document the Wiring
Before disconnecting any wires, take clear pictures or videos of the existing wiring configuration. Pay close attention to the color and terminal connections on the capacitor, ensuring you can reconnect them in the exact same way. If you have doubts about your ability to remember or replicate the existing wiring, mark wires with tape and corresponding labels. - Disconnect the Old Capacitor
Carefully disconnect the wires from the old capacitor. Use your insulated screwdriver to loosen the terminal screws, then carefully remove each wire one at a time. Keep each wire end away from any metal parts to prevent accidental re-connection. Handle the wires gently to avoid damage. - Install the New Capacitor
Position the new capacitor in the same orientation as the old one. Connect the wires to the new capacitor terminals, ensuring they match the wiring configuration you documented earlier. Use your insulated screwdriver to tighten the screws securely. Double-check all wiring connections to make sure they are firm and correct. - Reassemble the Unit
Once the new capacitor is installed and the wires are correctly connected, carefully put the control panel cover back in place, securing it with the screws you removed earlier. Ensure all wires are safely tucked away and there are no wires that might cause a short when the unit is re-powered. - Restore Power and Test
Go back to the circuit breaker panel and turn the power back on to your AC unit. Observe the unit's operation carefully. It should start up smoothly without any unusual noises. Allow it to run for a few minutes to verify that the cooling system is functioning correctly. If the AC system is still not working, turn the system off again and seek professional assistance.
**Important Note:** If at any point during this process you feel unsure or uncomfortable, stop immediately and seek assistance from a licensed HVAC professional. Mishandling electrical components can be dangerous and can lead to serious injury or death.
Frequently Asked Questions About Lennox AC Capacitors
This section addresses common queries regarding Lennox AC capacitors, providing concise answers to help you understand their function, potential issues, and maintenance.
- How can you tell if a Lennox AC capacitor is bad?
A failing AC capacitor often exhibits several symptoms. These include a humming noise from the AC unit without the fan or compressor starting, the fan motor struggling to start or turning slowly, inconsistent cooling performance, or the AC simply not turning on at all. Visual cues may include a bulging or leaking capacitor casing. Capacitance values can also be measured using a multimeter, which, when significantly off the rating, would confirm the failure. - What is the typical lifespan of a Lennox AC capacitor?
The lifespan of a Lennox AC capacitor typically ranges from 5 to 15 years, depending on usage, environmental conditions, and the quality of the capacitor itself. Factors such as high operating temperatures, frequent start/stop cycles, and power surges can shorten this lifespan. Routine maintenance and proper system operation can help extend its service life. - Is it safe to replace a Lennox AC capacitor yourself?
Replacing an AC capacitor involves working with high voltage electricity, which can be dangerous if not handled correctly. While it is possible for a homeowner with electrical experience and a good understanding of safety procedures to perform the replacement, it is generally recommended to seek professional help. Safety precautions must be strictly followed, including disconnecting power and properly discharging the old capacitor. Incorrect wiring can damage your system, and improper handling of capacitors can lead to shock. If you lack experience with electrical work, calling a professional HVAC technician is the safest course of action. - What is the average cost to replace a capacitor in a Lennox AC?
The average cost to replace an AC capacitor in a Lennox unit can vary considerably based on the capacitor type (single or dual), its specifications, and labor costs. Typically, a replacement may range from $100 to $400, including the part and professional labor. DIY replacements would obviously reduce this cost to only the part. However, improper installation can lead to higher costs in the long run, as well as safety issues. - Does the Lennox warranty cover AC capacitor replacements?
Whether your Lennox AC capacitor is covered under warranty depends on the specific terms of your warranty and the age of the unit. Most manufacturer warranties do not cover parts that have failed due to wear and tear. Capacitors are considered a wear item. However, the capacitor may be covered under a limited warranty period. It's advisable to consult your warranty documentation for detailed information, and contact Lennox or your installer to verify warranty coverage. - What factors influence how long a Lennox AC capacitor will last?
Several factors affect the lifespan of a Lennox AC capacitor. The operating temperature, the frequency of start-stop cycles, and the quality of the capacitor are the main factors. Exposure to environmental conditions such as lightning surges, heat and humidity, improper installation, can also shorten its service life. Regular maintenance and ensuring proper voltage are essential. - How can I determine the correct replacement capacitor for my Lennox AC unit?
The correct replacement capacitor must match the original in terms of capacitance (measured in microfarads, uF or MFD), voltage (VAC), and physical dimensions, to fit within the unit's space. Always check the existing capacitor's label for the required specifications. If the label is illegible, consult your Lennox AC unit’s documentation or a qualified HVAC technician to ensure you get a compatible capacitor.
Lennox AC Capacitor: Troubleshooting and Diagnostics
Before replacing a Lennox AC capacitor, a systematic approach to troubleshooting can save time and prevent unnecessary expenses. This section provides a concise guide to diagnosing common capacitor issues using visual inspection and safe discharge techniques.
Capacitor failure often manifests through visual cues. Begin your diagnostics by carefully inspecting the capacitor for the following:
- Bulging or Swelling:
A capacitor that is bulging or swollen is a clear indication of internal damage and imminent failure. The capacitor's casing may appear distorted or expanded, indicating a build-up of internal pressure. - Leaks:
Look for signs of oil leakage from the capacitor's body. Oil leaks typically result from a rupture in the capacitor's internal structure, often accompanied by other signs of failure. - Corrosion or Rust:
Check the terminals and the capacitor's casing for corrosion or rust. These indicate exposure to moisture or other corrosive elements and can compromise the capacitor's integrity.
If any of the visual indicators of failure are present, the capacitor should be replaced. However, if no visual signs are evident, further testing with a multimeter is required to check for functionality. A functional check is crucial before making any decision regarding the replacement of the part.
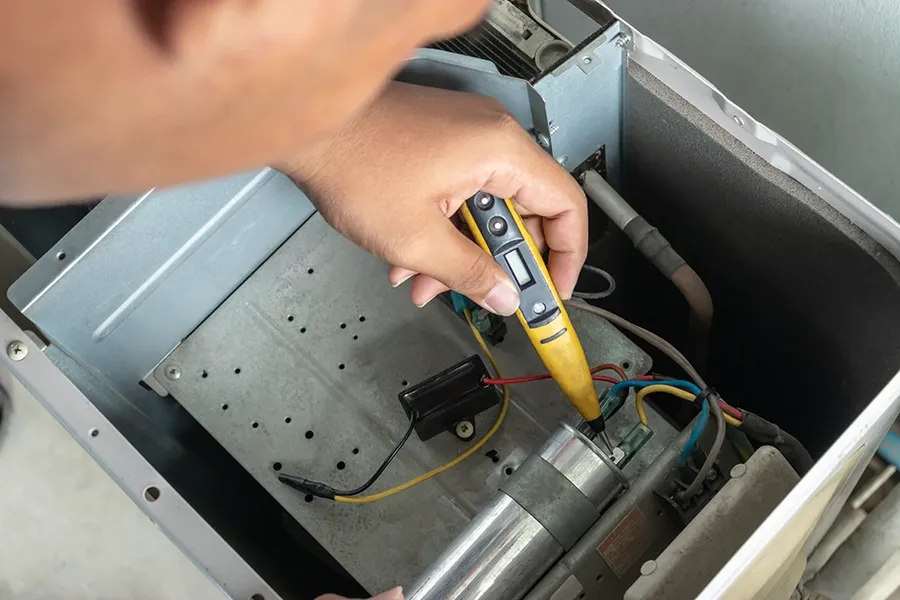
Before any testing with a multimeter, the capacitor must be safely discharged. A charged capacitor can store an electrical charge that can lead to electric shock. The steps to safely discharge a capacitor with a multimeter are as follows:
- Safety First:
Ensure the AC unit is completely powered off at the circuit breaker. This is the most important step to prevent electrical shock. - Multimeter Setup:
Set your multimeter to a DC voltage setting higher than the capacitor's voltage rating. If the capacitor rating is 440VAC, set the multimeter to at least 500V DC. - Connect Leads:
Carefully connect the multimeter leads to the capacitor terminals. Place the positive lead on one terminal and the negative lead on the other. - Observe Discharge:
Monitor the multimeter reading. The voltage reading should drop from the capacitor’s charge level to nearly zero. This indicates the capacitor is discharged. - Post Discharge Check:
If the capacitor did not discharge properly, reattempt the process. If the reading remains high and doesn't drop, a faulty multimeter is possible or the capacitor has failed and cannot be discharged safely, in which case call a certified technician to inspect. Once the capacitor is discharged it is safe to handle and continue with diagnostics.
After safely discharging the capacitor, you can test its capacitance with a multimeter with a capacitance setting. If the measured capacitance is significantly lower (more than 10% less) than its rated value, it should be replaced. If the capacitor appears to be operational, ensure that the unit as a whole is running correctly before assuming the capacitor is the root cause of failure.
Extending the Life of Your Lennox AC Capacitor
Maximizing the lifespan of your Lennox AC capacitor involves proactive measures focused on maintenance and operational best practices. By understanding the factors that contribute to capacitor degradation, you can implement strategies to prolong its functionality and avoid premature failure, which ultimately saves on replacement costs and ensures efficient AC operation.
- Regular HVAC Maintenance
Schedule routine inspections with a qualified HVAC technician. These checkups should include capacitor testing with a multimeter, ensuring they are within the specified capacitance range. Regular maintenance can catch early signs of capacitor wear or other issues before they escalate. - Preventing AC Overwork
Avoid setting excessively low thermostat temperatures, which force the compressor to run continuously, generating more heat and stress on the capacitor. Consider using a programmable thermostat to manage cooling cycles efficiently and reduce strain on the system. Using ceiling fans in conjunction with AC also helps reduce strain. - Addressing Voltage Fluctuations
Power surges and dips can damage sensitive electronics including AC capacitors. Install surge protection devices and ensure a stable power supply to prevent damage. This is especially crucial during lightning storms or instances of unreliable electrical grids. - Maintaining Cleanliness
Ensure the outdoor AC unit is free from debris and vegetation. Adequate ventilation is essential for heat dissipation, as overheating contributes to premature capacitor degradation. Periodically cleaning the unit can help maintain optimal operating temperatures. - Monitoring for Unusual Sounds
Pay attention to the AC system for unusual noises like humming, clicking or buzzing. These can be early warning signs of a failing capacitor. Promptly investigating these sounds can prevent more significant damage to the AC unit. - Environmental Factors
Extreme heat, humidity, and direct sunlight can all negatively affect capacitor lifespan. Consider shading the outdoor unit, if possible, to minimize thermal stress. Similarly, protection from heavy rain and physical debris can also be beneficial.
Lennox Capacitor Cost and Where to Buy
The cost of a Lennox AC capacitor can vary significantly based on factors such as its capacitance (measured in microfarads, or uF), voltage, and whether it's a single or dual run capacitor. Understanding these cost factors and knowing where to purchase a replacement are crucial for maintaining your Lennox AC unit efficiently.
Generally, expect to pay between $20 and $150 for a Lennox AC capacitor, though prices can be higher for specialized models or those sold by premium retailers. Capacitors with higher capacitance and voltage ratings tend to fall on the higher end of the price spectrum.
| Source | Price Range | Pros | Cons |
|---|---|---|---|
| Online Retailers (e.g., Amazon, HVAC supply websites) | $20 - $100 | Often lower prices, large selection, convenient purchasing, home delivery. | May not be OEM, potential for shipping damage, longer delivery times, no in-person support. |
| Local HVAC Supply Stores | $30 - $120 | Knowledgeable staff, immediate availability, higher quality parts. | Can be more expensive, limited selection, may require travel. |
| Lennox OEM Parts Dealers | $50 - $150 | Guaranteed compatibility, highest quality, often comes with a warranty. | Most expensive, may need to order, may not be readily available. |
When shopping, it's crucial to match the capacitor's specifications with your Lennox AC unit's requirements. Using an incorrect capacitor can cause damage to your system. OEM (Original Equipment Manufacturer) parts, sold by Lennox directly or authorized dealers, are designed specifically for your system but typically come at a premium cost. Aftermarket capacitors can be a cheaper alternative, but it is important to ensure they are high-quality from a reputable source and match the required specifications to maintain system performance and longevity.
When to Call a Professional for Lennox AC Capacitor Issues
While replacing a Lennox AC capacitor may seem like a straightforward task, certain situations necessitate the expertise of a qualified HVAC technician to ensure safety and proper system functionality. Knowing when to seek professional help can prevent further damage and ensure long-term performance of your Lennox system.
- Complex System Issues
If the capacitor issue is accompanied by other symptoms, such as a faulty compressor, refrigerant leak, or control board malfunction, it's best to seek professional diagnosis. Attempting to fix multiple issues without the proper expertise can exacerbate problems and cause further damage. - Warranty Concerns
Improper installation or use of non-OEM parts can void your Lennox system’s warranty. A certified technician can ensure the repair is performed correctly, protecting your warranty coverage and ensuring you are using the right parts. - Lack of Electrical Experience
Working with electrical components poses serious risks. If you are unfamiliar with electrical wiring, voltage testing, or capacitor discharge procedures, a professional technician is the safe option. They have the training and tools to handle electrical work safely and properly. - Repeated Capacitor Failures
If your AC system is experiencing frequent capacitor failures, a technician can investigate the underlying cause. Repeated capacitor issues can indicate other problems with the system such as improper sizing, overworking, or failing components. Addressing the root cause will save time and money in the long run. - Uncertainty About Diagnostics
If you are unsure whether the issue is actually the capacitor, a professional can provide a thorough assessment of your system and accurately identify the problem. This avoids unnecessary parts replacement and ensures efficient repairs. - Safety Concerns
Capacitors store a potentially dangerous electrical charge even when the unit is powered off. A professional HVAC technician knows how to properly discharge the capacitor and make a safe replacement, preventing the risk of serious electrical shock and injury.
Understanding your Lennox AC capacitor is key to maintaining an efficient and reliable cooling system. By recognizing the signs of failure, knowing when to replace the capacitor, and implementing preventative maintenance, you can prevent costly breakdowns. If you're not comfortable with DIY electrical work or if your issue seems more complex, don’t hesitate to contact a certified HVAC technician. Proper care and maintenance ensures your Lennox AC system and its vital capacitors, continue to perform optimally, keeping you comfortable and saving money on repairs in the long run.