Understanding AC Resistors: Function, Problems, and Solutions

In the quest for comfortable environments, whether at home or in our vehicles, the humble AC resistor plays a vital role. Like a tiny gatekeeper, it controls the flow of electrical current, regulating the speed of your fan or blower. This article breaks down everything you need to know about AC resistors, their function, common issues, and how to identify and fix them. We’ll use everyday examples of AC resistors to bridge the gap between engineering concepts and practical application.
What is an AC Resistor and How Does It Work?
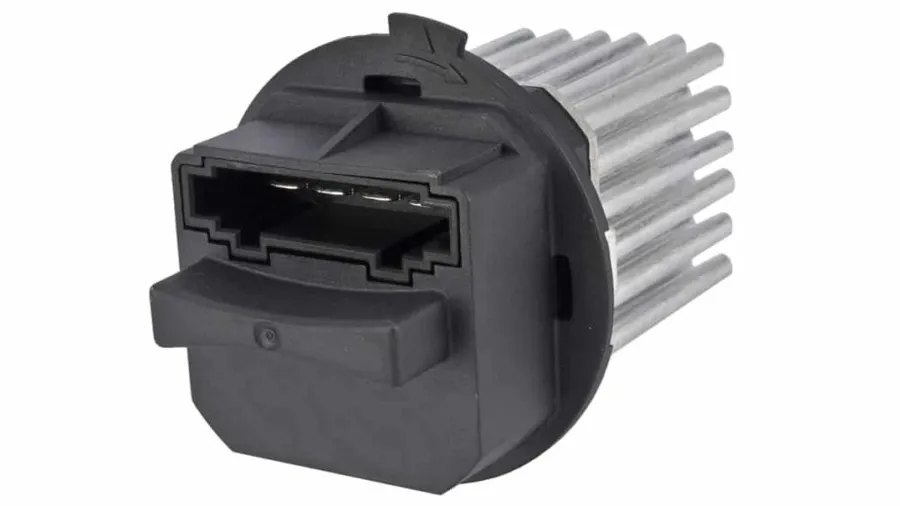
An AC resistor is a fundamental electrical component specifically designed to impede the flow of alternating current (AC). In the context of automotive HVAC systems, it plays a vital role in regulating the electrical current supplied to the blower motor. This regulation directly controls the fan speeds; higher resistance results in reduced current, leading to slower fan operation. This functionality is essential for maintaining proper air circulation and temperature control within a vehicle.
AC Resistors in Automotive HVAC Systems

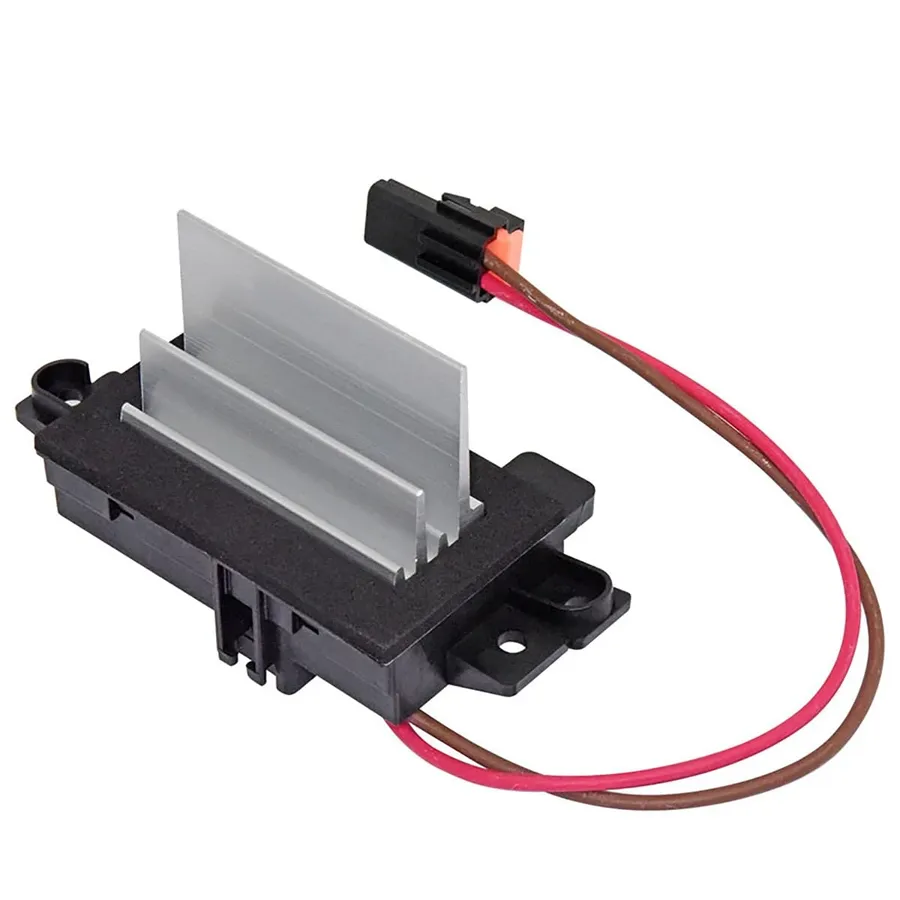
Automotive HVAC (Heating, Ventilation, and Air Conditioning) systems utilize AC resistors, typically located within the blower motor assembly, to regulate fan speed. These resistors are designed with varying levels of electrical resistance, with each level corresponding to a distinct fan speed setting. The selection of a specific fan speed on the vehicle's control panel activates a particular resistor, which then regulates the current supplied to the blower motor.
The relationship between resistance and current flow is inverse; higher resistance results in lower current flow and slower fan speed, and lower resistance yields higher current flow and faster fan speed. The resistors are designed to manage the electrical power delivered to the blower motor, enabling drivers to adjust the airflow within the vehicle cabin. In practice, these are not single resistors, but usually a series of resistors with taps that switch to different values when the user selects a fan speed, creating multiple speed options, as shown in the table below.
| Fan Speed Setting | Resistor Activation | Current Flow | Blower Motor Speed |
|---|---|---|---|
| Low | High Resistance Resistor | Low | Slow |
| Medium-Low | Moderate-High Resistance Resistor | Moderate-Low | Moderately Slow |
| Medium | Moderate Resistance Resistor | Moderate | Medium |
| Medium-High | Moderate-Low Resistance Resistor | Moderate-High | Moderately Fast |
| High | Low Resistance Resistor | High | Fast |
Common Symptoms of a Failing AC Resistor
A failing AC resistor typically disrupts the blower fan's operation, often manifesting as inconsistent fan speeds or complete failure at certain settings. These symptoms stem from the resistor's role in regulating current flow to the blower motor, and recognizing them is key to proper diagnosis and repair.
- Fan Operates Only at One Speed (Usually High)
When the resistor fails, often only the lowest resistance path remains functional, typically leading to the highest fan speed. This is a common symptom and indicates the resistor's inability to provide variable resistance for different speeds. - No Fan Operation at Any Speed
A complete lack of fan operation suggests a total failure of the resistor, such as an open circuit. This means no current reaches the blower motor, resulting in the fan being inoperative. - Intermittent Fan Operation
Inconsistent fan performance may indicate an intermittent failure within the resistor. The fan may work sporadically or cut out at random, which points to an unstable electrical connection or a partially failed resistor element. - Fan Speed Not Changing
The fan may function but only operates at one speed, regardless of speed settings. This implies that the resistance is not changing to meet the driver selected fan speed. - Unusual Noises from the Blower Motor
Although less common, a failing resistor can sometimes cause abnormal noises such as whining or buzzing from the blower motor. These are indirect symptoms related to irregular current being supplied to the motor.
Diagnosing a Faulty AC Resistor
Accurately diagnosing a faulty AC resistor is crucial before considering a replacement, especially to avoid unnecessary changes to the blower assembly. The diagnostic process begins with a careful visual inspection, followed by electrical testing to confirm the resistor's functionality.
A systematic approach to diagnosis will help ensure that the correct component is targeted for repair or replacement, saving both time and resources.
- Visual Inspection
Start by visually examining the AC resistor and its connectors. Look for any signs of damage, such as burning, corrosion, or broken components. These are clear indicators of a potential issue. - Multimeter Testing
If no visual issues are apparent, use a multimeter to measure the resistance. Comparing these readings with manufacturer's specifications will confirm or rule out the resistor as the issue. Ensure the multimeter is set to the ohms setting.
Testing an AC Resistor Using a Multimeter
A multimeter is the essential tool for assessing the health of an AC resistor. This diagnostic process involves verifying whether the resistor's resistance aligns with specified values, confirming its functional capability within the vehicle's HVAC system. An accurate reading will confirm the resistor's status, preventing unnecessary component replacements.
- Safety First: Disconnect the Power
Before starting, ensure the vehicle's ignition is off and disconnect the negative terminal of the car battery. This prevents any accidental electrical shorts during the testing process. - Locate the AC Resistor
Refer to your vehicle's service manual to precisely locate the AC resistor, typically near the blower motor assembly, often behind the glove compartment or under the dashboard. If needed, remove any covering panels or fasteners that obstruct access to the resistor. - Disconnect the Resistor Connector
Carefully disconnect the electrical connector from the AC resistor. Take pictures before disconnecting to aid in the reconnection process. Ensure to disconnect this carefully to avoid any damage. - Set the Multimeter to Ohms
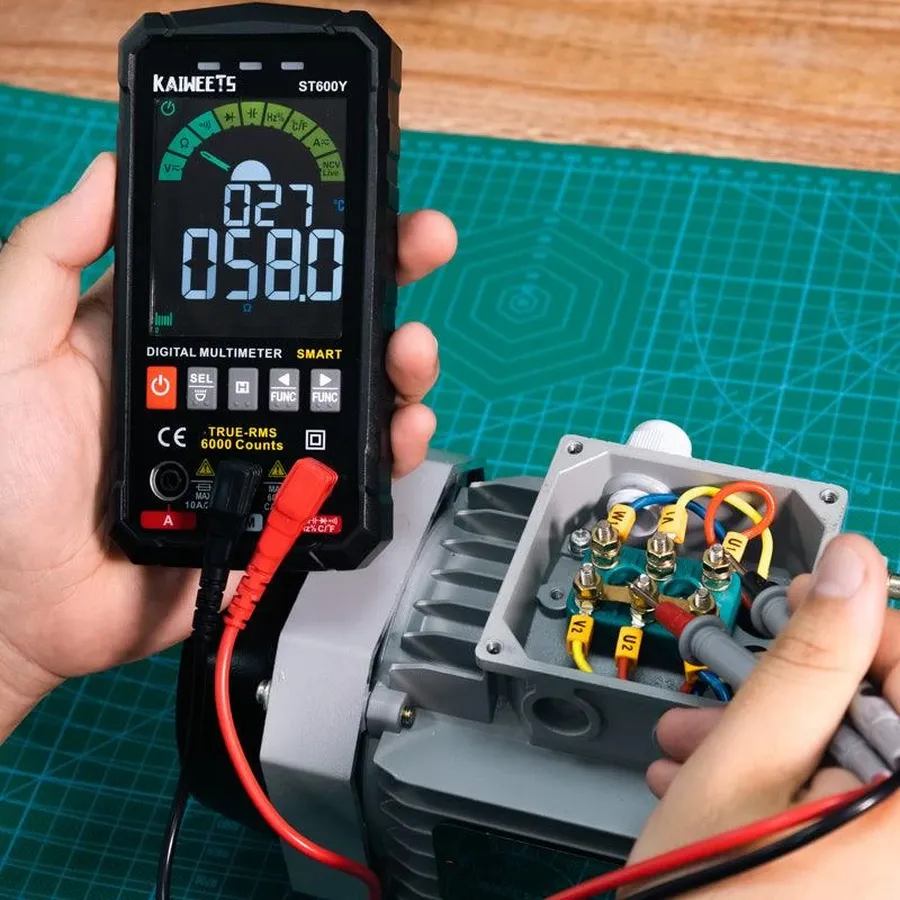
Set your multimeter to measure resistance (Ohms, Ω). The setting might be marked with the symbol Ω or identified with the word ohms. Choose a range that is suitable for the values of resistors you expect to be measuring. - Connect the Multimeter Probes
Place the multimeter probes to the terminals of the AC resistor. Ensure good contact between the probes and the resistor's terminals. The exact terminals might vary so refer to your vehicle's wiring diagram. - Read the Resistance
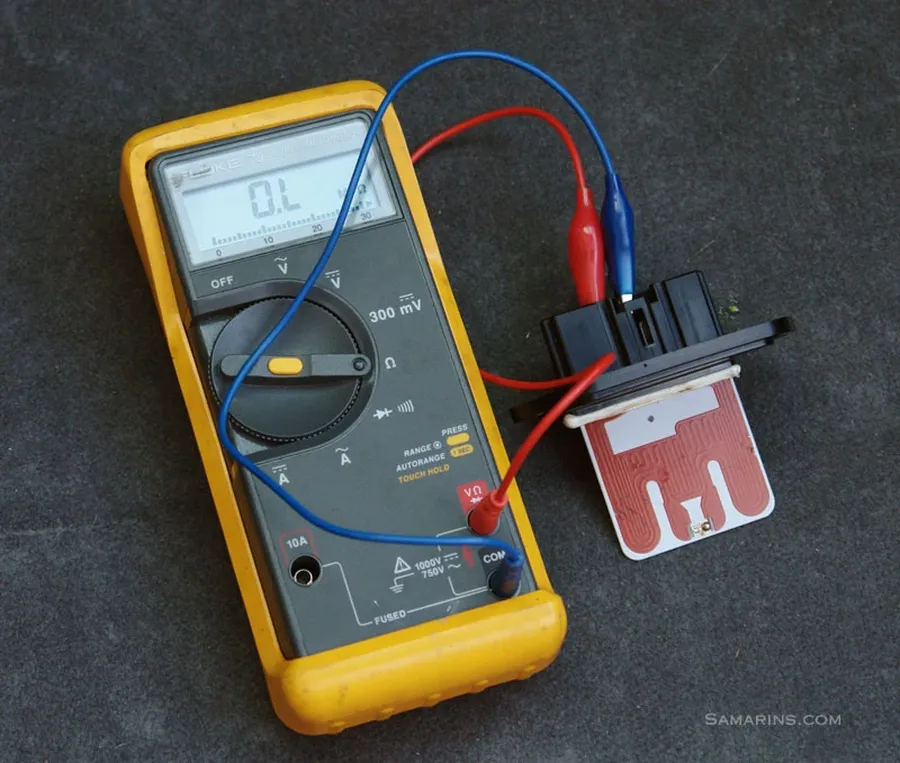
Observe the reading on the multimeter. Compare this measurement with the specifications provided by the vehicle manufacturer for the AC resistor (often found in the service manual). An infinite reading suggests the resistor is open; a reading that differs significantly from specifications also indicates an issue. - Interpreting the Results
If the resistance value matches the specifications, the resistor is likely functioning normally. If the value is significantly different or if you get an 'OL' (Over Limit) reading or zero resistance (a short circuit), the resistor is faulty and needs replacement.
Replacing a Faulty AC Resistor: A Step-by-Step Guide
Replacing a faulty AC resistor is a manageable task for individuals with basic automotive repair knowledge. This procedure involves carefully disconnecting the vehicle's battery, removing the malfunctioning resistor, installing the new component, and ensuring all connections are secure. Selecting a replacement resistor that precisely matches the original specifications is paramount to ensure proper functionality and to prevent any damage to the blower motor or the vehicle’s electrical system.
- Step 1: Disconnect the Car Battery
For safety, disconnect the negative terminal of the car's battery before commencing any work on the electrical system. This will prevent accidental shorts or other electrical issues during the replacement process. - Step 2: Locate the AC Resistor
Refer to your vehicle's service manual to pinpoint the exact location of the AC resistor. It's typically situated near the blower motor assembly, often under the dashboard or in the engine compartment. - Step 3: Remove the Old AC Resistor
Carefully remove the old AC resistor. Note how it's mounted and connected; a photo can be beneficial for reassembly. Disconnect any electrical connectors attached to the resistor. - Step 4: Install the New AC Resistor
Mount the new AC resistor in the exact position of the old unit, ensuring it's secured properly. Reconnect the electrical connectors, ensuring a snug and secure fit. - Step 5: Reconnect the Car Battery
Reconnect the negative terminal of the car's battery. Ensure it is securely tightened. - Step 6: Test the AC System
Turn on the vehicle and activate the HVAC system to test the fan operation at different speeds. Ensure the new resistor is functioning correctly and that the blower fan operates at all speeds as intended.
Frequently Asked Questions About AC Resistors
This section addresses common queries regarding AC resistors, providing concise answers to help users understand their function, potential issues, and solutions.
- What is the primary function of an AC resistor in a vehicle?
The primary function of an AC resistor is to regulate the electrical current supplied to the blower motor in the vehicle's HVAC system. By controlling this current, the resistor directly impacts the speed of the fan, allowing for variable airflow. - What are the typical symptoms indicating a failing AC resistor?
Common symptoms of a failing AC resistor include a blower fan that only operates at one speed (typically high), a complete lack of fan operation, or intermittent functionality of the blower motor. These symptoms often indicate that the resistor is not properly regulating current. - How much can I expect to pay for a new AC resistor?
The cost of an AC resistor can vary significantly depending on the vehicle's make and model, as well as whether you choose an OEM or aftermarket part. Typically, prices range from $20 to $100. - Where is the AC resistor typically located within the vehicle's AC system?
The AC resistor is typically located within the blower motor assembly, though its exact location may vary slightly between different vehicle makes and models. It is usually a small, heat-dissipating component near the blower motor itself. - Can I replace an AC resistor myself, or do I need a professional?
Replacing an AC resistor can often be a DIY task, particularly for those familiar with basic automotive repair procedures. However, if you are not comfortable working with electrical systems or accessing the resistor, it's advisable to seek professional assistance. - If my blower motor only works on the highest setting, is it definitely the AC resistor?
While a blower motor only working on high speed is a classic sign of a faulty resistor, other potential issues could cause this. Therefore, testing the resistor with a multimeter is crucial before you attempt to replace it. This ensures a proper diagnosis and avoids unnecessary replacements. - What precautions should I take when replacing an AC resistor?
Always disconnect the vehicle's battery before working on the electrical system to prevent short circuits or other electrical damage. When selecting a replacement, ensure it matches the original's specifications to ensure proper function and avoid potential damage.
AC Resistor Comparison: OEM vs Aftermarket
When replacing an AC resistor, the decision between Original Equipment Manufacturer (OEM) and aftermarket options often arises. Understanding the differences is crucial for making an informed choice that balances cost, quality, and performance. OEM resistors are designed to the vehicle's exact specifications, while aftermarket resistors offer a broader range of options, often at a lower price point.
| Feature | OEM Resistors | Aftermarket Resistors |
|---|---|---|
| Manufacturer | Vehicle manufacturer or their supplier | Third-party manufacturers |
| Design Specifications | Meets exact vehicle specifications | May have varying specifications |
| Cost | Generally more expensive | Generally less expensive |
| Quality | High, due to strict standards | Variable, quality can range from high to low |
| Compatibility | Guaranteed to fit and function correctly | Compatibility may vary, check specifications |
| Warranty | Usually backed by vehicle manufacturer | Warranty may vary depending on manufacturer |
The primary advantage of OEM resistors lies in their guaranteed compatibility and adherence to the vehicle's original specifications. This ensures optimal performance and reduces the risk of electrical issues. Aftermarket options, while often more affordable, can vary significantly in quality and may not always match the original resistor's specifications. It is crucial to verify compatibility, read reviews, and consult with trusted sources before purchasing an aftermarket resistor. Choosing between OEM and aftermarket resistors involves considering cost, the importance of vehicle-specific precision, and the availability of high-quality aftermarket parts.
Tips for Maintaining Your AC Resistor
Extending the lifespan of your AC resistor involves proactive care and attention to the vehicle's HVAC system. By preventing excessive load on the blower motor and ensuring unobstructed airflow, you can significantly enhance the resistor's longevity and performance. Following these maintenance tips can also save on potential replacement costs and keep your vehicle's climate control system running smoothly.
- Ensure Proper Airflow
Regularly check and clear any obstructions in the air vents and ductwork. Blocked vents can cause the blower motor to work harder, increasing the thermal load on the resistor, which can lead to premature failure. - Clean the HVAC System
Periodically cleaning the HVAC system, including the blower motor and surrounding areas, helps to remove dust and debris that can insulate the resistor, preventing adequate heat dissipation. - Avoid Continuous High Fan Speeds
Operating the blower fan on high speeds for extended periods places excessive demand on the resistor. When appropriate, use lower fan speeds to reduce the load and heat generated, thus prolonging the life of the resistor. For the same amount of air flow, it is more efficient to use the lowest fan speed required. - Monitor Blower Motor Performance
Listen for unusual noises from the blower motor. If the blower motor is struggling, it could indicate higher current draw which can lead to increased heat and stress on the resistor. If you notice any issues, address it immediately to prevent damage. - Address Electrical Issues Promptly
If you have experienced any electrical issues with the car such as fuses blowing or other components failing, have the cause investigated and repaired as soon as possible. Electrical problems that impact the operation of the blower motor can put excess load on the resistor causing damage.
AC resistors, often overlooked, are essential components in vehicle HVAC systems. They are vital in controlling the fan speed in your vehicle and are a crucial part of ensuring your comfort and safety. This article has covered their function, common symptoms of failure, diagnostic tips, replacement guides and provided some FAQs to better educate you about AC resistors. By understanding the role of the AC resistor, you can effectively troubleshoot, maintain, or replace it when necessary, saving money and extending your system’s lifespan. Remember, proper diagnosis is key, and when in doubt, consult a professional mechanic.